


Updated April 2024
Dux-Soup helps over 300,000 users around the globe to automate repetitive lead generation, sales and marketing tasks every day - and rightly deserves its place as a leading LinkedIn automation tool.
But what does Dux-Soup actually do?
Put very simply, our clever little tool can take care of the repetitive LinkedIn outreach tasks that take up a huge amount of your time, but are necessary to scale your lead generation. It helps you to generate more leads, faster.
Tasks like visiting profiles, sending personalized LinkedIn connection requests, organizing and engaging with prospects, and following up until you feel it’s time to ‘switch to manual’ and close the sale. Simply select your LinkedIn list, and then set Dux-Soup to carry out automated actions against that list of targets.
Dux-Soup is a Chrome extension that mimics human-like prospecting behavior on LinkedIn. This is a very important part of Dux-Soup's success and one of its many safety features. It contains safety features to snooze, and have breaks - just like a human being would.
We offer Browser-based (Pro and Turbo) and Cloud-based (Cloud) editions of Dux-Soup, plus have Team plans and Agency plans, giving you the right LinkedIn automation functionality at the right price.
This blog is part of our perennially popular ‘Get Started’ series and provides a step-by-step guide on how to set up, and use Dux-Soup Pro.
And if you'd rather watch the video, our 'Get Started with Pro' webinar is an excellent resource.
LinkedIn basics
Before you begin any lead generation activities on LinkedIn, let's start with some basics......
1. Update your profile
Every action that you carry out on LinkedIn creates a notification somewhere. This is why keeping your LinkedIn profile up-to-date and relevant is the most 'easy win' possible, as this is your advert to the world!
Update your headline regularly, thinking about who you're targeting. It may be that you focus on a specific industry, so put that in your headline. Everyone who visits your profile will take in your headline, so this is a great opportunity to promote the benefits that you bring to your clients.
Update your skills, experience and background to appeal to your target audience. These are simple things you can do that carry a lot of weight.
2. Be active
Be active and engaging on LinkedIn. Comment, Like, Share and Engage with your connections. The more active you are, the more people will visit your profile, make you more credible and you’ll appear higher up the search results.
3. Have clear goals
Have clear goals for what you’re trying to achieve. Do you want to grow your network, increase your engagement on your website, invite people to an event or increase readership of some new content? This will feed into your actions and messaging so you can steer the responses towards achieving your goals.
4. Who are you targeting?
Spend time working out who you're going to target on LinkedIn before carrying out your searches to create good quality LinkedIn lists. Sales Navigator offers excellent search criteria, allowing you to be hyper-personalized in your outreach.
5. How are you going to engage with your targets?
Are you just visiting profiles, are you going to connect with your target market, or do you want to develop a well-constructed LinkedIn messaging strategy
to engage and nurture them?
Once you've thought these elements through, you're ready to get going with your lead generation activity. Let's explore Dux-Soup Pro and what how it can help.
Why Dux-Soup Pro?
Dux-Soup Pro offers fantastic value, being the lowest-priced plan from Dux-Soup. Launched in 2015, it has been one of our most popular plans over the years, and is great for LinkedIn automation beginners. This is because it offers some key features in the lead generation process, whilst being easy to use for first timers.
If you're looking to grow your network, auto-visit profiles, download LinkedIn data or send a direct message to your connections, then Pro is for you.
Dux-Soup Pro's main features
Before getting into the setup process, it’s worth highlighting Dux-Soup Pro's main features:
- Auto visit, auto message, auto like a post, and auto send connection invitations
- Scan LinkedIn lead lists
- Organize potential leads with the Dux-Soup tagging function
- Endorse, follow and re-engage with prospects
We’ll talk about these features in detail after we show you where to start if you don’t have Dux-Soup installed on your browser yet.
Installing Dux-Soup Pro
You can purchase Dux-Soup Pro on a monthly or annual payment plan.
First, you'll need to Install Dux-Soup on your Chrome browser. You can refer to our tutorial video: How to Install Dux-Soup.
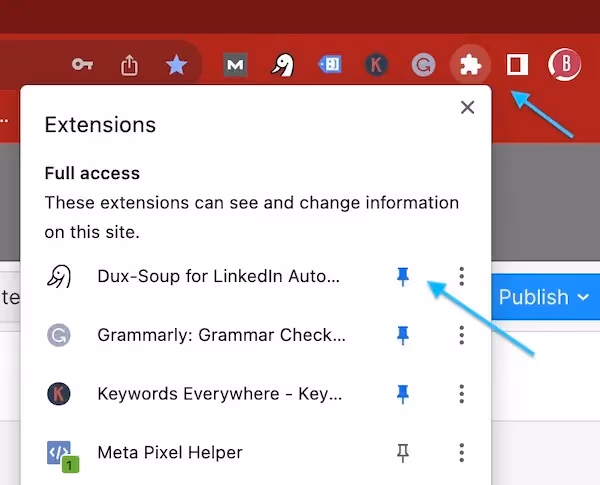
Once you've installed the Dux-Soup Chrome extension, you can pin it to your toolbar to easily find it again. Do this by clicking on the pin next to Dux-Soup in your extensions menu, as shown below.
Now let's go into your Dux-Soup extension and take a look around. The color of your Duck will reflect your plan. If you've purchased a Pro plan then your extension will be blue for Dux-Soup Pro.
Regular and Expert user interface (UI)
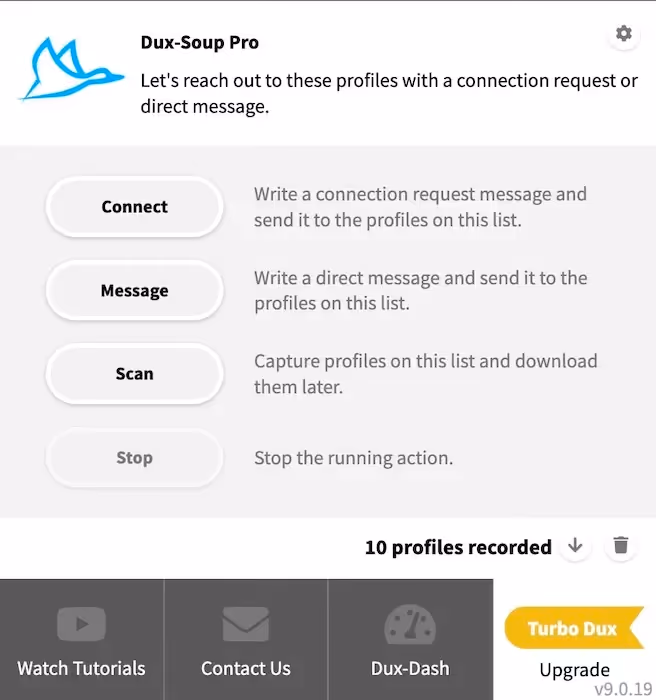
Dux-Soup automatically installs the regular UI. This is designed to make it easier to use. The regular UI includes the tasks that users run the most, hiding more advanced settings and features. The regular UI features include scanning and visiting profiles and sending connection invitations as seen below. And for most users, this is enough.
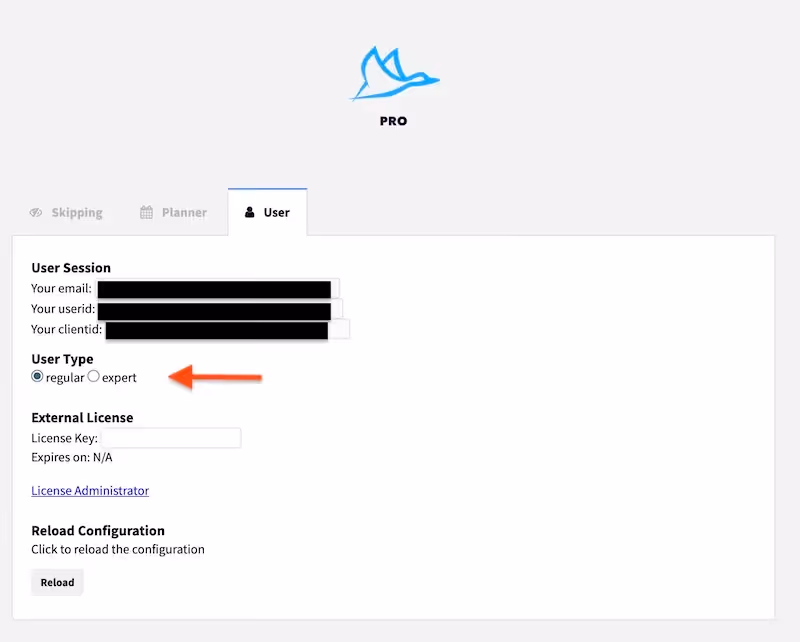
For some more advanced tasks, you will need to turn on the expert UI. You can easily switch between the interfaces at any time. To do this, click on 'options' in your Dux-Soup extension.
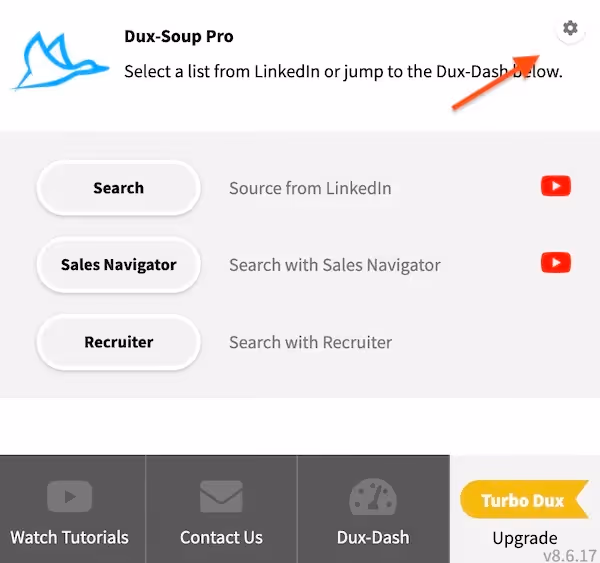
Under the 'User' tab, you'll be able to switch between regular and expert.
Your extension will now look slightly different and you will see more tabs appear in your 'options' menu, including 'Actions, 'Throttling', 'Connect' and 'Browser' giving you additional control of your Dux-Soup settings. We'll look deeper into these features at the end of this blog. For now, let's stay with the 'regular' UI.
Know your daily limits
It's good to understand your daily automation limits and the LinkedIn weekly invitation limits to keep your LinkedIn account safe.
Having installed Dux-Soup Pro, the first thing you have to do is to set your Throttling options according to the type of LinkedIn account you use and the total number of connections you have at the moment. We recommend following these guidelines to make sure your account is safe.
By default, Dux-Soup is configured to stay below the allowance set by LinkedIn (100 visits per day). However, you can override this by going to the Dux-Soup Options, Throttling tab and checking the “I understand the risk” box (you'll need to be in the expert UI for this).
You will then be able to select the limit you want from the drop-down. Be very careful with this to make sure your account is safe and keep in mind the following:
- If you have a free LinkedIn account, you can visit up to 100 profiles a day
- With a Business Premium account it’s 250 profiles a day
- Sales Navigator will let you visit 500 profiles a day.
Learn more about LinkedIn Search Limits.
When it comes to sending connection requests, we always advise sending a maximum number of requests to 3-5% of your current number of 1st-degree connections, i.e. if you have 10,000 connections in total, you could send up to 500 requests per day. Check out our recommended daily LinkedIn automation limits.
Read more about best practices using Dux-Soup Pro.
So - we’ve covered basic set up and now onto finding and engaging with potential new customers using Dux-Soup Pro.
How to automate your lead generation with Dux-Soup Pro
1: Find your prospects
So now it's time to find potential leads on LinkedIn. There are 3 major ways to search and visit profiles with Dux-Soup: 1) LinkedIn Search, 2) LinkedIn Groups, 3) Dux-Soup X-Ray tool.
LinkedIn Search
The Search bar at the top of the LinkedIn page allows you to search for people, jobs, companies, posts, and more. To run a search on LinkedIn, you need simply to enter your keyword in the Search bar at the top of the page.

Note: Once you have entered a search keyword, make sure you have also selected the “People” filter from the bottom of the search bar. You can use as few or as many search filters as you like, to widen or narrow your list of targets accordingly.
LinkedIn Groups
One of the best ways to leverage your LinkedIn network is by joining LinkedIn Groups.
LinkedIn makes it easy to find Groups that are relevant to your business or the audience you’re trying to reach. Within LinkedIn, you can perform a search in the search feature based on keywords and filter to find the right Group.
Make sure to spend the majority of your time on the key Groups you find that are managed well and have constant interactions.
Find out more about the different benefits of joining LinkedIn Groups.
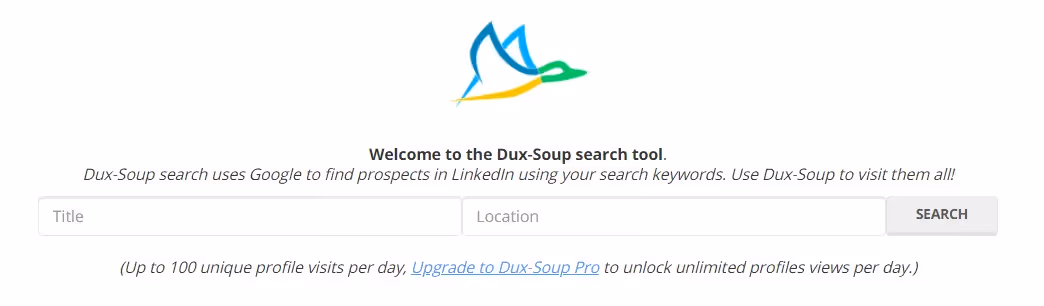
X-Ray tool
Dux-Soup X-Ray is a handy option when you have reached your commercial use limit on LinkedIn. All that you have to do is to click on the XRay button from Dux-Soup drop-down menu and specify your search criteria in the following window:

Learn more about different Dux-Soup icon colours and find out more about how to use Dux-Soup X-Ray tool.
2: Automated LinkedIn engagement and lead generation
Sending personalized connection invitations
Whether or not you are using the Dux-Soup LinkedIn automation tool or doing it manually, your lead generation journey on LinkedIn starts with the same single step - your connection invitation.
To send a personalized message to your 2nd and 3rd-degree connections (people you are not connected with), it's really easy. Once you've found your target LinkedIn list (see Step 1), click on your Dux-Soup icon in your browser. Wait for your Dux-Soup icon to turn green (showing it's ready) and you'll now be able to click the ‘Connect’ option, as shown below:

Next, enter the personalized message for your connection request into the text box. Note that whilst most users have 300 characters for their connection messages, some free LinkedIn profiles are restricted to 200 characters.
Make sure you use the placeholders below the text box to personalize your message, for example _FN_ will add the first name to each connection invitation.
When you’re done, click ‘OK’ and Dux-Soup will send everyone in your target LinkedIn list a connection request.

Watch our short tutorial on sending personalized connection invitations with Dux-Soup Pro.
Note: We highly recommend sending a personalized connection message with your request because it stands out from the usual connection requests, looks more powerful and has a much higher acceptance rate. Users are achieving acceptance rates as high as 70% when using a high degree of personalization and relevancy. Adam Osman, Head of Marketing at Dux-Soup shares his experience and gives some extra tips on how to write connection messages that get results.
Sending personalized direct messages
With Dux-Soup Pro you can send direct messages to your 1st-degree connections. These are people that have accepted your connection invitation. To do this, follow these steps:
1. Load up a list of your 1st-degree connections by clicking on the link here.
2. Now, click on the Dux-Soup icon in your browser to bring up the menu and then click on ‘Message’.

3. In the text box, add your personalized message. With messages you have 3000 characters to play with, so you can add more content. Once you're done writing your message, click ‘OK’ and Dux-Soup will start sending messages on your behalf, personalizing each message as it sends it.

We share some useful tips and templates for writing direct messages to your 1st-degree connections.
Watch our short video tutorial on sending messages to 1st-degree connections with Dux-Soup Pro.
Just remember that your throttling speeds will determine how many messages are sent each day.
Collecting LinkedIn data with Pro
Using the Scan feature to download basic data
Dux-Soup can also scan profiles, allowing you to extract basic data from a list of LinkedIn Prospects without actually viewing the profiles. This data includes - LinkedIn URLs, First Name, Last Name, Where they work, and potentially some other data, depending on your search results.
LinkedIn does not class this as visiting a profile and as such, no user will be aware that you have extracted information about their profile.
To scan data, find a list of profiles that’s of interest to you. Now click on the Dux-Soup icon in your browser to bring up the menu and click on ‘Scan’.

Read our blog Visiting vs Scanning LinkedIn Profiles with Dux-Soup to learn more.
Using the Pro Expert UI
Let’s take a deeper look at the Dux-Soup Pro expert menu. When you enable the expert menu, you will see more tabs appear.

And the Dux-Soup extension menu will now look like this:

You'll gain access to more advanced features, including:
- Just visiting profiles
- Sending InMails
- Tagging profiles and searching profiles by tag - to create more custom lists
- Revisiting data
Let’s have a look at some of these functions.
On the Pro expert menu the ‘Visit Profiles’ or ‘Visit & Connect’ buttons offer a series of other platform specific options. Dux-Soup will execute the options you select during the auto-visit. You can select these further actions from the 'Actions' tab:
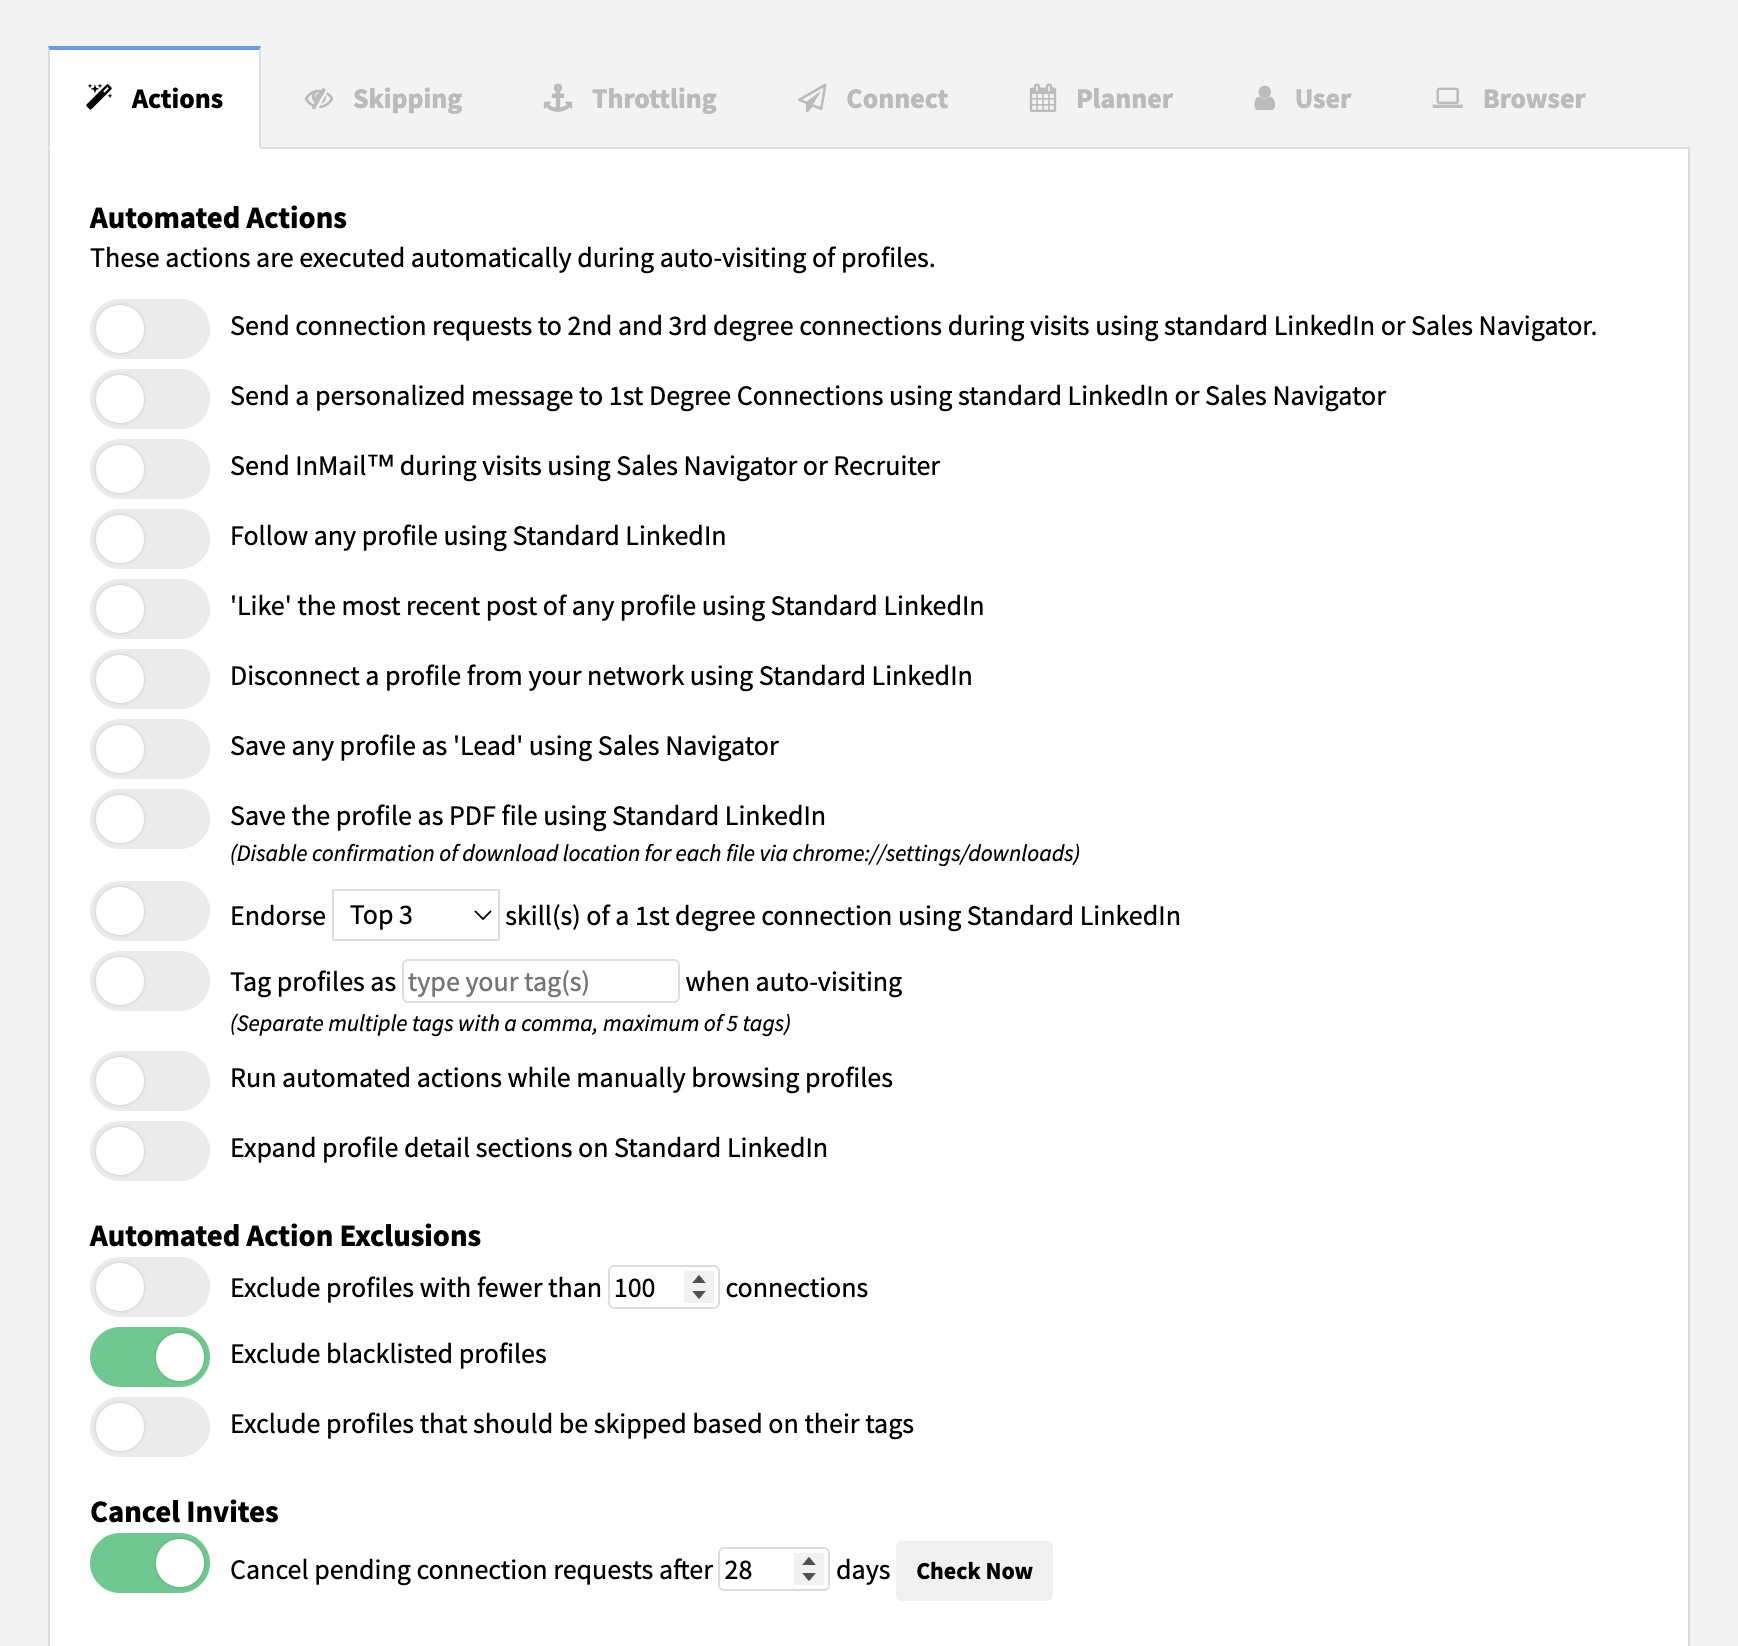
To see this in a live demo, watch from the 14 minute mark of our 'Get Started with Pro' webinar. You'll se a demonstration on how to:
- Just visit profiles
- Download the data of the profiles visited
- Send an InMail (check out our InMail hacks which are getting excellent results for users)
- Follow a profile
- Disconnect a profile from your network
- Save a profile as a Sales Navigator lead
- Endorse profiles
- Tag profiles. This is useful to add a label to profiles as you visit them, so you can easily find them again later (or skip them from further messages, as we show you below). Find out more about how to tag in our 'Organize' section below.
-
3. Auto-Filter
Dux-Soup offers a variety of skipping features that lets you target specific LinkedIn groups of people:
- Filter 'Influencers', 'Premium Members', 'Job Seekers', 'Open Link members', 'CRM imports'
- Filter Tagged Profiles
- Filter based on a Custom pattern

Find out how each one of them works here.
4. Organize
Tag and re-engage
You can set up auto-tagging by going to Dux-Soup Options, Actions tab and enable the feature to add a tag during the auto-visiting :

This means that when you visit profiles with Dux-Soup, you will see a pop-up message indicating that it's tagging the profiles:

Tip: You can see the list of auto-tagged profiles by using Dux-Soup Search by Tag tool:

And you can then either include, or exclude these tagged profiles from your next automated direct message campaign.
Learn more about Dux-Soup tagging options by following this link or see this in action here.
Monitor your performance
The Dux-Soup Dashboard (known as the Dux-Dash) can only be fully accessed by Turbo users. It shows you what the bot previously did and what it’s about to do. The Activity Log can also be accessed by Pro users via this link.

Here you can find queued activity for all Dux-Soup campaigns and do the following:
- Find the past action for a specific LinkedIn profile by URL.
- Filter past activity by action.
- Filter past activity by action status.
5. Sharing LinkedIn data
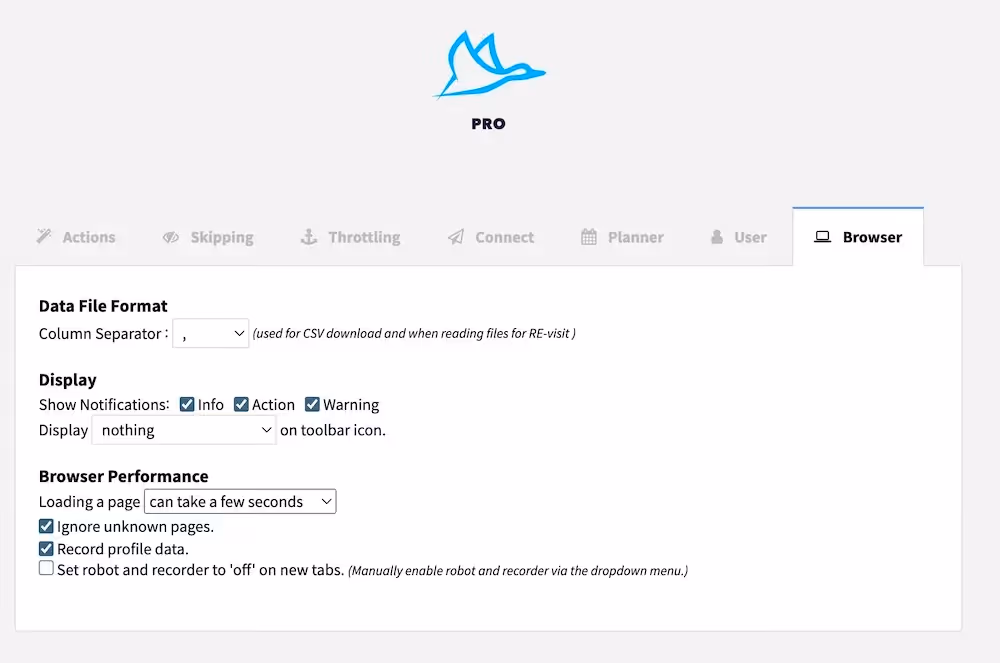
In order to download LinkedIn data, you'll first need to allow Dux-Soup to 'Record Profile Data' in the 'Browser' tab of your Expert UI.
Download your recorded data
You can download your visit/scan data if you have a Dux-Soup Pro, Turbo or Cloud account. All recorded data will be downloaded as a CSV file format.
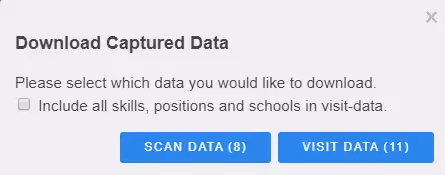
To download the data, go to the LinkedIn page and click on the “Download Data” button, which will look like this for the Dux-Soup Pro - Expert menu:

Or this, on the Dux-Soup Pro - Regular menu…

Note: The data collected differs if you select to download ‘Visit’ or ‘Scan’ data. The scan data only provides more basic information that Dux-Soup can access without fully visiting a profile.
You can also watch a short video tutorial on how to download data.
Visiting profiles is the most comprehensive way to get lots of data as the following fields are captured:
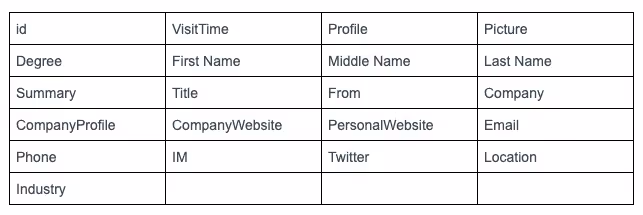
Note: In addition, when ‘visiting’ Dux-Soup is able to extract the profile’s employment history, education, and skills list.
Watch our tutorial on YouTube How to Search & Visit LinkedIn Profiles.
Scanning profiles is much quicker than visiting as Dux-Soup does not have to open each profile one by one, but instead can quickly work through hundreds of profiles in minutes. The fields that are downloaded from the scan data are the following:

Revisit data with Dux-Soup
Dux-Soup Revisit Data tool on the Dux-Soup extension menu lets you revisit profiles based on previously downloaded files. Dux-Soup recognizes a certain format of the document and in order to work, you need to make sure your document contains these 3 columns, with these exact (case-sensitive) column headings:
- Profile (LinkedIn URL)
- First Name
- Last Name
Please see an example below:

Once you upload a file, Dux-Soup will revisit profiles in your custom file. Watch our 'How to Revisit data' tutorial and read more about the Dux-Soup Revisit Data tool here.
Book a Booster call
If you need more 1:1 help to get started you can book a Booster Call with a product expert. This one-hour session is tailored for you and will provide help with your technical and process setup so you can be self-sufficient at lead generation with Dux-Soup Pro.
Summary
We hope that after reading this you’re able to start using the Dux-Soup Pro tool with confidence and will quickly start seeing benefits and results for your business.
If you’re reading this and are still undecided about Pro then visit our website for blogs, case studies and other information to help you make up your mind!
If you’re not already a user, take advantage of our 2-week free Turbo trial. You’ll have access to ALL of the features for a complete Dux-Soup experience. We don’t ask for your credit card details, so there really is no ongoing commitment (although we do think you’ll like what you see!)
Questions?
Should you have any questions or comments, feel free to contact us at info@dux-soup.com.


