


Whether you are a regular Dux-Soup user or a newcomer, you will have one thing in common — you’ll want to leverage LinkedIn in the best way to find the right people to connect with.
When searching for new prospects to connect with on LinkedIn, it's best to be as targeted as possible, so that you can make your messaging more relevant and improve your conversion rates.
You can search for lists of people by using LinkedIn search filters such as job title, industry, location etc. (check out our LinkedIn search and filter masterclass to help with this), but did you know that LinkedIn Groups offer a clever way of finding new prospects also?
Searching based on 'interests'
If you want to connect with people who have a certain interest in specific areas, your traditional LinkedIn search method may not work. For example, if you are searching for people interested in property development, outdoor events or buying Bitcoin. These interests are unlikely to be listed on their LinkedIn Profile, or in search filters in LinkedIn or Sales Navigator.
This is where using LinkedIn Groups can be brilliant. LinkedIn Groups offer communities where members can share common interests. So, if you can find Groups that are relevant to your target market, the likelihood is that the people in these groups are going to be the perfect target audience for you to connect with.
Once you are a member of a LinkedIn Group, you can use Dux-Soup to connect with people in that group. And once you're connected, you can engage away to your heart's content. It's a win-win strategy for generating brand awareness and uncovering leads with people right in your target market.
4 steps to harness LinkedIn Groups
This technique shows you how to grow your network using LinkedIn Groups. By using Dux-Soup to automate the whole process, you'll save a lot of time and get amazing results! Of course, you're welcome to take the manual approach where Dux-Soup is mentioned but wouldn't you rather be doing better things with your time?
In fact, you can grab yourself a 2-week Dux-Soup Turbo trial and give it a go without any commitment - absolutely free!
Step 1 — Check what LinkedIn Groups you're already in
First, here's how you can see what Groups you're already a member of, or waiting to be accepted into.
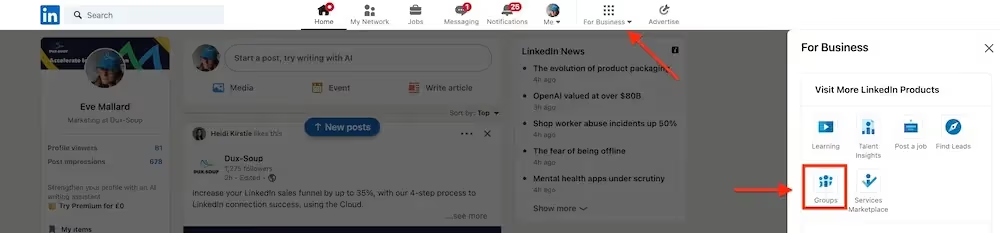
On the top right of your LinkedIn browser, click on ‘For Business’. Then from the dropdown click on ‘Groups’:
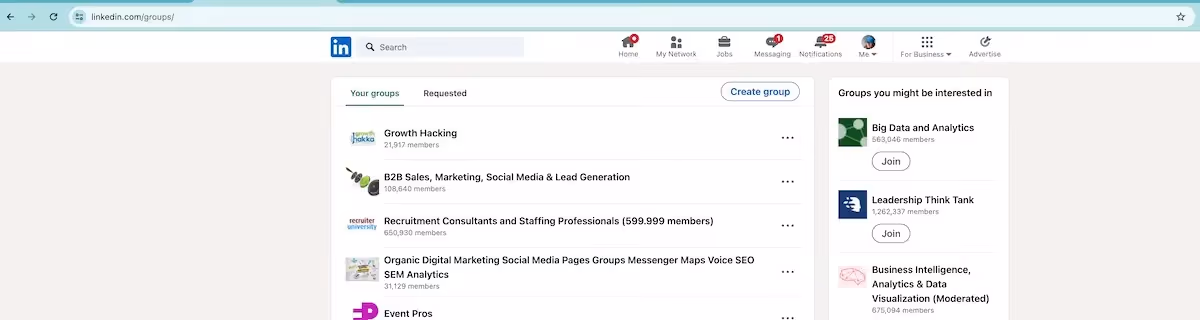
You'll see two tabs at the top: a list of 'Your groups' you are already a member of, and a tab with groups you have 'Requested' to join:
If you're already in some Groups that offer good networking potential, you can skip straight to step 3 and start using Dux-Soup to connect with these group members!
Here are shortcuts to these Group lists:
Groups that you have been accepted in
Step 2 — Finding LinkedIn Groups to join
Now, assuming you want to join some new Groups, let's search for some relevant LinkedIn Groups to join.
Standard LinkedIn
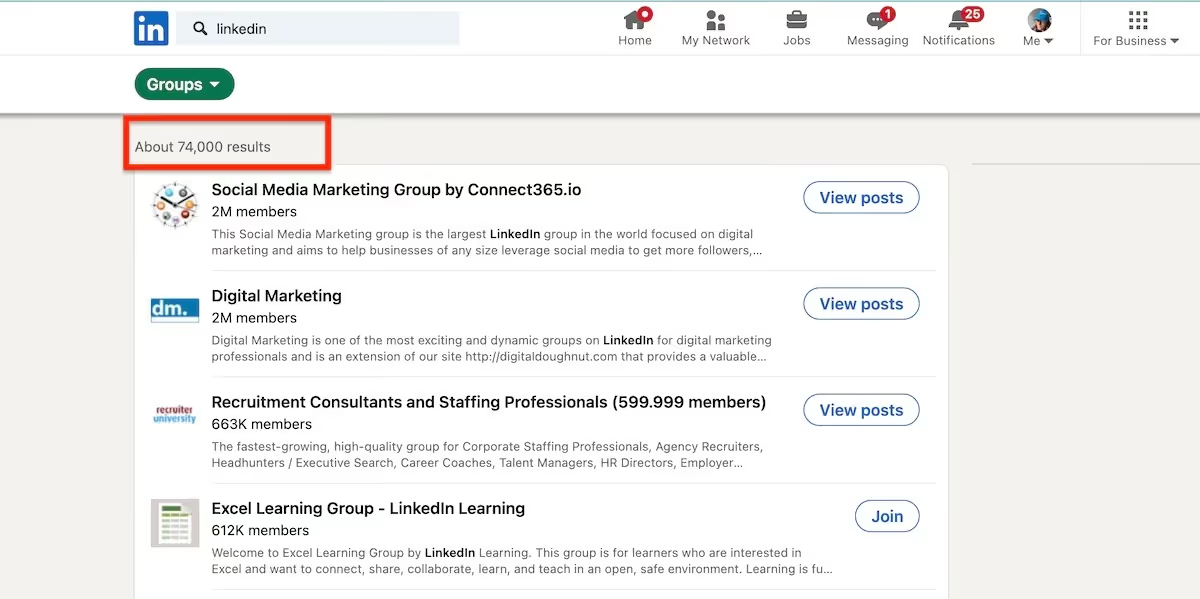
In the search bar at the top, type in some keywords. A tip here is to type in keywords that your target audience would be interested in. For example, I'm going to type in 'LinkedIn'. You'll notice that you're served with all results, so click on the 'Groups' button underneath the search bar to narrow your search down to just groups.

You'll then get a list of groups relevant to your search. Here we have around 74,000 results - so you could refine this search to make the results more relevant.
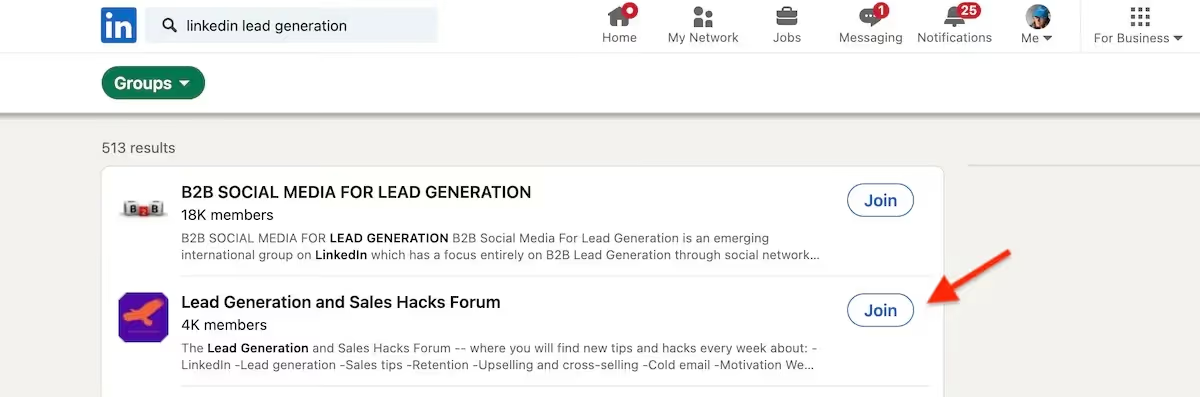
If you see a relevant group in the list, just click ‘Join’:
Some LinkedIn groups are open and you are accepted immediately, whilst others are closed and managed by a moderator. You will not always be accepted into every group you ask to join.
Quick Tip:
When looking at which groups to join, look at the number of members within the group. We recommend groups with fewer than 5000 members. Groups of this size usually have more suitable people. Sometimes when groups have 20,000+ it means that the admin has not been strict on who joins the group meaning that many people may not be in the right industry that you want to target.
By clicking on a group name, you can see more information about the group, including an 'about' section, member highlights, admins and some posts:
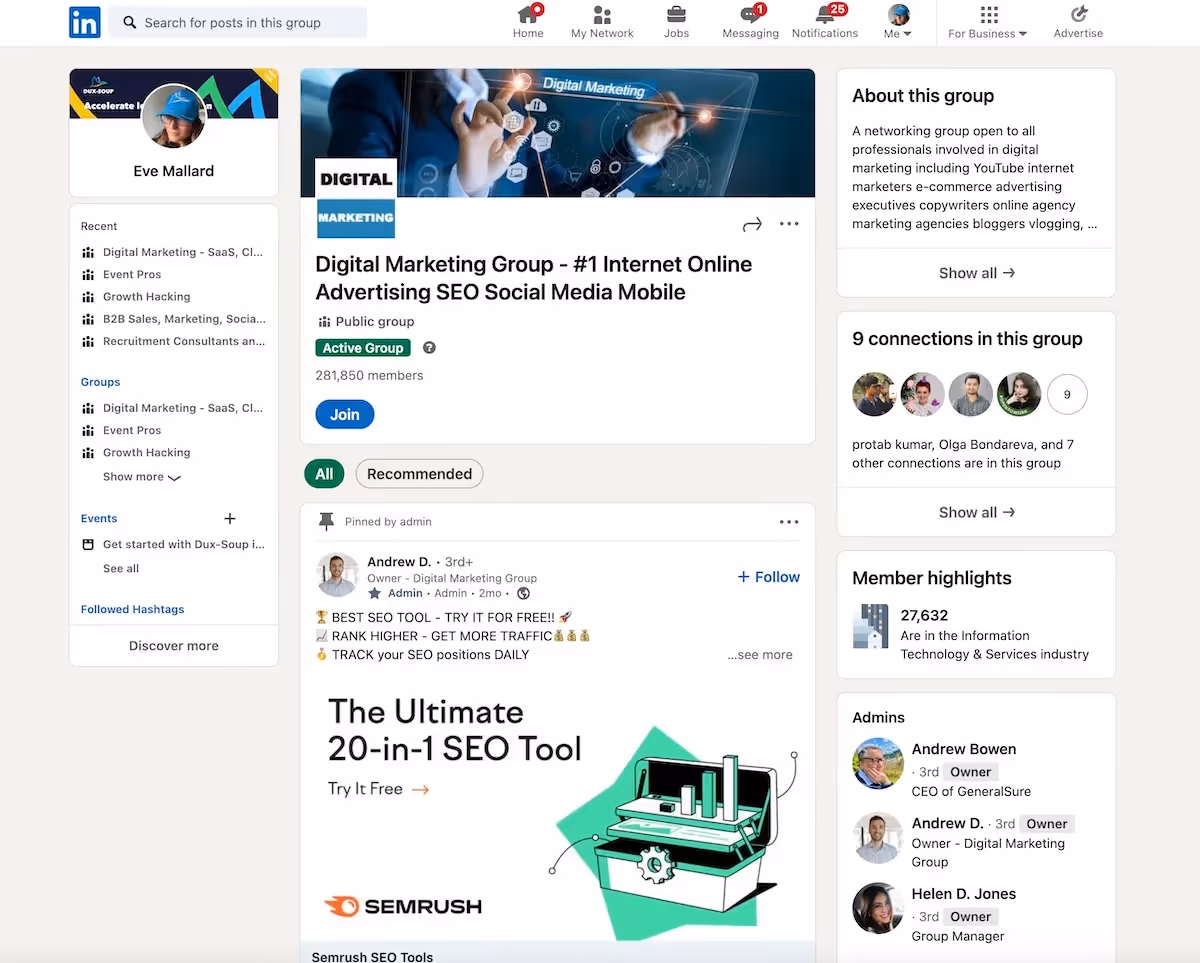
Before you ask to join the group, have a glance to see if any of your connections are in the group and if they seem like the right sort of people that would be interested in your products or services.
If everything seems positive, click ‘Ask to join’ and repeat this process for 10–15 groups. You are steps away from being part of several groups with a lot of potential customers all in one space.

Quick note here: you can only have 10 pending groups at once, so make sure you are accepted to a particular group before joining others.
Once you have asked to join groups, it can take anything up to a couple of days to be approved depending on how active the admins of the group are.
Sales Navigator
One of the best features of Sales Navigator is its advanced search capability. And we can use it here for Groups too.
Go to Sales Navigator.

And create a new search for ‘lead filters’. Once you have clicked on 'lead filters' you will see a popup box to input all the criteria you are looking for:
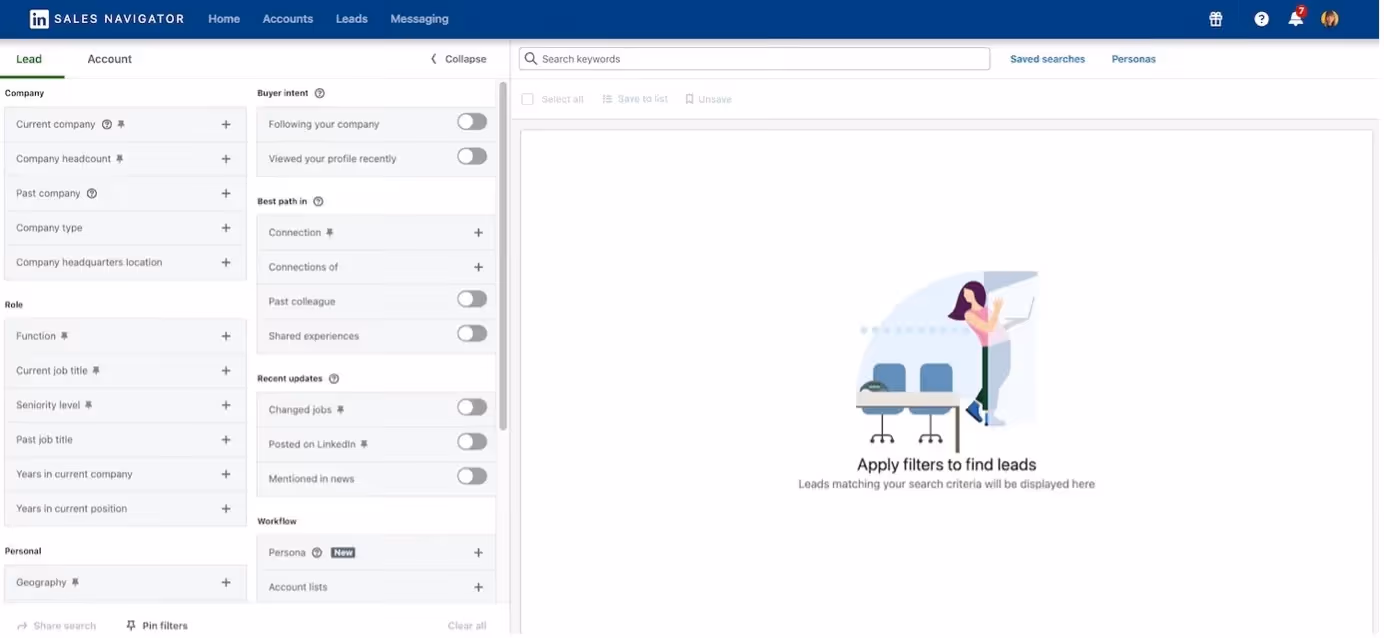
Input all the search criteria to find your target market. In this example we are going to use:
Industry: Marketing Services
Geography: United Kingdom and United States
Title: Founder / Owner / Co-Founder/ Director
The search now looks like this:
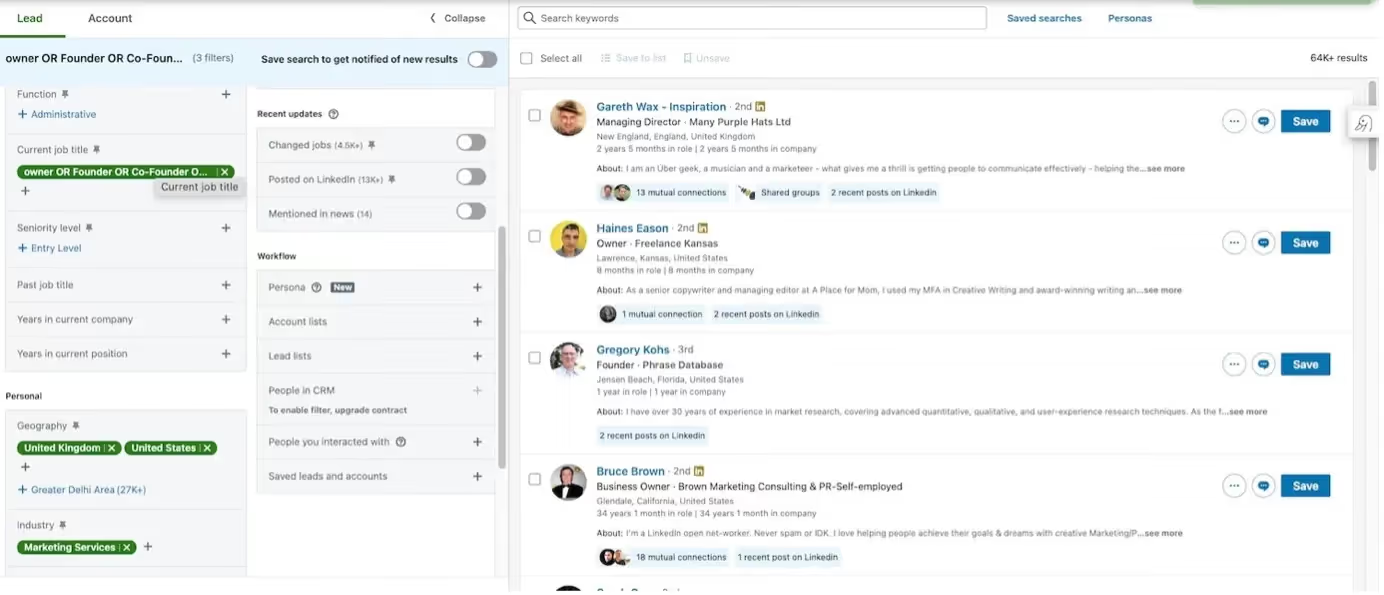
Although this shows 64k+ results, there are way too many prospects here to target effectively. In the context of this example, let's make our target market smaller, and make our connection message more relevant by finding members of groups that we are interested in. So we'll search for groups containing agency owners.
Add Group search to Sales Navigator settings
Simply scroll down, and under the 'Personal' section you'll see 'Groups'. You may not know the exact names of the Groups you want, so just type in anything related to agency owners for this example and you see a dropdown of all the groups you are a member of:
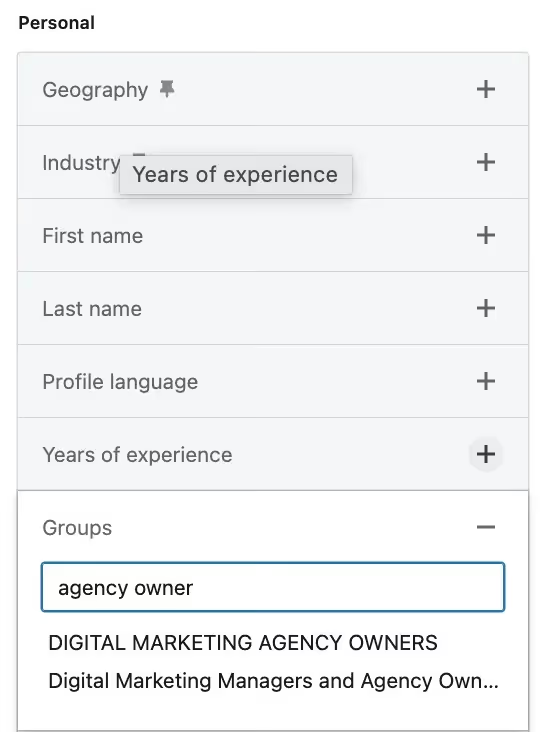
Add any groups that you think could be relevant to you.
Now, if you scroll back up to the top of the page, you will see that the search criteria has changed and narrowed down to a smaller number. In this case we have 53 matching profiles. you can now head straight to your Dux-Soup extension in Step 3 to connect with these profiles.
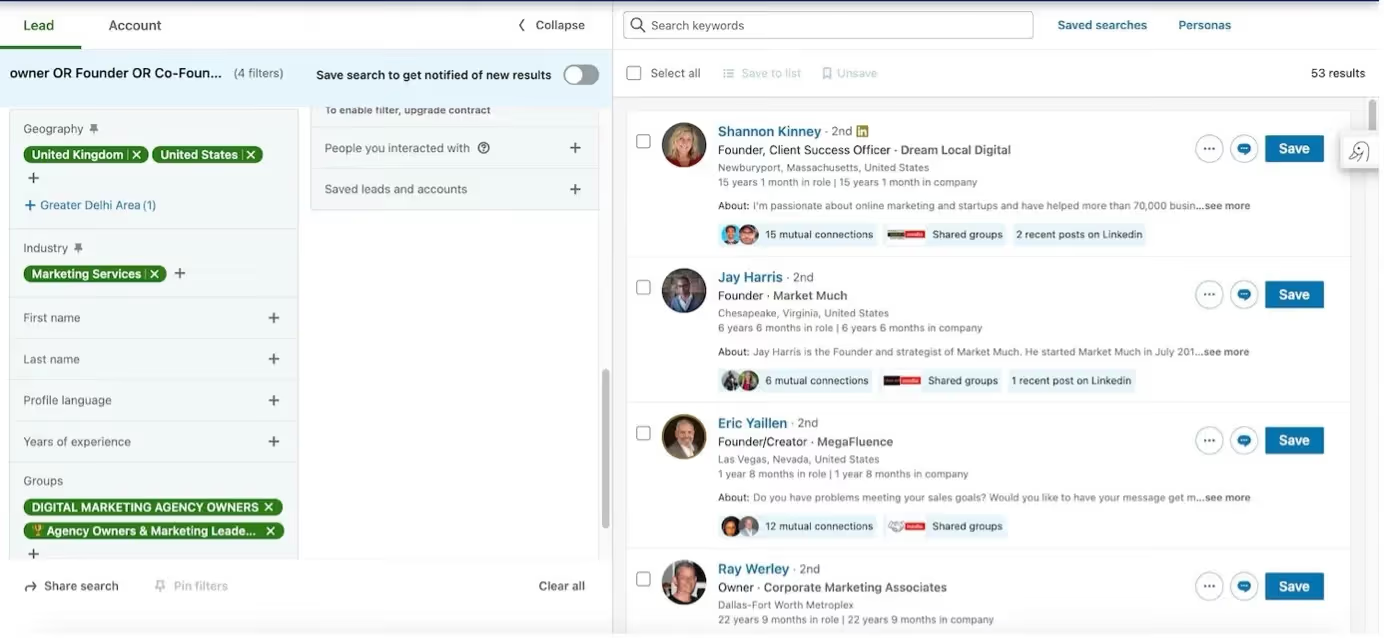
The number is very small, is this broken????
The answer is no, this small but very accurate number is perfect!
Remember, your goal on LinkedIn is not to connect with everyone (connecting with irrelevant people might lead to them marking you as ‘I don’t know this person’ which can result in your account being flagged).
The goal is to connect with highly relevant people who would be interested in speaking to you. Therefore, in this example 53 profiles who have an interest in networking with other agency owners is much better than targeting 64k+ people, and we can talk to them about a common interest.
Step 3: Connecting with people in groups
Once you are in a group, it is time to get to work and put Dux-Soup into action! Instead of manually clicking on each profile and sending the connection message (which you can absolutely do if you'd rather), Dux-Soup will automate the whole process for you, even personalizing your connection messages as it sends them.
If you go to the right hand side of any group you are a member of, you will see a description of the group and a list of members:
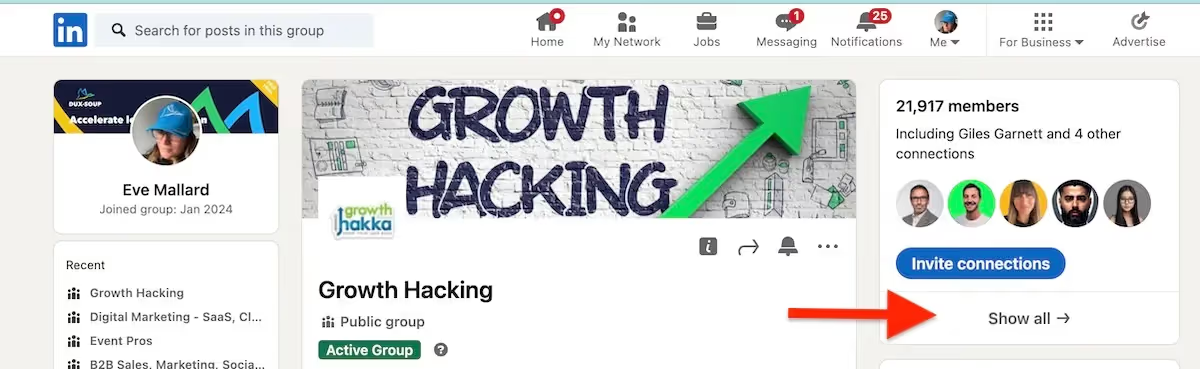
Click on 'show all' (in this instance, there are 21,917 members) and you will be taken to a page listing all of the members in the group.
If you have been accepted to multiple groups, then you can imagine the potential for how many relevant people there could be to connect with in every group.
You can use Dux-Soup Pro, Turbo or Cloud to send personalized, automated connection requests. Or, of course, start with our free trial.
How do you send your connection requests with Turbo / Cloud Dux?
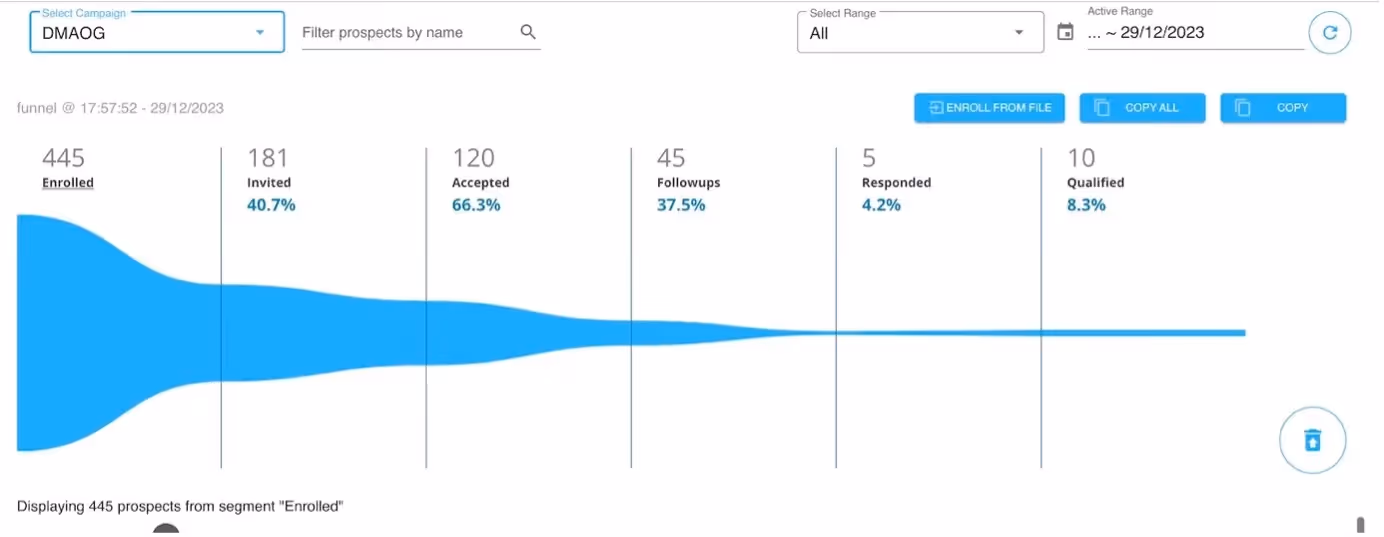
Create a campaign in the Dux-Dash with a simple connection message. Here's an example of a connection message that was sent to Group members which achieved a 66% connection acceptance rate!!
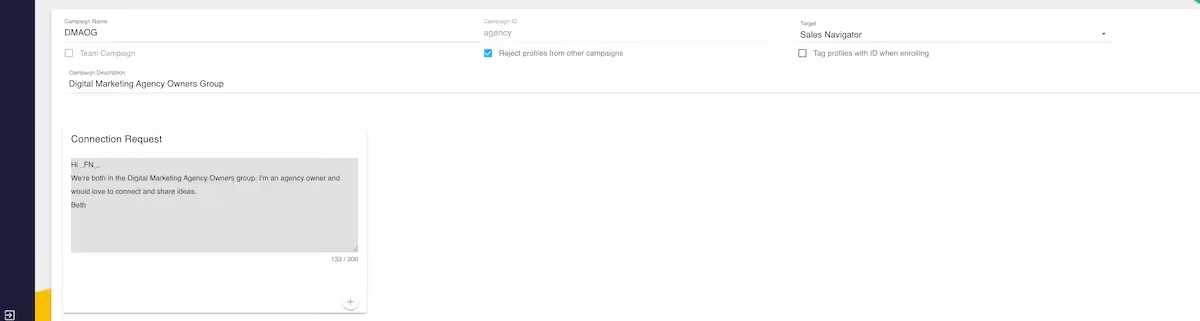
With Turbo and Cloud Dux, you can add follow-up messages to your connection message too! Read our article on creating Dux-Soup campaigns.
Once your campaign is created, and with your list of Group member profiles active in LinkedIn or Sales Nav, simply click on 'Enroll' from your Dux-Soup extension and choose the campaign to enroll them into from the drop-down menu.
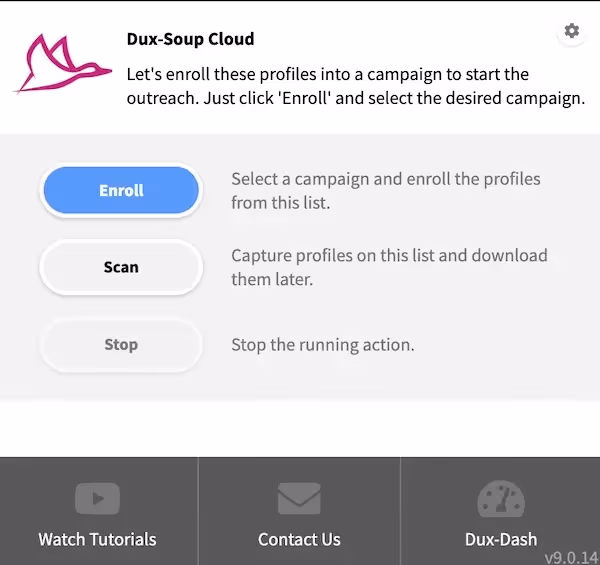
It's that simple! Dux-Soup will queue and send your connection requests for you, personalizing each one.
What about the results?
With Cloud and Turbo Dux you can access your campaign results from the Funnel Flow in the Dux-Dash. It allows you to monitor your invited profiles and connection acceptance rates to see what's working best for you.
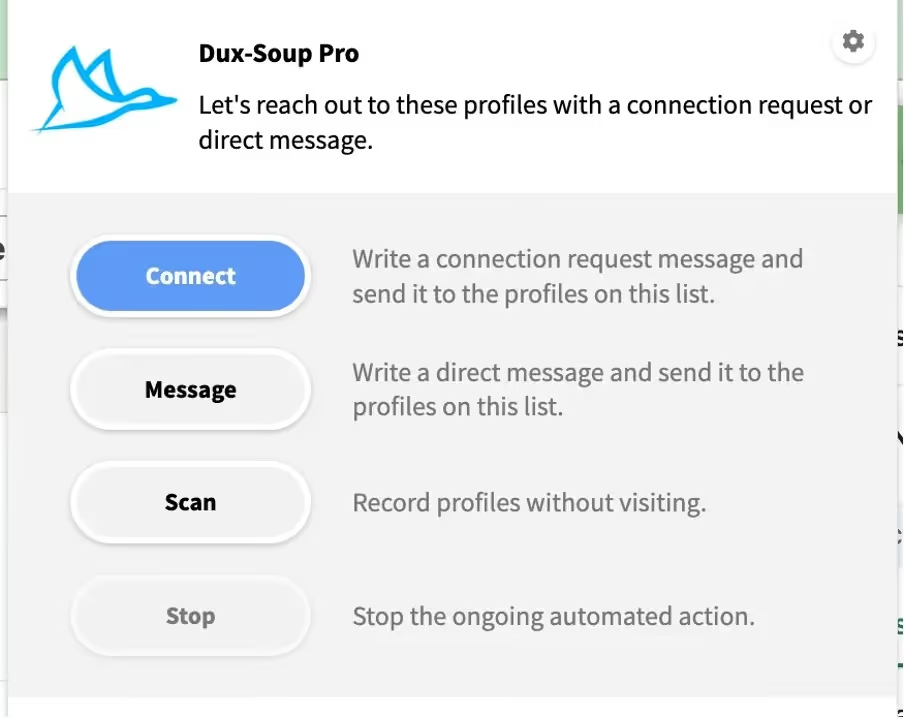
Sending connection messages with Pro Dux
Your options will be slightly different, with Pro - just click on 'Connect' from the Dux-Soup extension.
A box will pop up to type in your connection request message. Make sure to use the personalization markers, like first name, to make your message hit the mark. When you're done, click 'OK'.
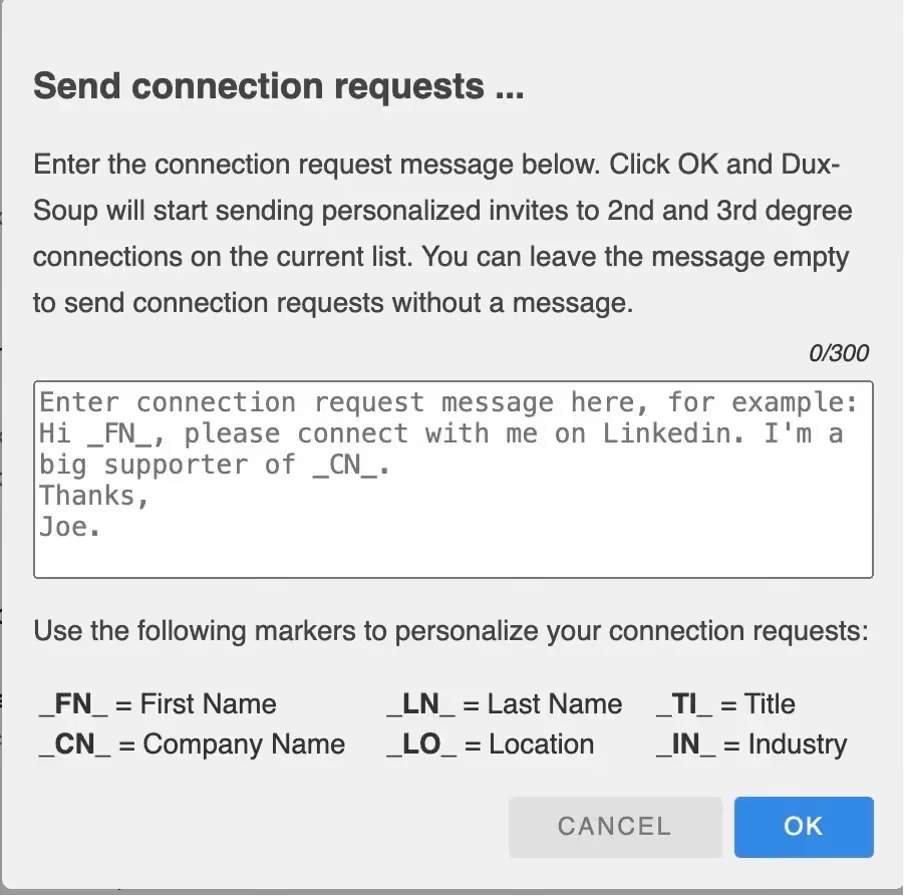
And there you go, Dux-Soup Pro will start sending your connection requests for you. Why not sit back and grab yourself a coffee?
Bonus Tips
Bonus Tip 1:
Remember to add a Tag with the group name when you are connecting with people. That way you will be able to keep track of what sort of connections and sales are coming from certain groups.
Bonus Tip 2:
If you have a free LinkedIn account, you will often see this message when you have searched for too many profiles in one month:
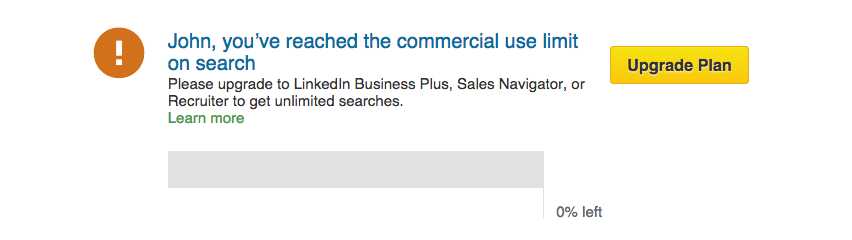
This means that you cannot search for any new profiles. However, if this happens, just go to the groups that you have joined and you can engage with all people in those groups with no limitations.
Summary
By using our LinkedIn Groups technique, you can now search and find a lot of new profiles to visit and connect with. One point to note is that the relevance of the group members can vary. This means that you should spend some time analyzing the group and its members and only then start visiting their profiles and sending connection request messages.
A simple way to do this is by scanning all the profiles first with Dux-Soup, downloading them and removing any profiles that you think are not suitable. Once you have a database of perfect contacts, use Dux-Soup re-visit function to connect with all these people.
Good luck with finding the right groups for you and get in touch at info@dux-soup.com if you have any questions :)


