


Ready to turn those LinkedIn connections into customers?
With Turbo and Cloud Dux, you're not just making connections - you're building an automated lead gen machine. By letting your drip campaigns handle your follow-ups, you get to skip the small talk and focus on your connections who are ready to talk business.
Since LinkedIn recently introduced its 100 connection request weekly limit, the secret to winning isn't 'more' - it's 'better'!
With our Campaign Tricks Widget, you can cherry-pick your top prospects and manually add them to your campaigns. It's about high-intent, high-conversion, and zero waste with your outreach.
In this blog, we’ll cover:
- Drip Campaign 101: The essentials of Dux-Soup automation, and types of campaigns you can create
- Batch vs manual enrollment and
- The manual touch: Tips and tricks for manually enrolling prospects
- Campaign information: Let the data drive the strategy
Note: The manual “Enroll” feature is available with Turbo and Cloud Dux, plus the free trial.
Dux-Soup drip campaign 101
Drip campaigns are created and managed within the Dux Dash. Watch our tutorial on how to create a drip campaign and enroll prospects.
With Dux-Soup, you have the freedom to build unlimited campaigns tailored to your goals. Each campaign supports up to 12 automated actions, allowing you to mix and match the following:
- Connection invitations and InMails
- Messages
- Post lies and Follows
- Visits and Endorsements
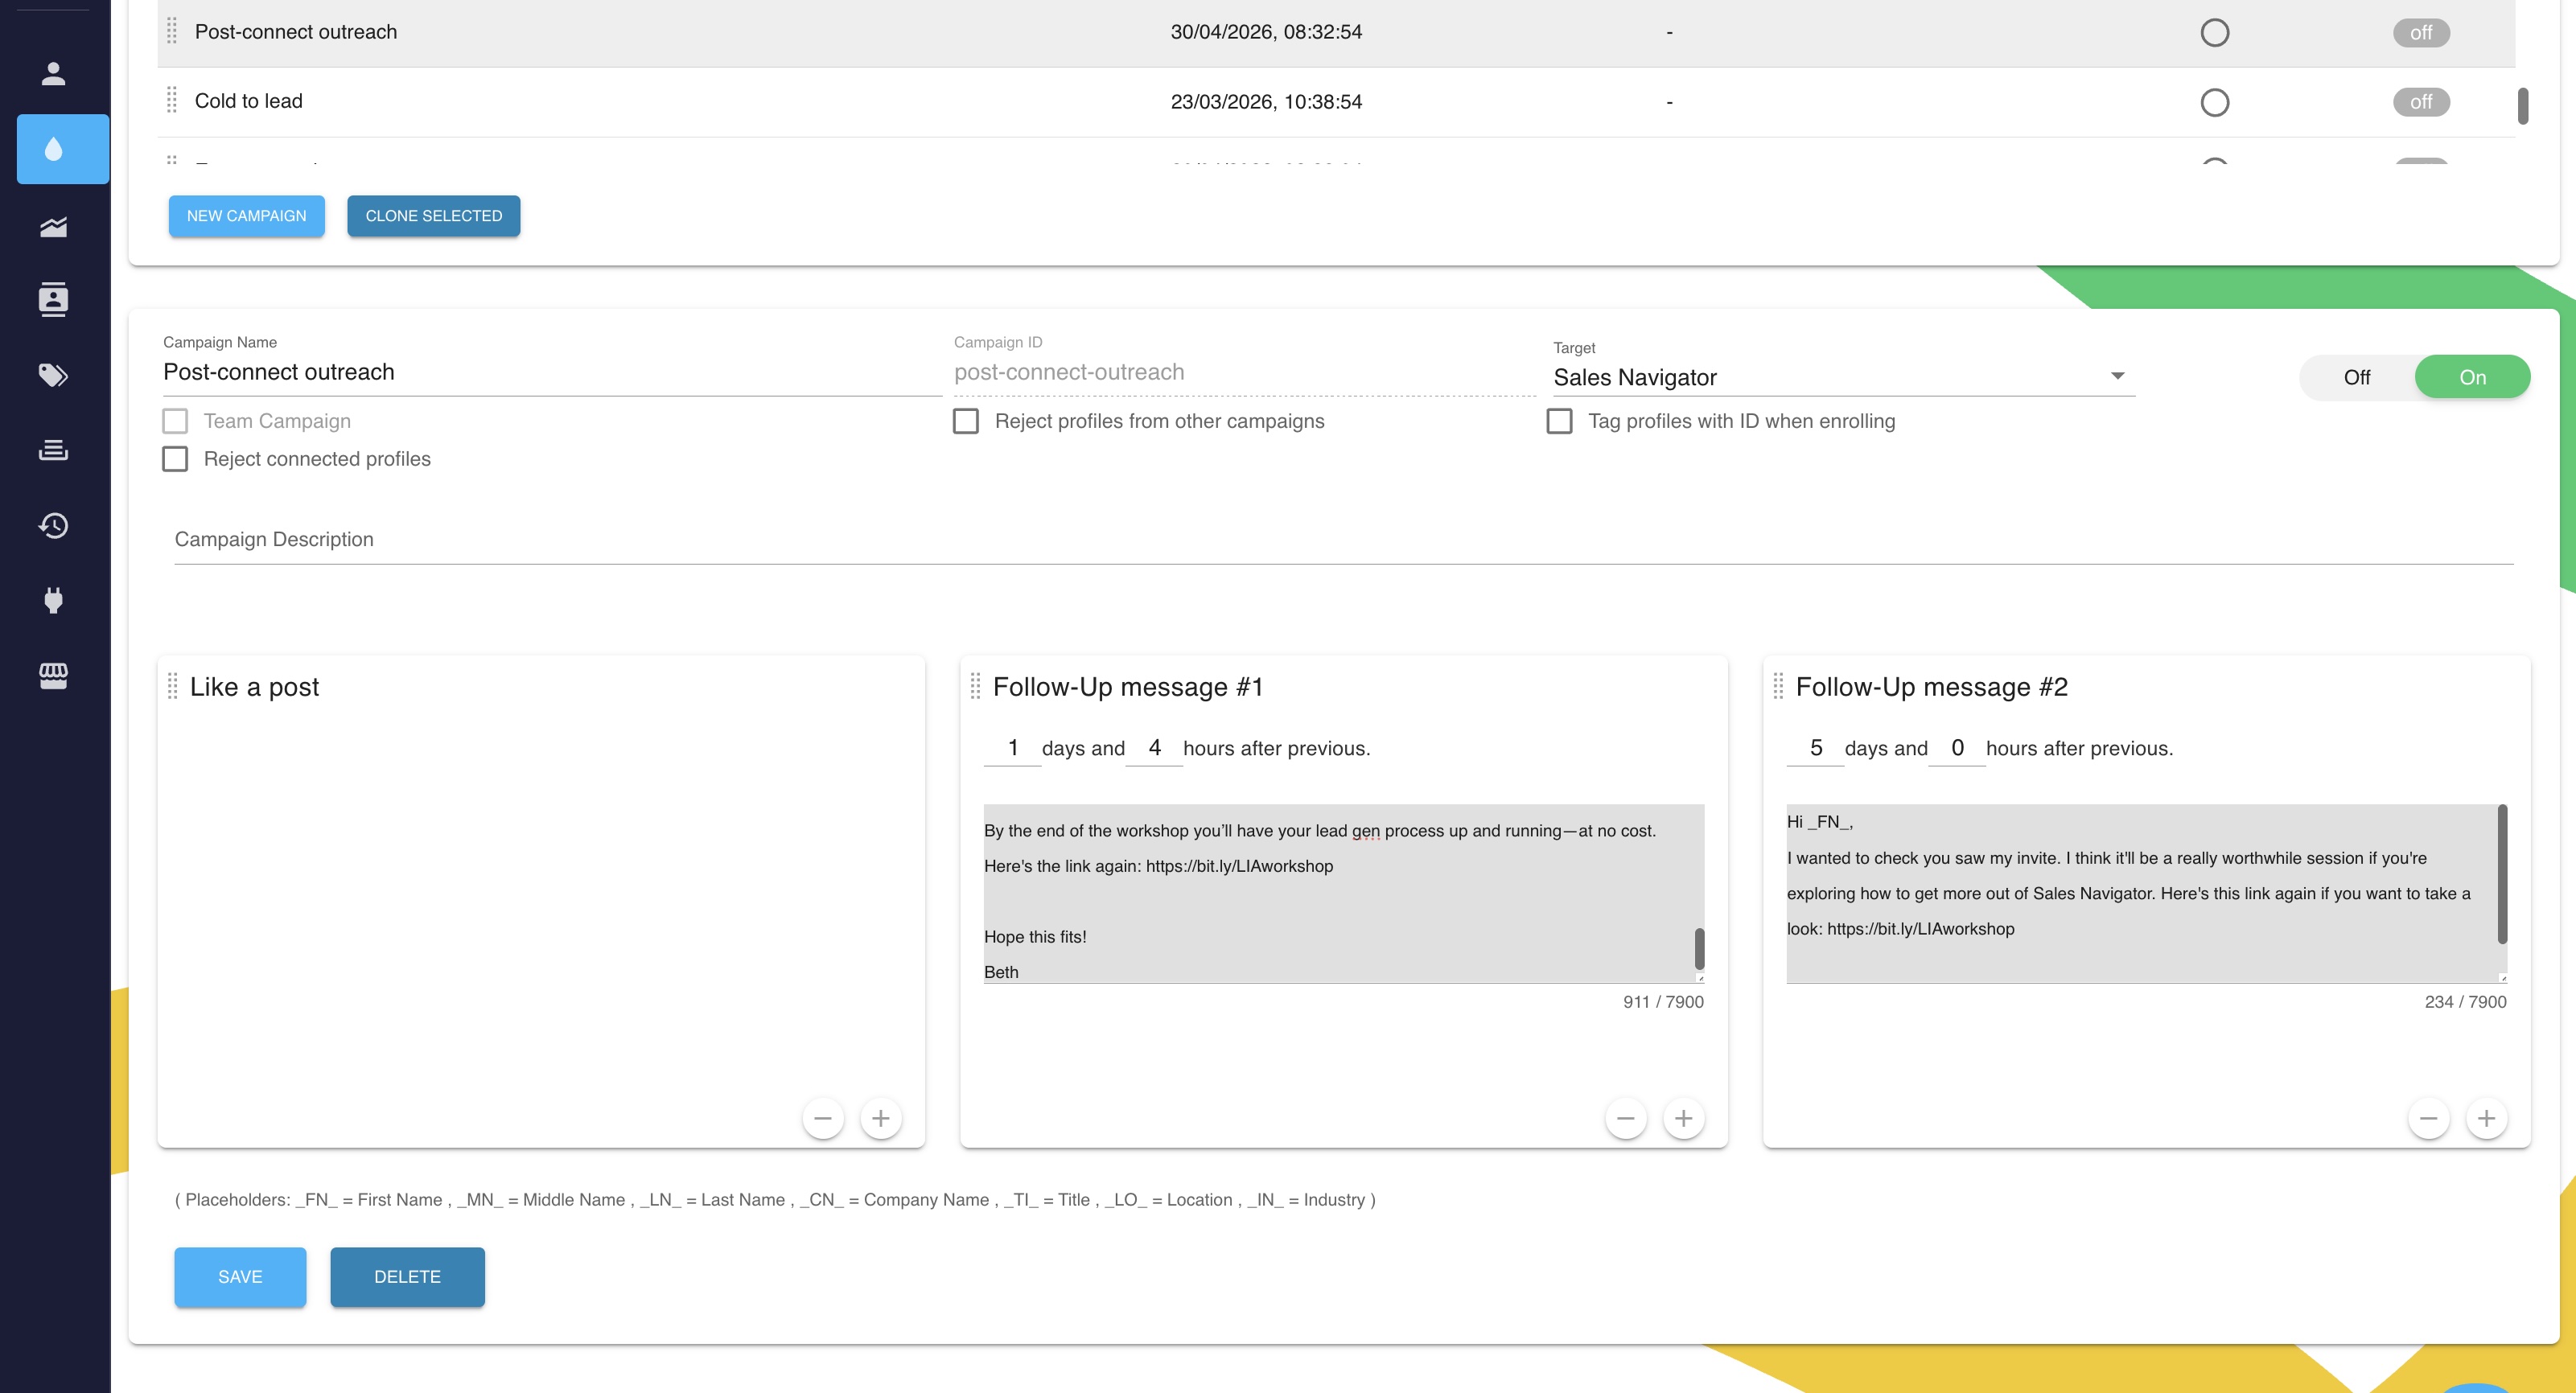
When targeting 1st degree connections, you don't need to include a connection invitation. Your campaign goal may be a simple three-step workflow to generate webinar attendees, and include:
1. A post like
2. A message inviting your prospect to an event a day later
3. A follow-up message reminder 5 days later.
Like this:
Want to see more? Watch our video on choosing the right campaign sequence for your target audience to explore different campaign strategies tailored to your specific goals.
Here are some things to note:
- By using the placeholders, Dux-Soup will personalize your messages, entering the relevant LinkedIn data in its place.
- Dux-Soup will schedule the next action once it has executed the previous step in your drip campaign. Use the time delays to dictate when the next action should happen. That way, you never need to remember a follow-up again.
- You can drag and drop your drip campaign steps to rearrange the order of your actions, but Dux-Soup will automatically prevent you from adding actions in the wrong place in the sequence e.g. placing an InMail after a connection invitation.
- If your campaign includes a connection invitation, and you enroll a first-degree connection to your campaign, Dux-Soup will automatically skip ending a connection invitation and move to the next action.
Make sure your campaign is switched on, and then press save.
Now, let's look at how you add prospects to your campaign, and the power of the Tricks Widget. With Dux-Soup, we call it 'enrolling' them.
Bulk vs Manual enrollment
Your LinkedIn outreach is only as effective as the prospects you target. Depending on your goal, you can choose from two enrollment strategies:
1. Bulk enrollment. Enroll an entire list of prospects at once into a campaign, which will get you a broader, volume-based but less targeted reach.
2. Selective manual enrollment. Hand pick prospects for a personalised targeted outreach approach that prioritises quality over quantity.
If you want to be more selective (great choice by the way), the Dux-Soup Tricks Widget is your superpower.
The manual touch: Tips and tricks for manually enrolling
Our Tricks Widget allows you to individually enroll prospects into your drip campaigns - either when manually browsing them, or from a LinkedIn, Sales Navigator, or Recruiter list.
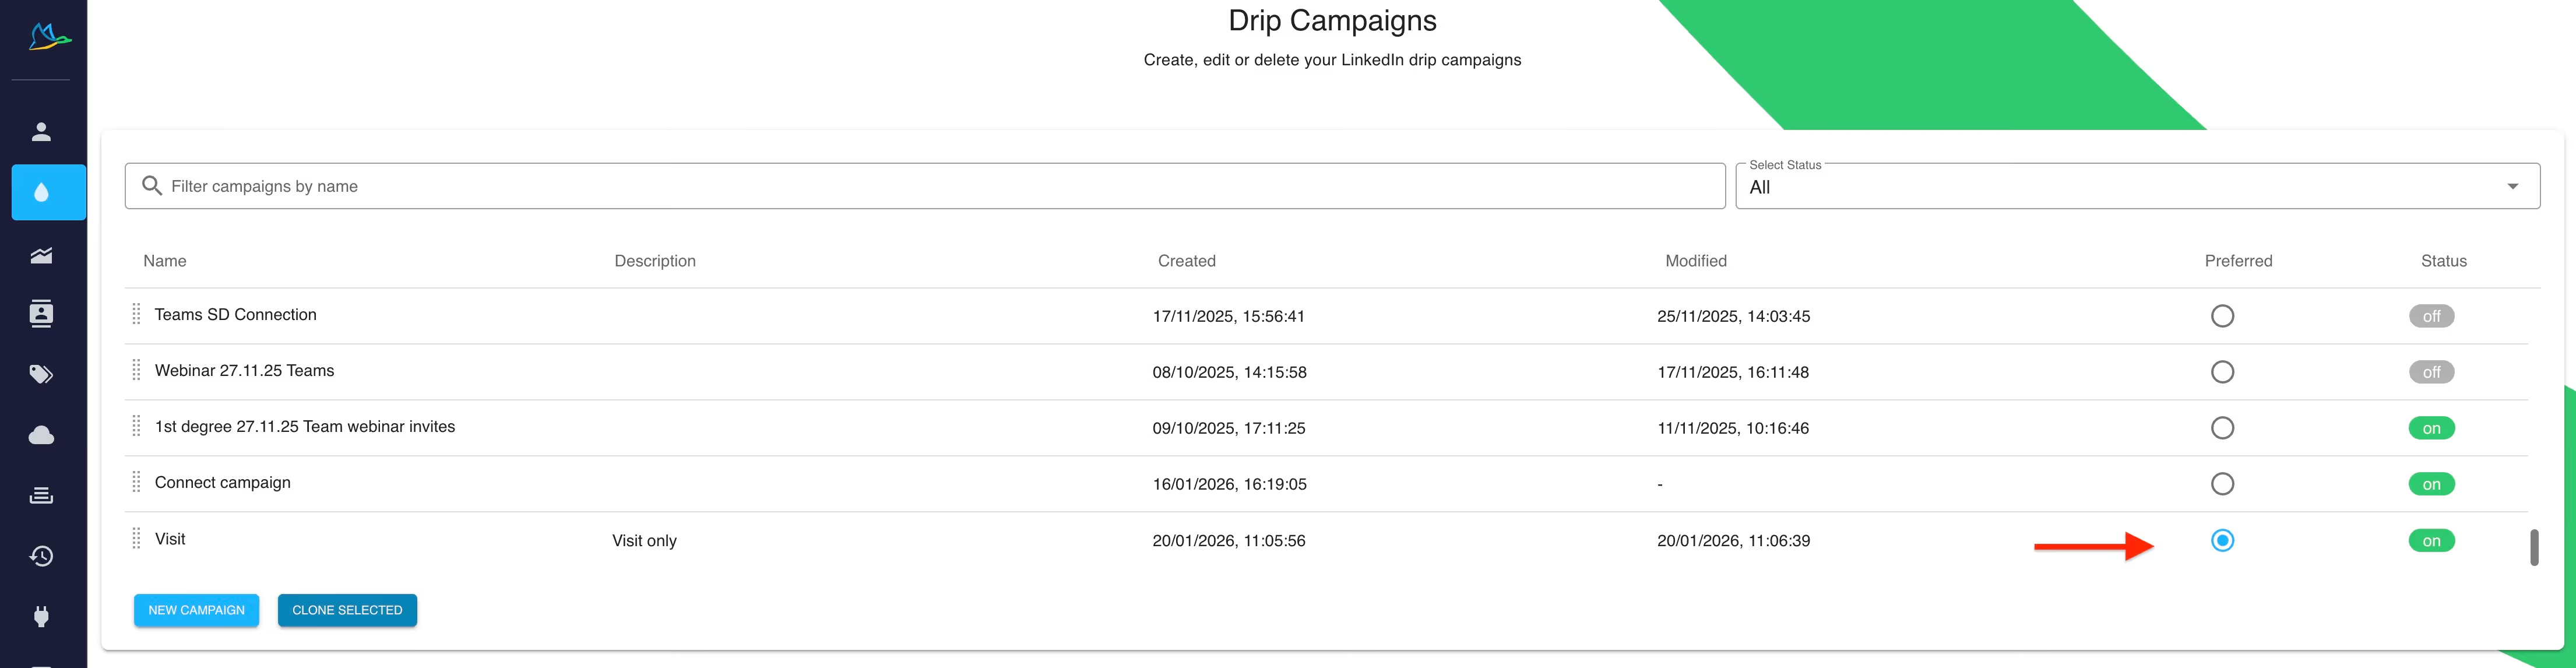
Tip: When enrolling via the Dux-Soup Tricks Widget, we recommend making it your preferred campaign to make the manual enrollment process faster. Just select the preferred option as you see below:
Manually enrolling from a list
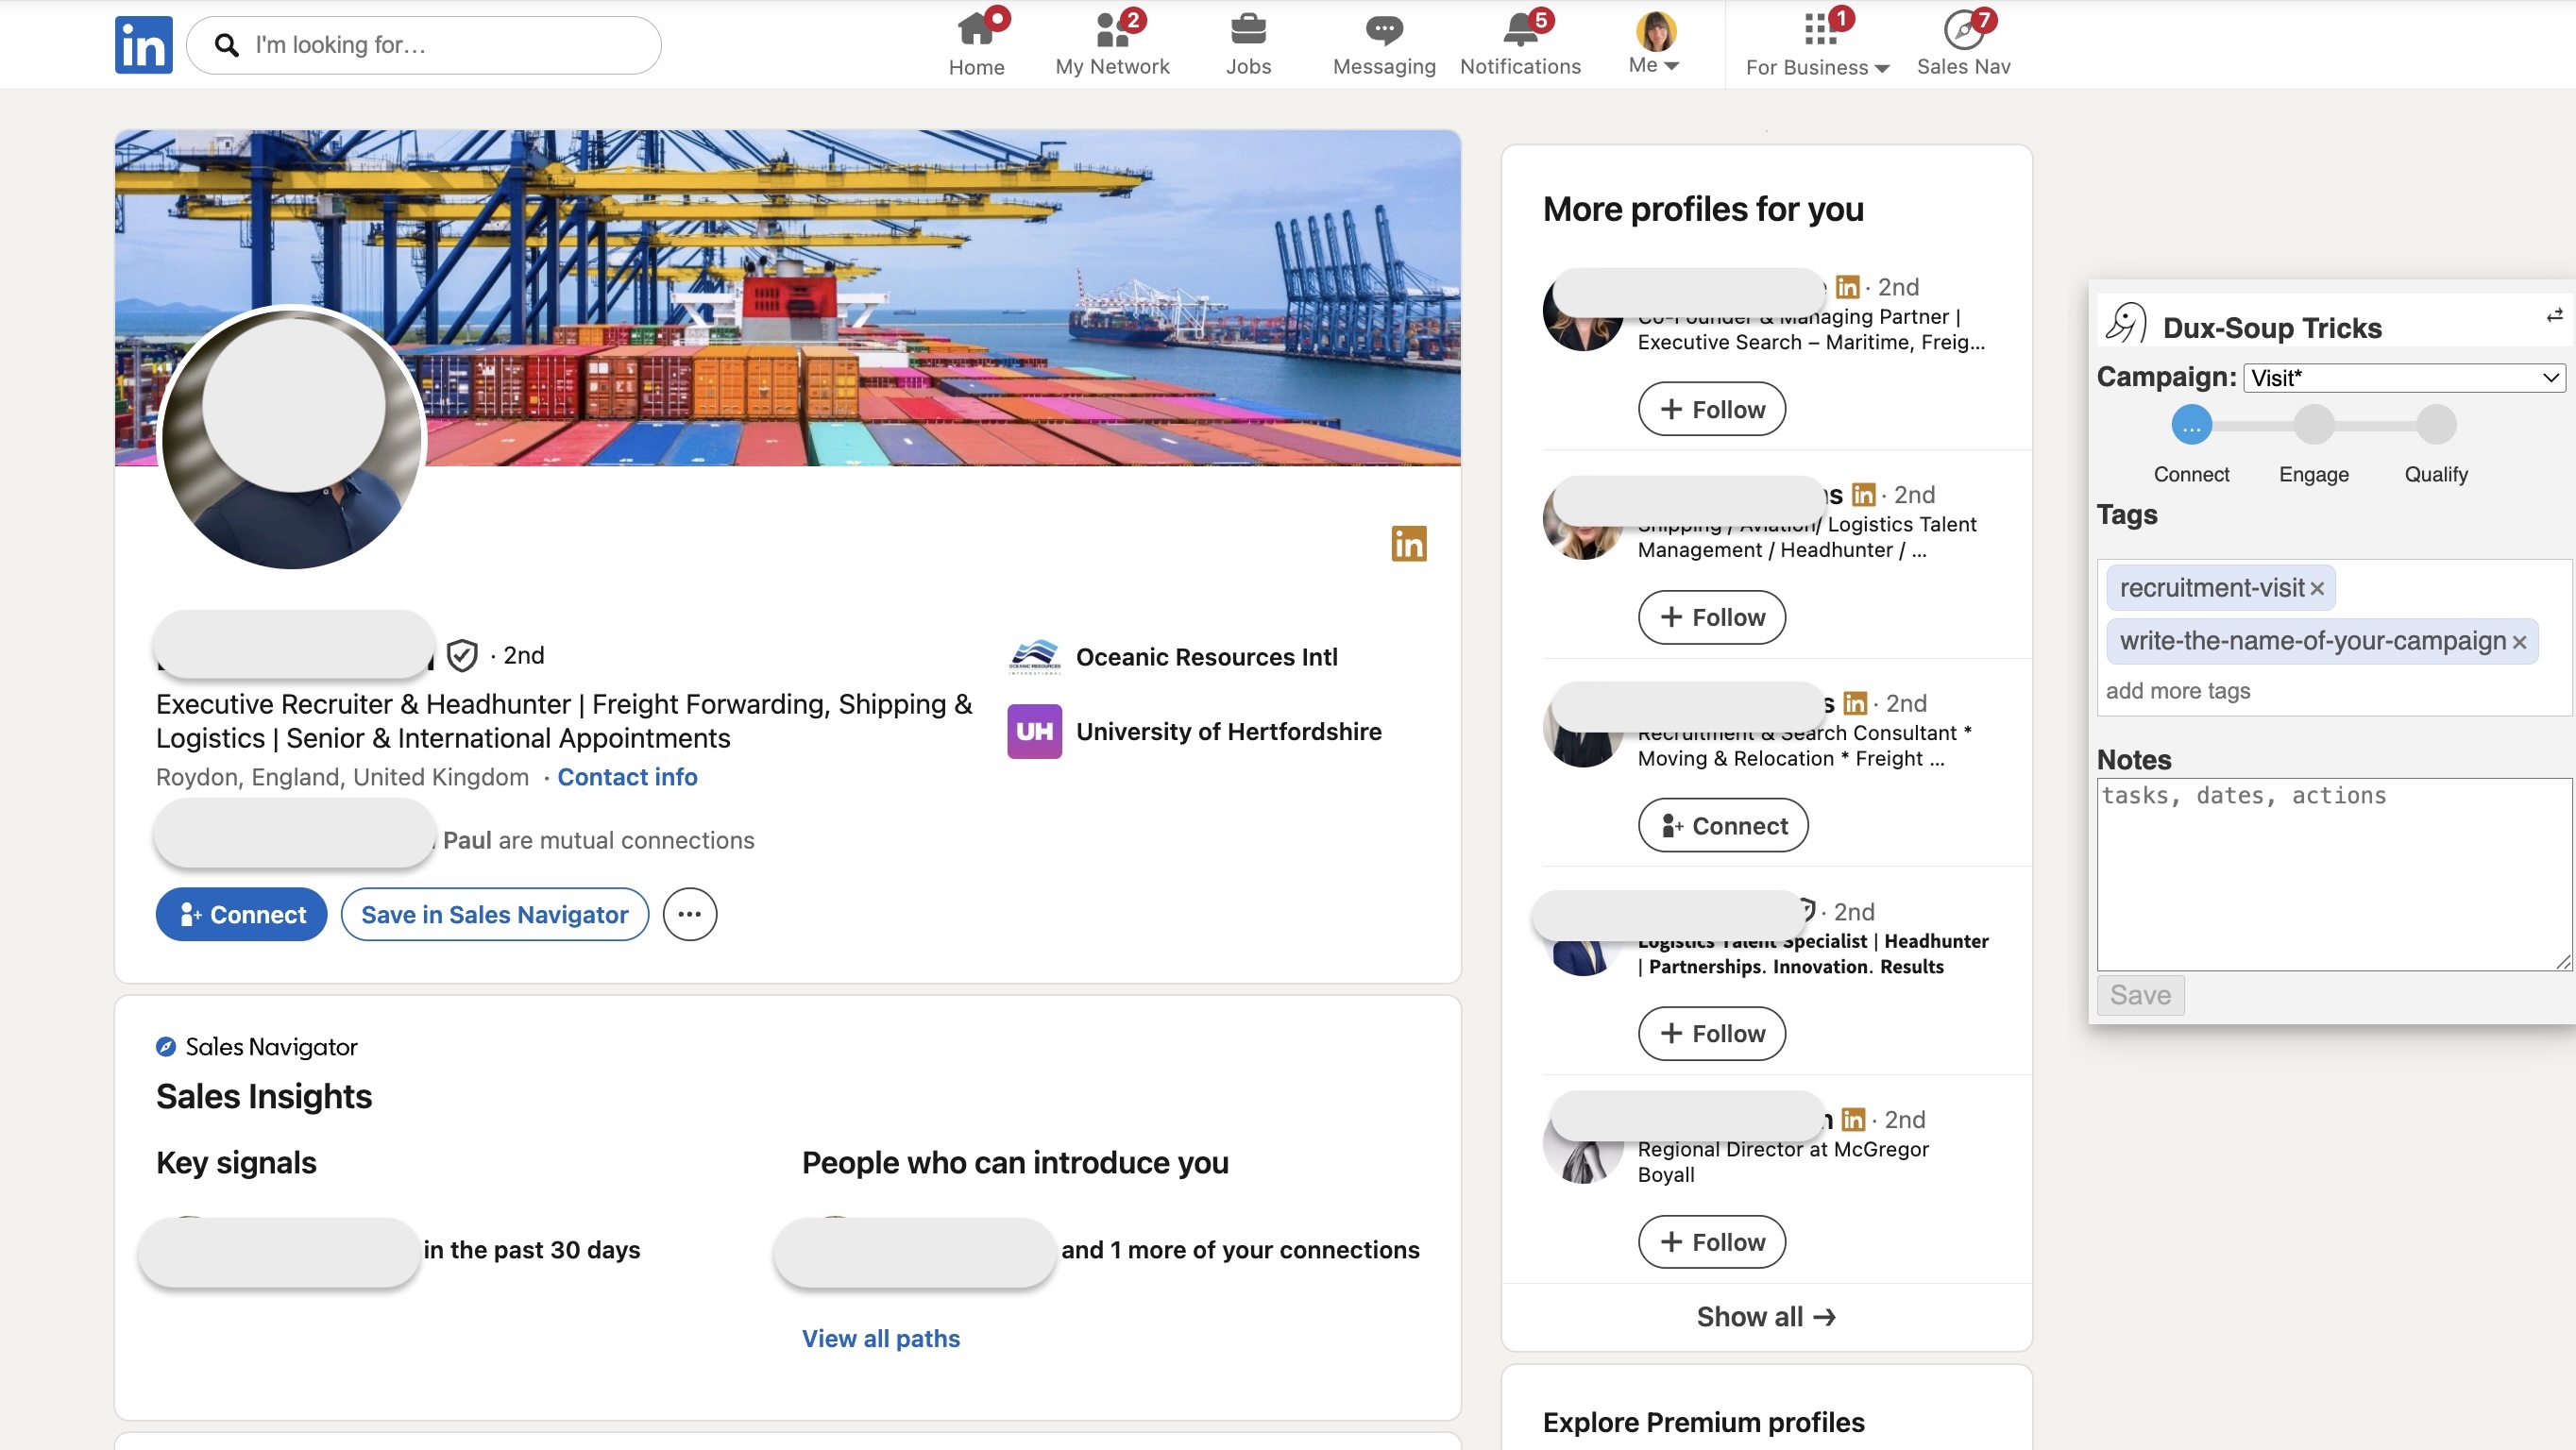
Run a search on LinkedIn, Sales Navigator, or Recruiter. A Dux-Soup icon will appear on the right-hand side of your screen. Click on it, and your Tricks Widget will appear (you may need to wait a few seconds for the Dux icon to appear).
Click the ‘Enroll’ button against the individual in the Campaign Tricks Widget, and select the campaign (your preferred campaign will be at the top of the list):

Voila, your prospects will be added to your chosen Dux-Soup campaign.
Manually enrolling while browsing profiles
If you are manually browsing/visiting profiles on LinkedIn, Sales Navigator or Recruiter, the Dux Tricks widget will again appear on the right-hand side of your screen.
Click on the Enroll button, and then select the campaign you wish to enroll them into:

Once you click on the Enroll button, Dux-Soup will schedule your actions for you and then execute them, personalizing messages as it sends them. You can see which campaigns the profile is enrolled in via the Tag box (if you selected to 'tag profiles when enrolling' in the campaign options).
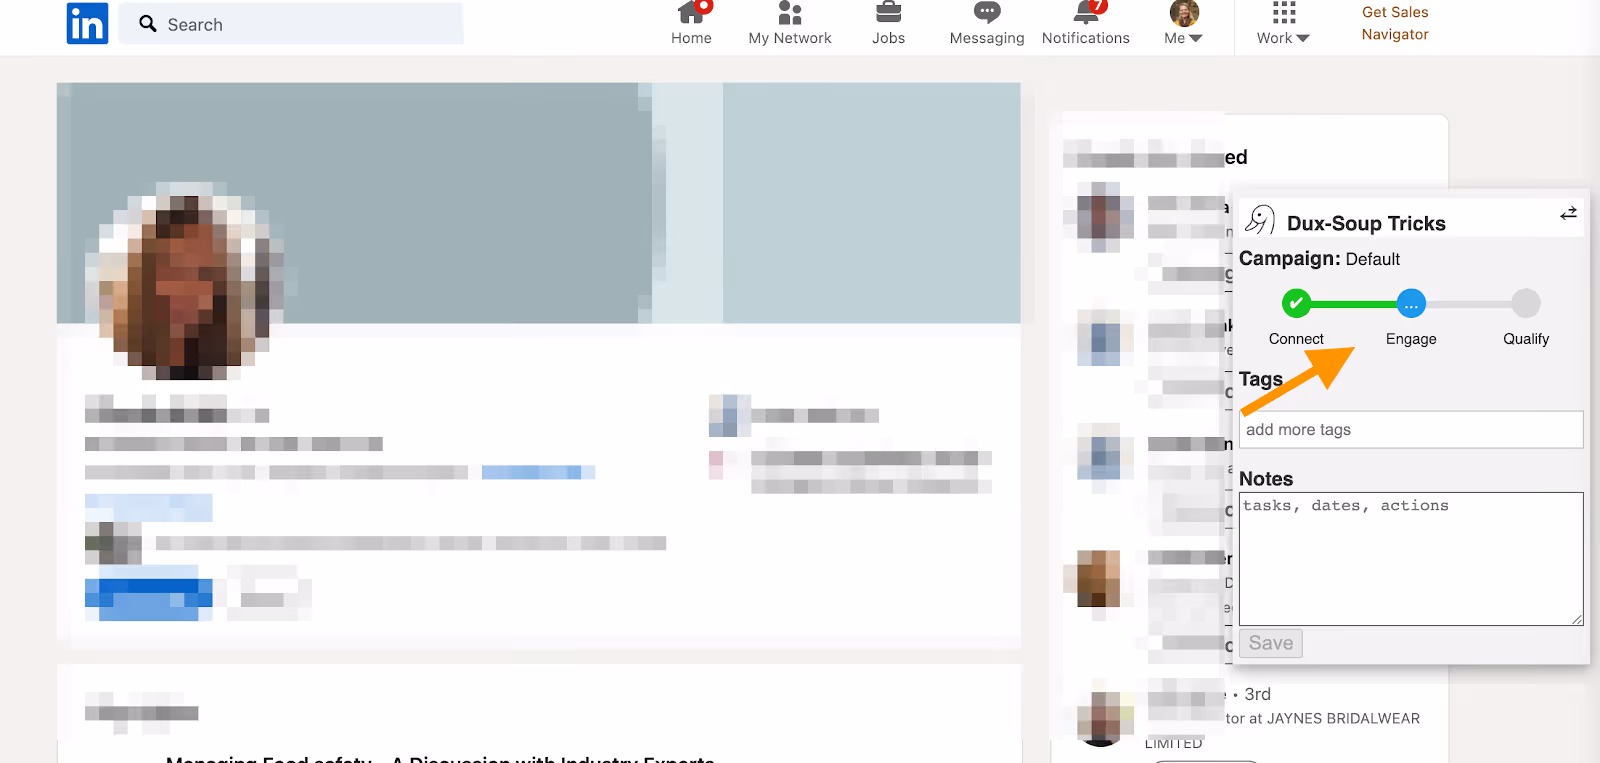
Here, since this is a 2nd degree connection, and hasn't been enrolled in a campaign that contains a connection invitation, the blue 'Connect' button indicates that a connection message has not been sent.
Once we send a connection invitation and a LinkedIn prospect accepts your connection request, or if they are already a connection, the 'Connect bubble' turns green, and Dux-Soup will schedule the next actions in your drip campaign, looking like this:
Once you've enrolled your prospects into your campaigns, how can you check that Dux-Soup has actually actioned it? l
Campaign information at your fingertip
Monitor your scheduled tasks under the Queued Activity tab in the Dux-Dash. Once you click Enroll, your prospects will appear here - giving you full peace of mind that Dux-Soup is working seamlessly in the background.
To see the performance of your campaign, open the Funnel Flow and filter your campaign results by campaign, and date range:

The Funnel Flow provides the insights you need to pinpoint exactly what's working - and what's not:
Low acceptance rates?
Shake things up. Maybe try sending a blank connection message against a personalized one - see which resonates best.
Low response rate?
You might be reaching the wrong audience. Experiment with a different market segment to find a better fit.
With Dux-Soup, the options are there; now it's time to find your strategy.
About Dux-Soup
Dux-Soup Turbo and Cloud offer automated outreach campaigns to accelerate your LinkedIn lead generation, using automated drip messaging sequences. The great news is that you can try all these features for free with our Dux-Soup Turbo 14-day trial!
Questions?
Have any feedback, questions, or comments? Send them over to info@dux-soup.com. We look forward to hearing from you!


