

Triggering different Webhooks for testing
With the Webhook feature you can set up a trigger to link Dux-Soup Turbo with any other external app and record Dux-Soup events to invoke specific behaviour.
This opens the door to a world of endless possibility - working with the data you gather from LinkedIn and using it in many different ways.
We have previously discussed what Webhooks are and how to use them with Dux-Soup Turbo. In this blog we will try to cut through the mystery around different Webhook events and learn how to trigger Webhooks for the following events:
- visited profiles with create and update visit events;
- connection request and sent message with action events;
- accepted connection request, sent and received a message with message events;
Note: you can access the full list of Dux-Soup events here.
To test these Webhooks, we will use Zapier - find out more about Zapier by following this link.
Visit Events
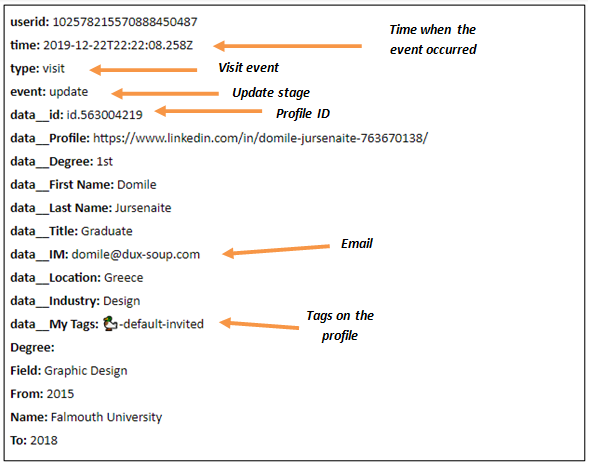
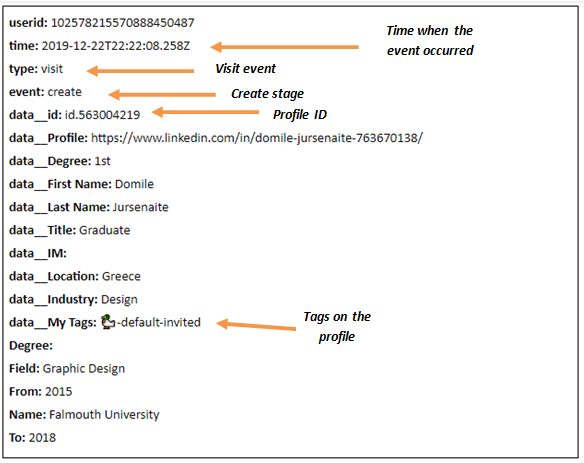
Visit Events occur when manually and automatically viewing profiles on LinkedIn. An automated visit will result in 2 events:
1. for the initial profile view (create event);
2. after the robot opens the contact tab - this will include the email address if the prospect is your 1st-degree connection (update event).
To test these events in Zapier, here is what you have to do:
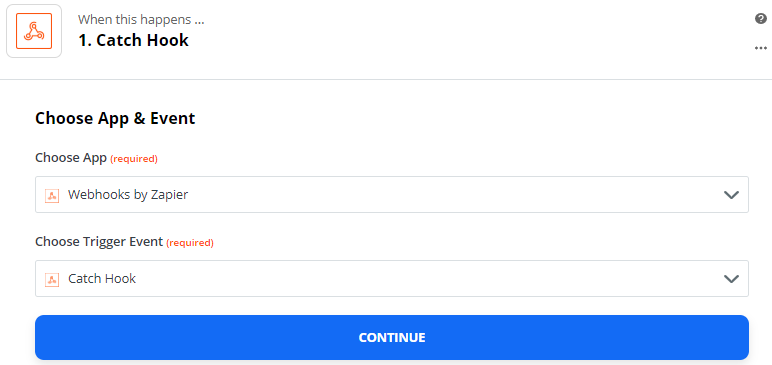
1. Make a new Zap:

2. Select Webhooks by Zapier as Trigger App and Catch Hook as Trigger Event:
3. Click on Continue and retrieve your customized Webhook:

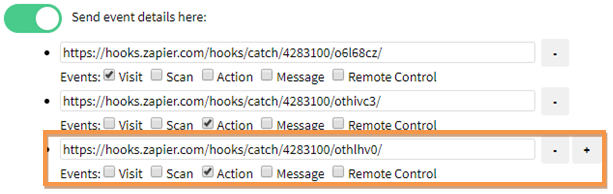
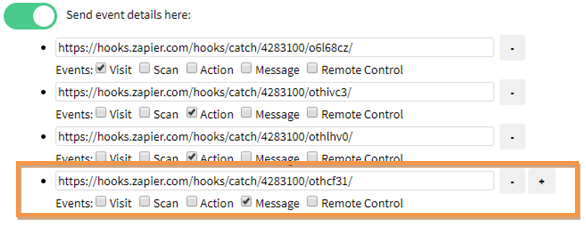
4. Copy and paste a custom Webhook URL to Dux-Soup Options, Connect tab. Make sure that you have enabled the Webhook option and ticked the Visit event:

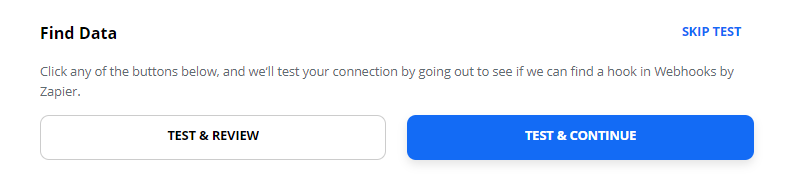
5. Go back to Zapier and select Continue:

6. Enable “Run automated actions while manually browsing profiles” in Dux-Soup Options, Actions tab so you record the Webhook test data (when manually browsing profiles ):

7. Go to your 1st-degree connections and manually visit one profile.
8. Go back to Zapier and click on “Test & Continue”:
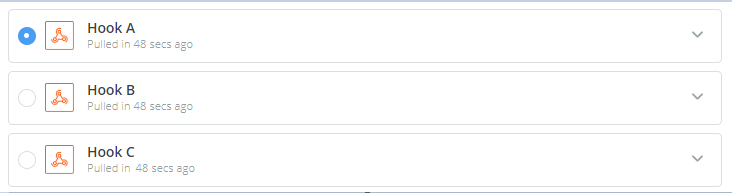
9. You should receive 2 Webhooks: Hook A (update event) and Hook B (create event):

Hook A:
Hook B:
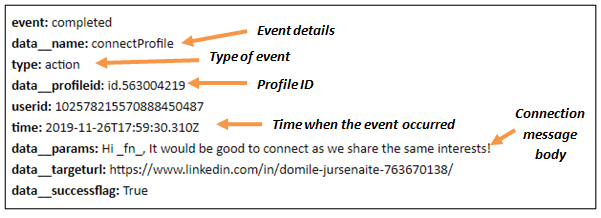
Action Event - Connection Request Sent
A “Connection Request Sent” event occurs when you send an automated connection request with Dux-Soup in LinkedIn. To test this event in Zapier, make a new Zap, retrieve custom Webhook URL (steps 1-5) and tick the Action event in Dux-Soup Options, Connect tab:

Go back to Zapier and select Continue:
Make sure that “Run automated actions while manually browsing profiles” is enabled:
And enable automated connection requests in the Dux-Soup Options, Actions tab:

Now run a search on LinkedIn for 2nd degree connections. Manually visit a target profile and Dux-Soup will send a connection request and trigger the corresponding events.
Go back to Zapier and click on “Test & Continue”:
You should receive one Hook in Zapier:

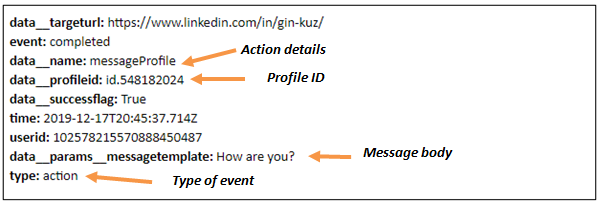
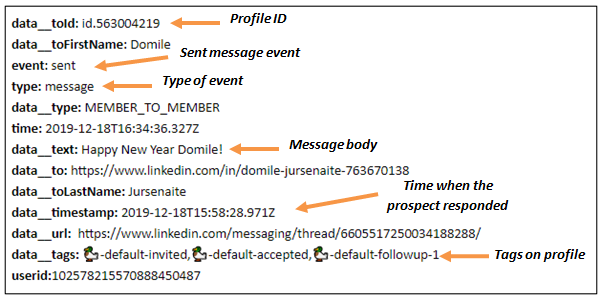
Hook A will contain the following information:
Action Event - Message Sent
A “Message Sent” event occurs when you send the message with Dux-Soup Turbo on LinkedIn to your 1st-degree connections, this also includes follow-up messages. To test this event in Zapier, make a new Zap, retrieve custom webhook URL (steps 1-5 from the 1st Zap) and tick the Action event in Dux-Soup Options, Connect tab:
Go back to Zapier and select Continue:
Make sure that “Run automated actions while manually browsing profiles” is enabled:
Go to your 1st-degree connections and manually visit one profile with enabled option Dux-Soup Options, Actions tab:

Go back to Zapier and click on “Test & Continue”.
You should receive one Hook in Zapier:
Hook A will contain the following information:
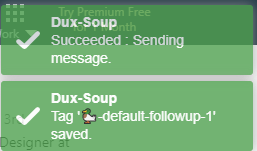
Note: Follow-up messages belong to Action event as well. Once Dux-Soup sends a follow-up message, it adds 🦆-default-followup-1..5 tag and Zapier catches an Action event:
Tip: Find out more about automated system tags here.
Message Event - Invitation Accepted
Message Events occur when the Message Bridge has been enabled and new messages are being processed by Dux-Soup, it also records the new connections that have been made.
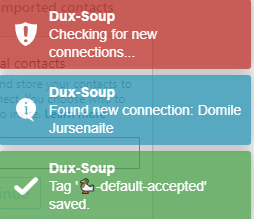
Accepted invitation event occurs when Dux-Soup detects a new 1st degree connection in LinkedIn and adds a 🦆-default-accepted tag.
To test an accepted invitation event in Zapier, tick the Message event, make a new Zap and retrieve a custom Webhook URL - paste it to Dux-Soup Options, Connect tab:
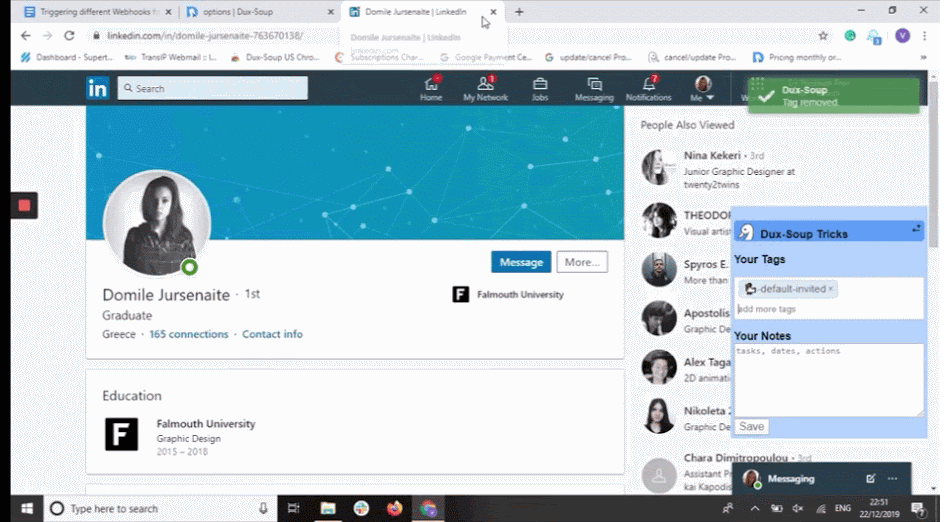
Go to your LinkedIn 1st-degree connections, select the most recently added profile and manually remove the 🦆-default-accepted tag to speed up the process. Find more details on how to remove a tag here. Afterwards, toggle the Message Bridge on and off until Dux-Soup opens a new tab and runs a check of the new connections:

Note: Dux-Soup runs one check at a time and there are 3 checks in total: unread messages in Standard LinkedIn Inbox, unread messages in Sales Navigator Inbox and new connections. So the new connection will be checked the 3rd time you toggle the Message Bridge
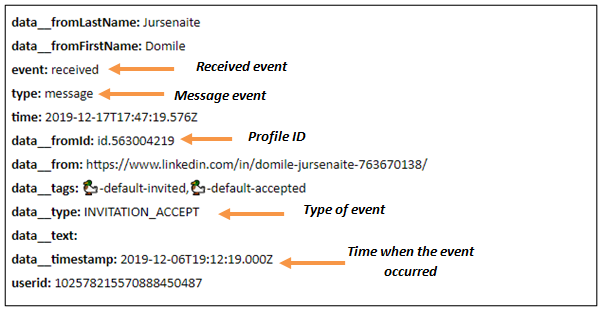
Once you have done this, Dux-Soup will detect the new connection and add the 🦆-default-accepted tag:
The result in Zapier should be the following:
Message Event - Message Sent, Message Received
A “Message Sent” events occur when a new sent message has been read by the Message Bridge while a “Message Received” event occurs when a newly received, unread, message has been read by the Message Bridge and a 🦆-default-responded tag has been added.
When processing new unread messages, Dux-Soup will forward all the last exchanges in that conversation:
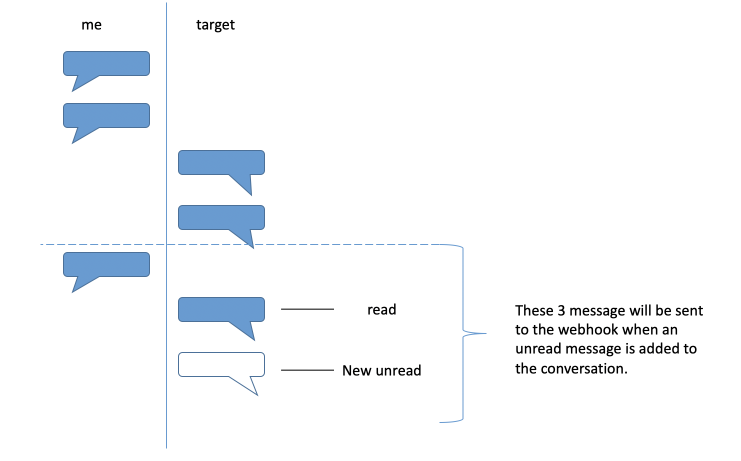
Therefore, multiple “sent” and “received” message events can be received at the same time by the target Zap.
To test the response message event in Zapier, tick the Message event, make a new Zap and retrieve a custom webhook URL - paste it to Dux-Soup Options, Connect tab:
Go to your LinkedIn Inbox and make sure that you select the responded message as unread:
Then, turn toggle the Message bridge on and off until it runs a check for unread messages:

Once the responded message is detected, Dux-Soup adds a 🦆-default-responded tag:

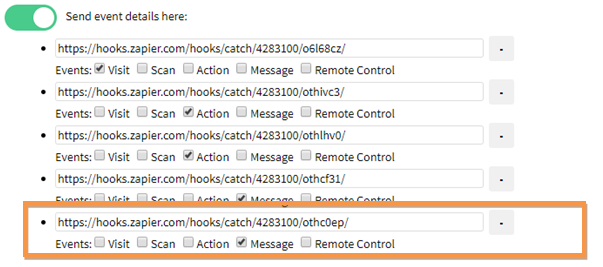
Go back to Zapier and you should see 3 webhooks:
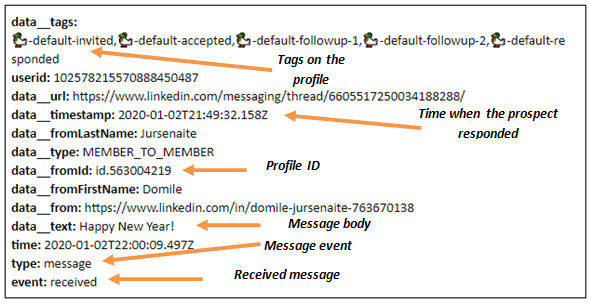
An example of a sent message event in Zapier:
An example of a received message event in Zapier:
Join our webinar to learn more
See this in action by registering for our free webinar here. In this webinar Will van der Sanden, Founder of Dux-Soup and Giles Garnett, Head of Professional Services, will demonstrate how you can trigger different action and message webhooks and how to use the visit Webhooks to create and update event. Plus Q&A session!
If you are unable to participate - you can watch all previous webinar recordings here.
Should you have any further questions, feel free to contact Dux-Soup support at info@dux-soup.com and we will be happy to help!


