


So you’ve just heard about our newest Turbo Edition and don’t know what it’s all about? Well, this is your chance to test it out for yourself using our 7 day free trial!
As the release of Turbo brought in a lot of questions about the use of Zapier and Webhooks. In this article we will show you WHERE and HOW you should get started. Keep on reading and follow along the steps to create a Webhook.
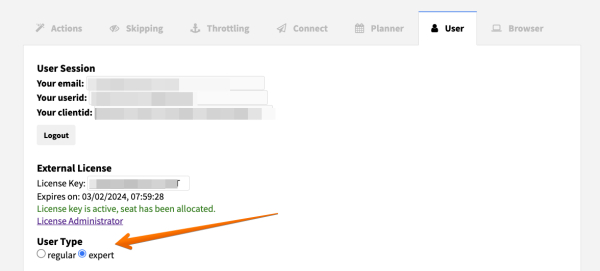
This blog showcases an expert user interface. If you don’t find the options mentioned here, simply enable them in the User tab located within Dux-Soup Options.
What are Webhooks?
Let’s start from the beginning. A Webhook simply POST data to a specific URL every time some activity is registered in Dux-Soup. Specifically, when a Profile Visit, a Profile Scan, or an Automation Action has been executed. The Webhook will send data of the event that occurred, which you can use to kick off a workflow in Zapier. By using Webhooks via Zapier, you can set up a trigger to link Dux-Soup with any other external app. For example, use Google Sheets to store and save all of your visited profiles! Having said that, Dux-Soup Webhook is by no means restricted to Zapier and can be configured to post events and data to any application.
Connecting Dux-Soup to Zapier
To set up your Webhook in Dux-Soup to post data to Zapier, make sure you have Turbo account and that you can access the “Connect” tab in the Options panel.
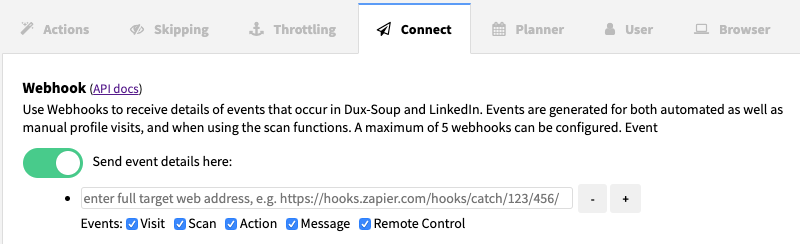
Step 1: Go to the "Options" and click on the "Connect" tab
Step 2: Enable Webhook
Step 3: Now click on "Actions" tab and enable "Run automated actions while manually browsing profiles"

Step 4: Go to Zapier.com and make a Zap!

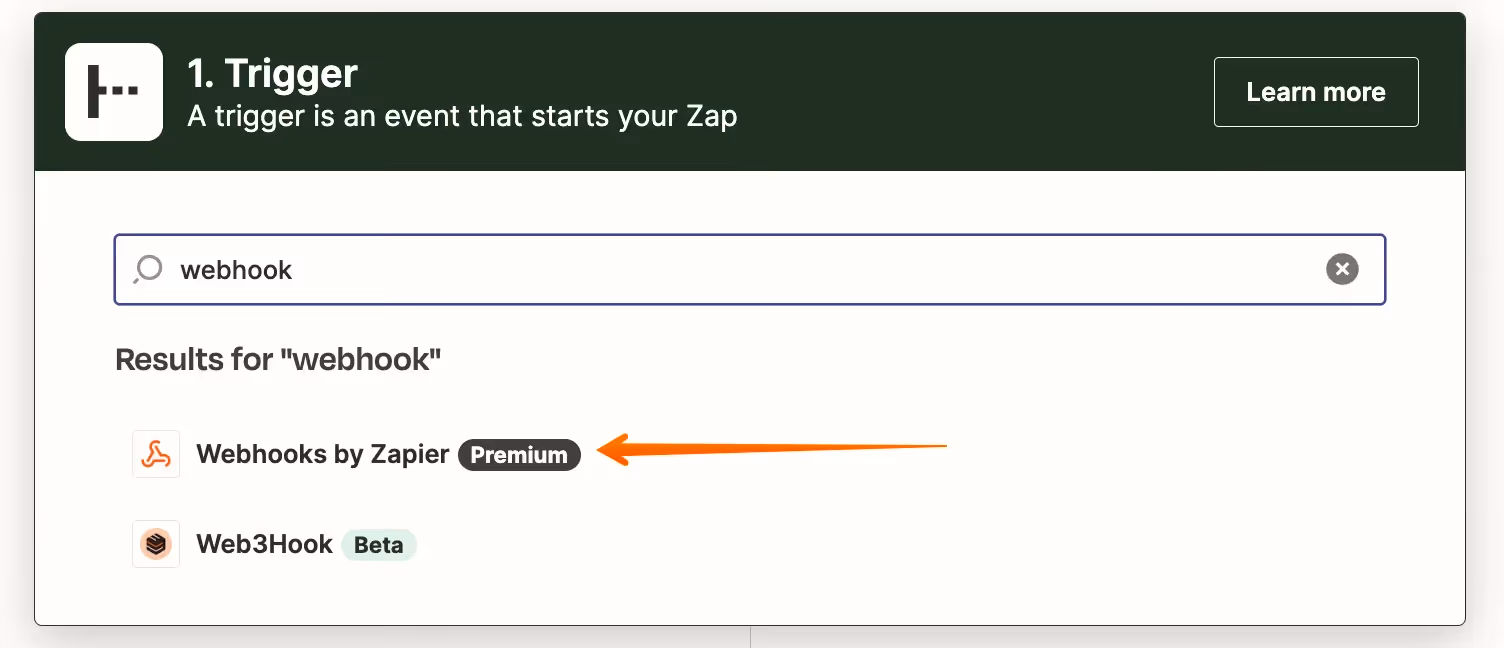
Step 5: Choose "Webhooks by Zapier" as a Trigger app. Tip: Name your Zap first!
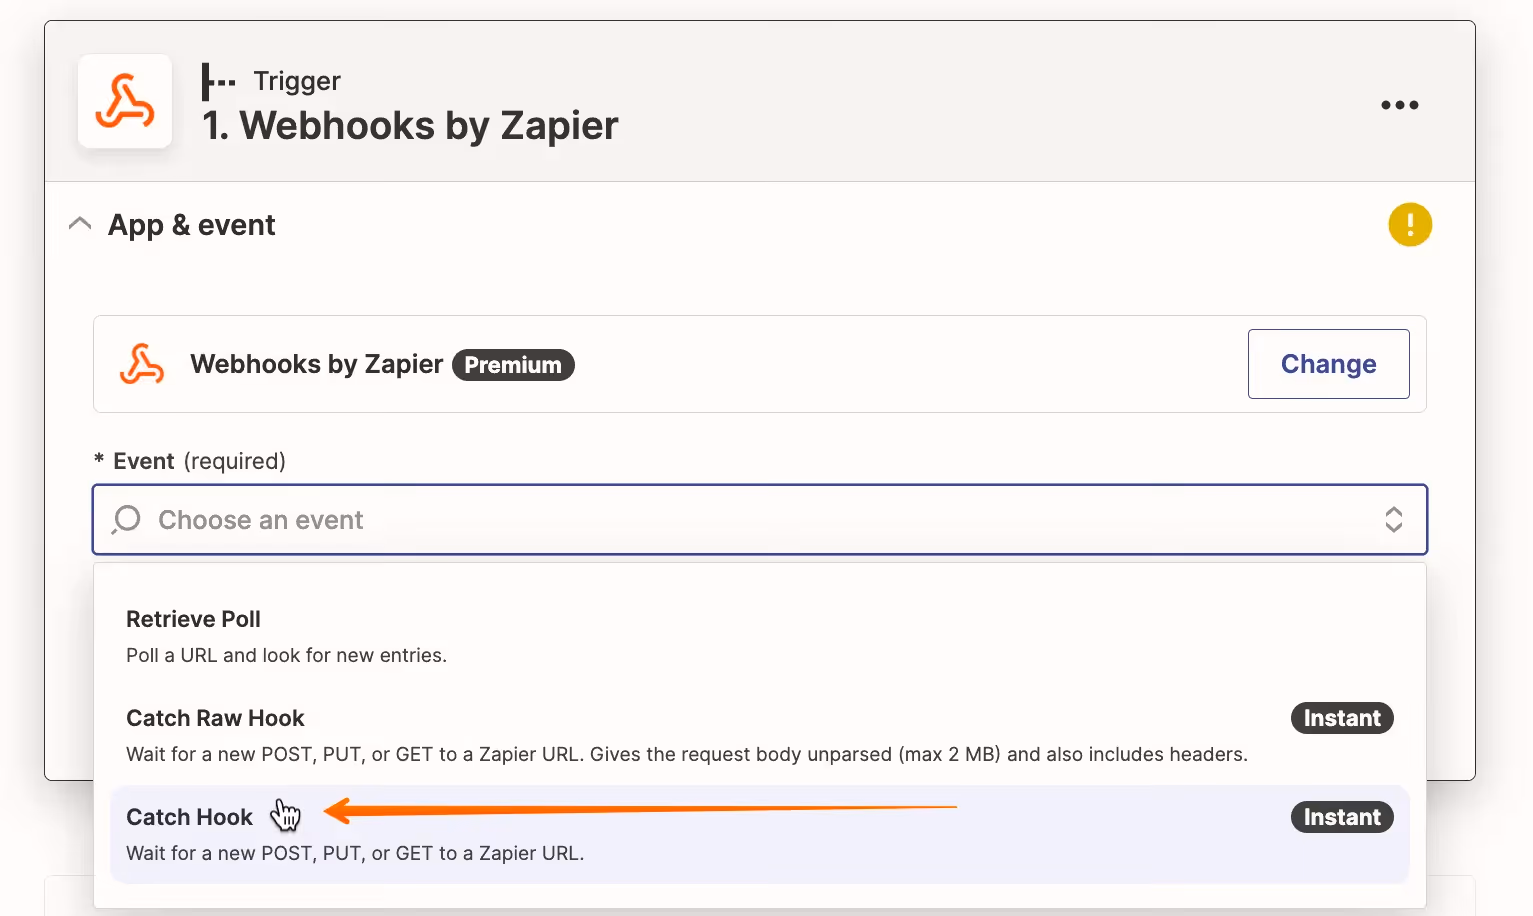
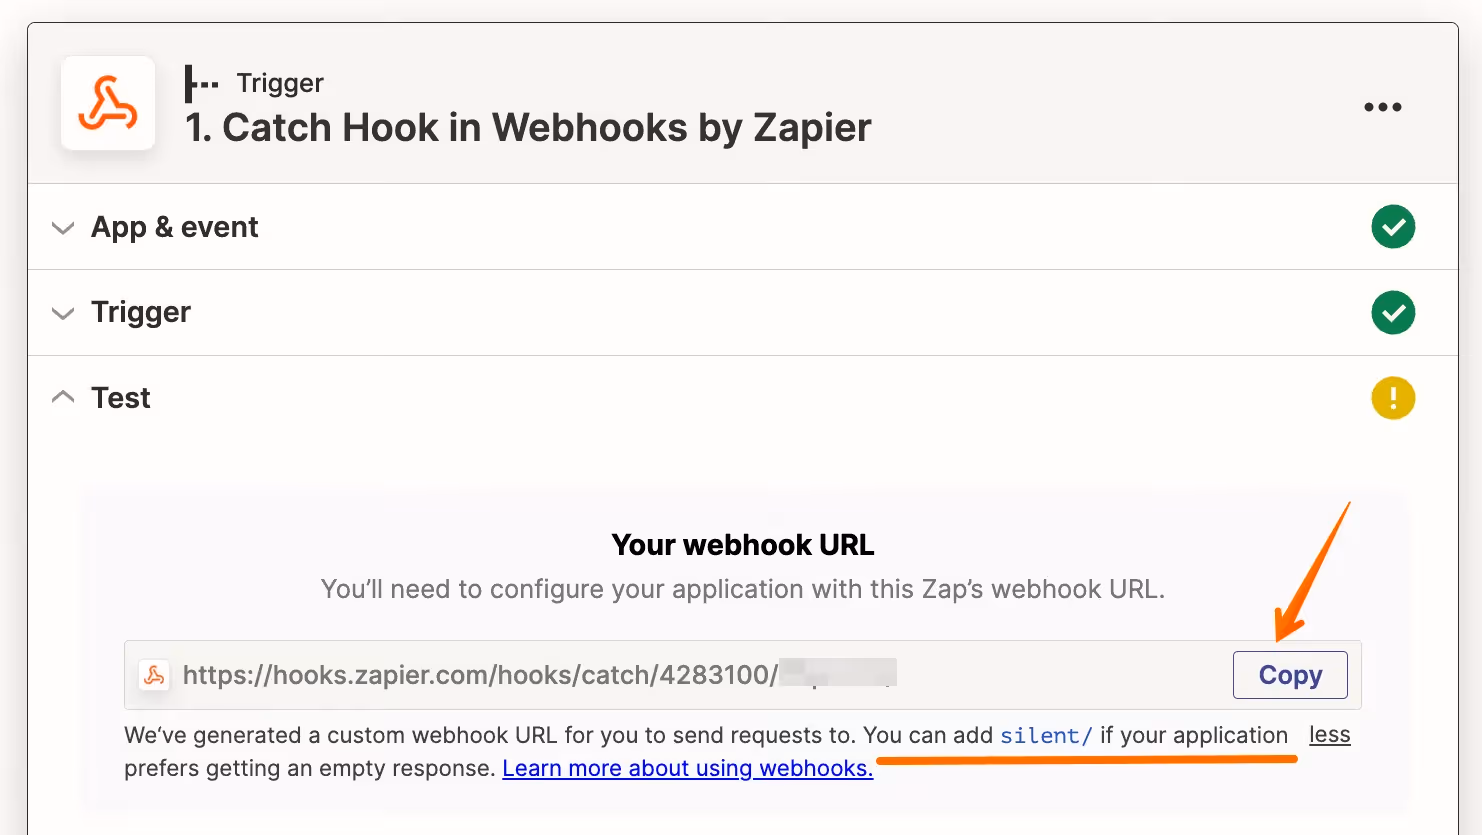
Step 6: Click on Catch Hook and then Continue
Step 7: You'll see a URL which you need to copy. And click "Continue". Tip: For better user experience you can add silent
Step 8: Go back to Dux-Soup "Options" and click on "Connect" tab on Dux-Soup. Then paste the URL link. Click on Send Sample and go back to your Zap.
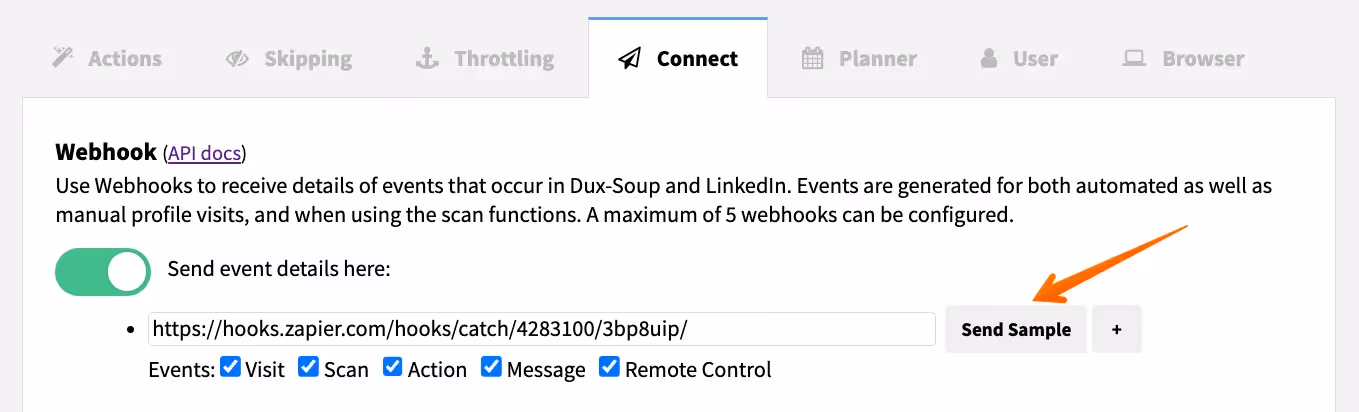
Perhaps you should choose a single event, learn about different types of Dux-Soup events in this article.
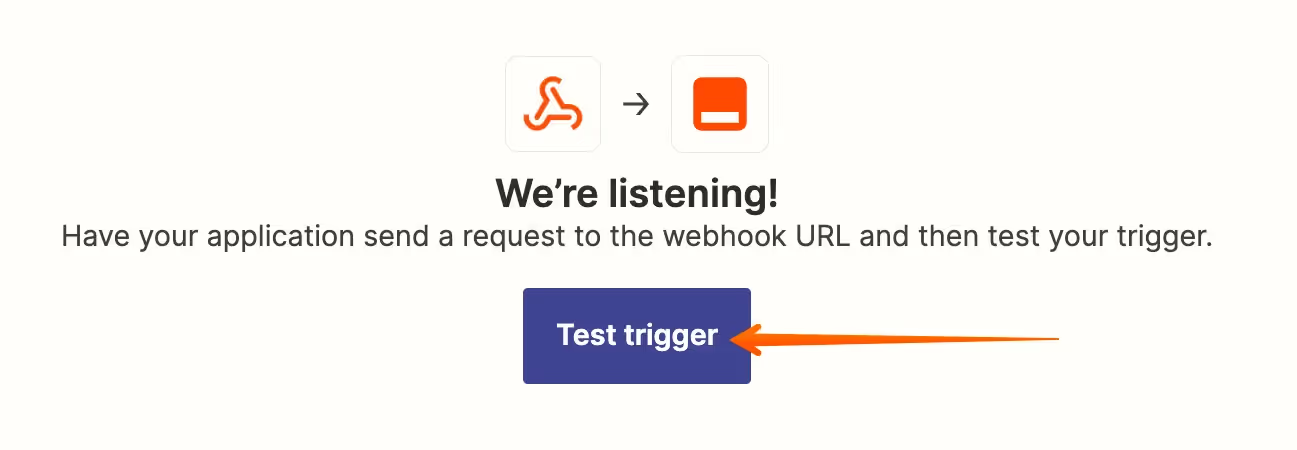
Step 9: Now go back to Zapier and press "Test Trigger"
Step 10: You are ready to add an action of your choice! For example, you can integrate HubSpot, Google Sheets, Slack or any other external app supported by Zapier. You can simply do it by clicking on "+Add a Step".
We hope this will help to get going! Play around and find the best use for your integrations yourself!
Should you have any further questions, we are always happy to help - contact us at info@dux-soup.com and send us your comments, suggestions or feedback.


