Introduction
Hello fellow marketeers and growth hackers. Make sure to first read the first two parts of this series, before starting to implement what's described in this last part. As a quick recap of what happened in part 2: We made sure everyone stopped seeing our ads after a period of two weeks, and continued with sending automatic follow-ups to everyone that accepted - while updating their status real time in Pipedrive CRM.
Part 1: How to show your LinkedIn prospects ads at scale
Part 2: How to connect and follow-up with your LinkedIn prospects at scale
Part 3: How to cold email your LinkedIn prospects that do not accept your request
- How to cold email your LinkedIn prospects that do not accept your request
In the first two parts of this series, we found our Ideal Customer on LinkedIn through Sales Navigator, we’ve made sure that we mapped out our entire funnel, we went on and showed everyone ads through LinkedIn and Facebook, added everyone to our network with Dux-Soup Pro, and finally followed-up with everyone that has accepted our request.
But what if your prospect does not accept? Let's say that 35% of prospects accept your LinkedIn request, that means that the other 65% does not and therefore do not receive your follow-up message.
Based on our own historical data, we know that 70% of the leads that accept your request, accept within the first week after receiving your invitation, while 95% of the leads accept within two weeks. By implementing an extra email campaign to the flow, we make sure even the non-acceptors will still receive our follow-up messages.
Let’s begin.
Getting started
Before we start sending cold emails to our prospects, we have to do some groundwork. Sending cold emails can be a super effective channel if done properly - but you can also mess things up if you skip the preparation process.
Sending cold emails is different than sending out LinkedIn messages, as it is in general more difficult to end up in inbox while triggering the prospect to open and engage with your message.
When implemented correctly, though, combining LinkedIn with cold email can be highly effective.
*PS sending cold emails to European citizens? Make sure to read this article if you want to comply to all relevant GDPR ruling: https://mailshake.com/blog/gdpr-compliant-cold-email/
Step 3.1 Using a separate domain for cold email
Before sending out cold emails at scale, you want to be sure that you have a new domain warmed up and ready to use. Why not use your (clients) existing domain I hear you ask? Well sending out cold email campaigns isn’t the same as sending out ‘warm’ email campaigns.
The recipient of your campaign has never explicitly opted in to receive your cold email, hence the deliverability of the email is more fragile. Other than that, especially for clients, you want to be sure that you do not impact your clients domain deliverability in a negative way. Spam traps, a bad quality email list, or negative campaign feedback could impact your domain's deliverability. In other words, when sending cold emails at scale, you generally want to warm-up a new domain and email address, to specifically use for cold email outreach.
You can normally buy and set up a new email domain for around €10,- per year which is really worth the money considering the risk of having your clients general emails ending up in every spam filter.
When your main domain is wespikegrowth.io, you generally want to buy a domain that looks like the main one, like wespikegrowth.com.
Step 3.2 Warming up your domain and IP address
Your domain and IP address reflect the reputation of the sender, which is based on several factors.
- Send volume. The number of emails sent.
- Send frequency. The number of campaigns that are deployed per week or month.
- User interaction. Individuals who open and click — and complain or unsubscribe.
- Quality. Percentages of bounces or undeliverable emails.
When sending emails from a new domain, you want to be sure that the domain is warmed up properly. Sending out 1000s of emails per day on a new domain and IP address will almost definitely kill your reputation and therefore your email deliverability.
Warming up your domain and IP address can be a real hassle if done manually. Luckily, cold email service provider Lemlist has a service that does this for you. Through a pool of community members, you can warm-up your email domain and IP by sending out “fake” emails to the community, having them to open and reply to these emails in an automated way. This way, you can have your domain warmed-up in about 30 days on autopilot. To learn more about the LemWarm service and email deliverability in general, have a look at this article.
Step 3.3 Find the correct person in Pipedrive
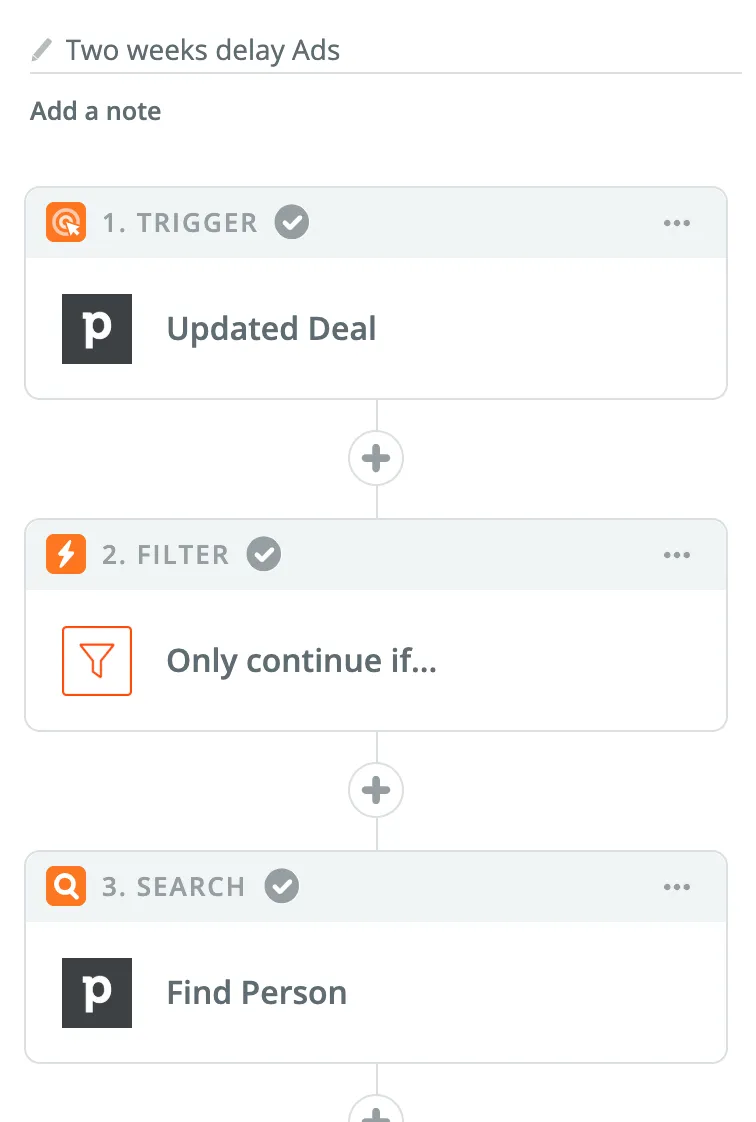
In the last part of this series we worked on adding our leads to our network on Linkedin. Now we’re two weeks in and we want to email the leads that have not accepted our request.
If you followed all steps in the previous part of this series correctly, you’ll have selected the “rotting” function in the “prospect” stage (part 1, step 2.4).
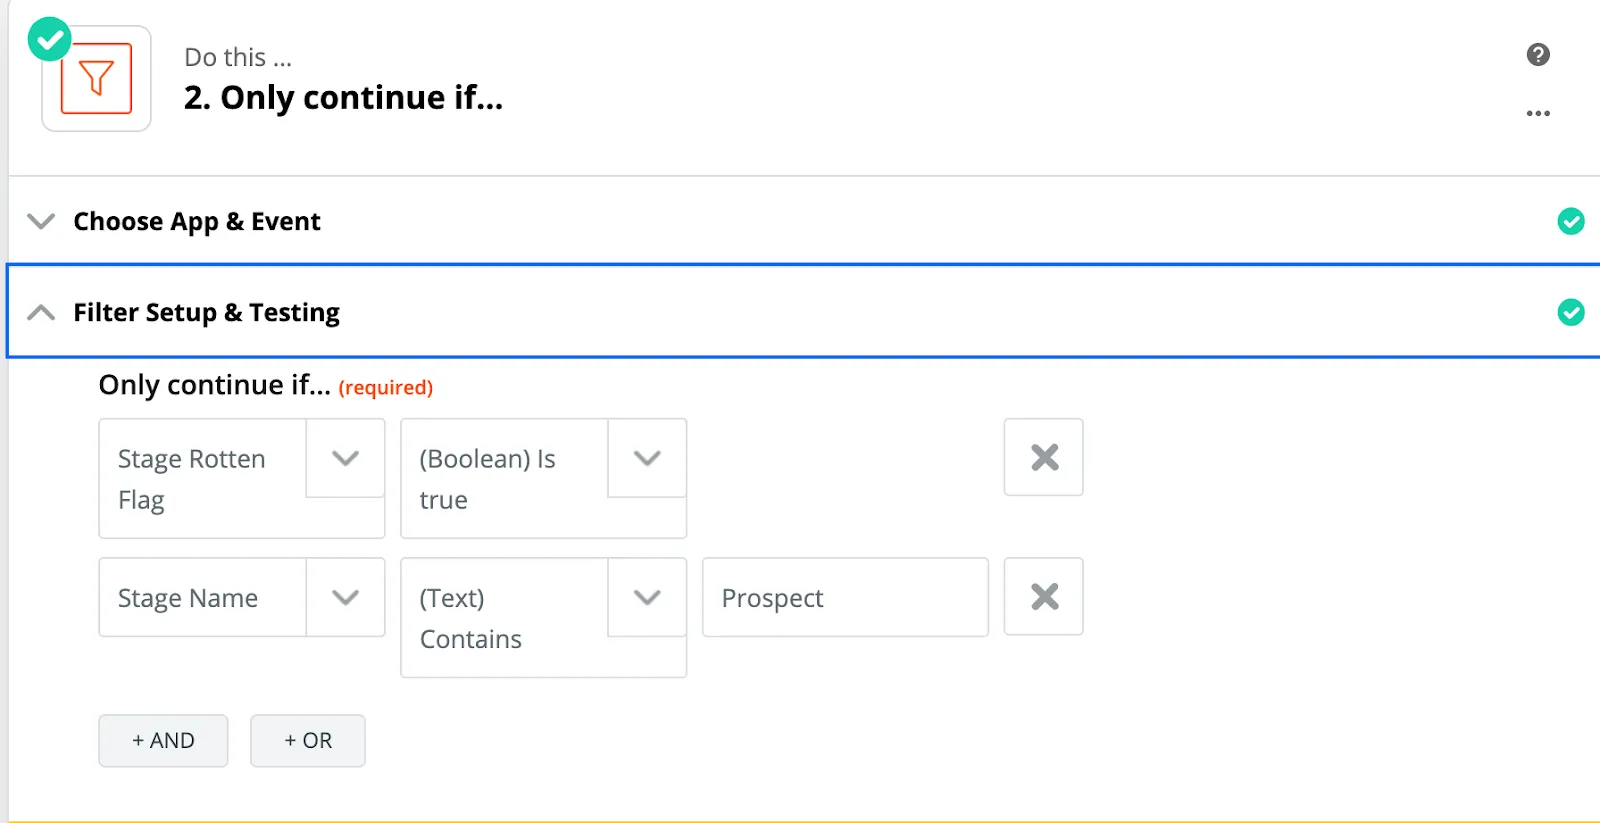
Now, we’ll go on and add a Trigger to Zapier that Triggers whenever a deal is updated. Next step is to add a filter to only continue if the “Stage Rotten Flag” = true.
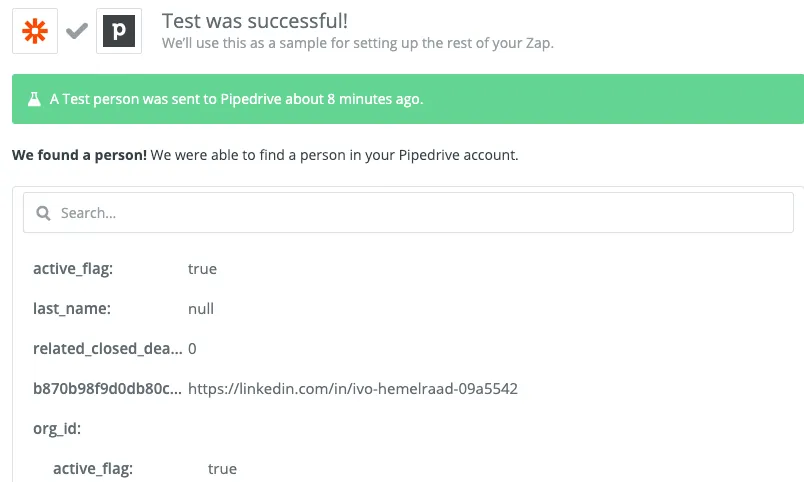
Next up is to tell Zapier to find the correct person by adding a Pipedrive Search to the Zapier stack. We will use the Person ID from the “Updated Deal” trigger, to find all of the information of the person we want to target.

If applied correctly, Zapier will now show you an overview of all of the fields pulled out of Pipedrive. We will use this information to find the propects email address in the next step.
Step 3.4 Filter out the deals that have not accepted after 14 days
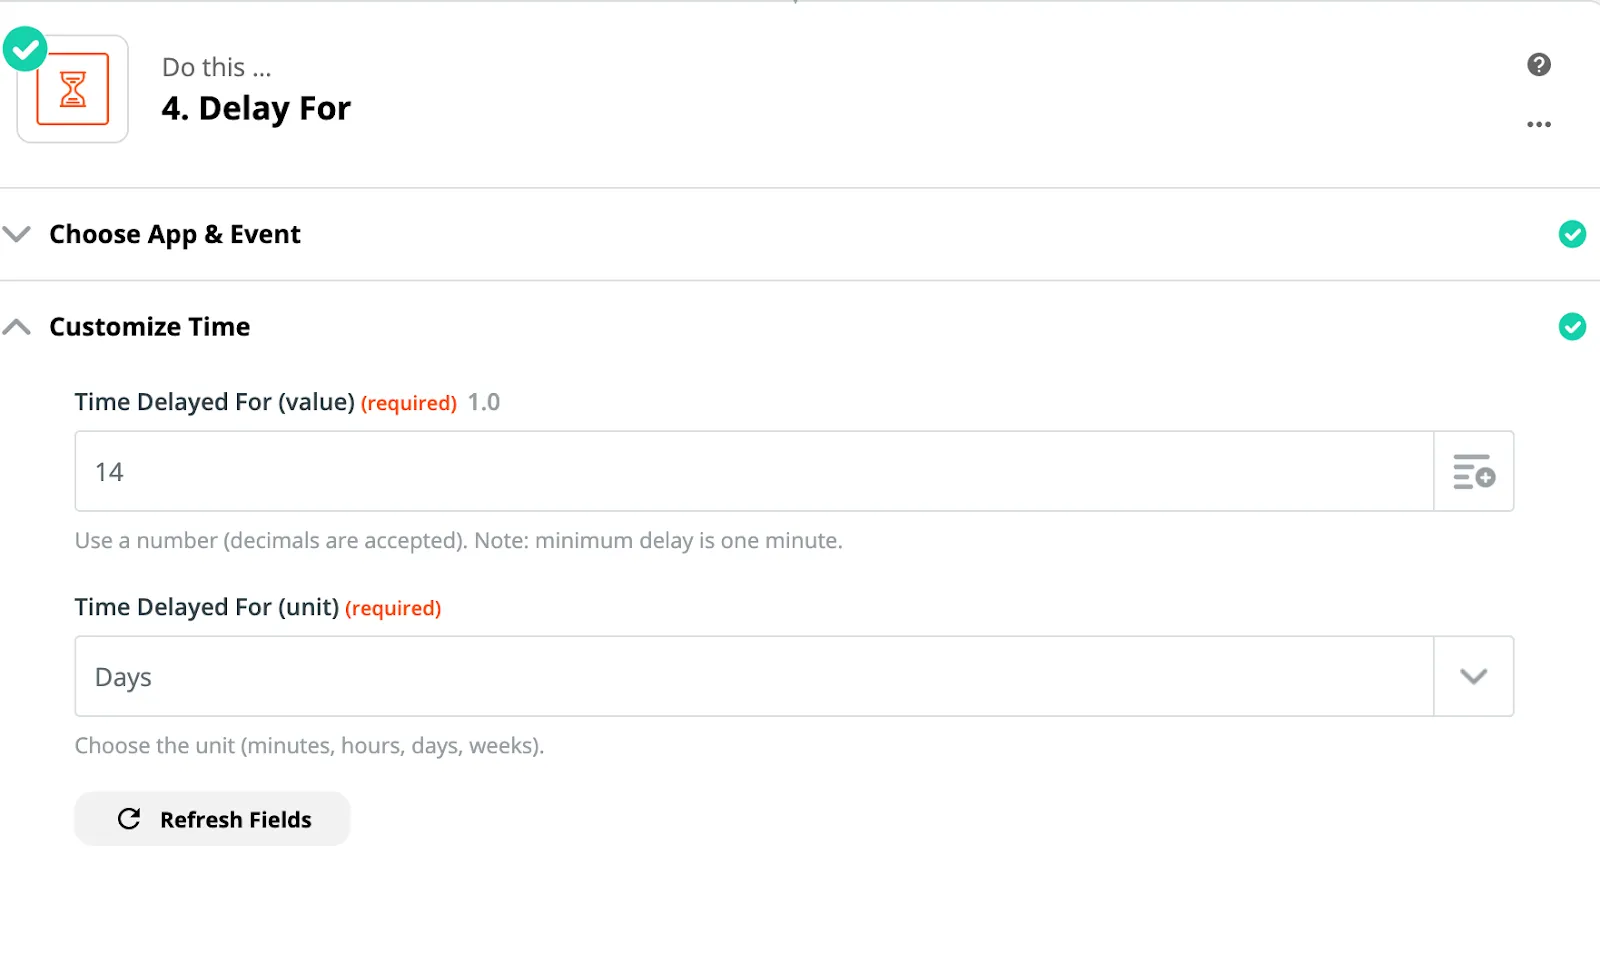
We want to email prospects that have not accepted our request two weeks after inviting them on LinkedIn. With the current setup, the deal turns to rotting right before we send out an invitation. Therefore, we want to set a delay of 14 days and then check if the deal is still in the “prospect” stage (in the current setup, if the prospect accepts, the deal gets pushed to “Connected (Lead)”).
So let's first set a delay in Zapier:
Now find the deal in Pipedrive and check if it is still in the “Prospect” stage:
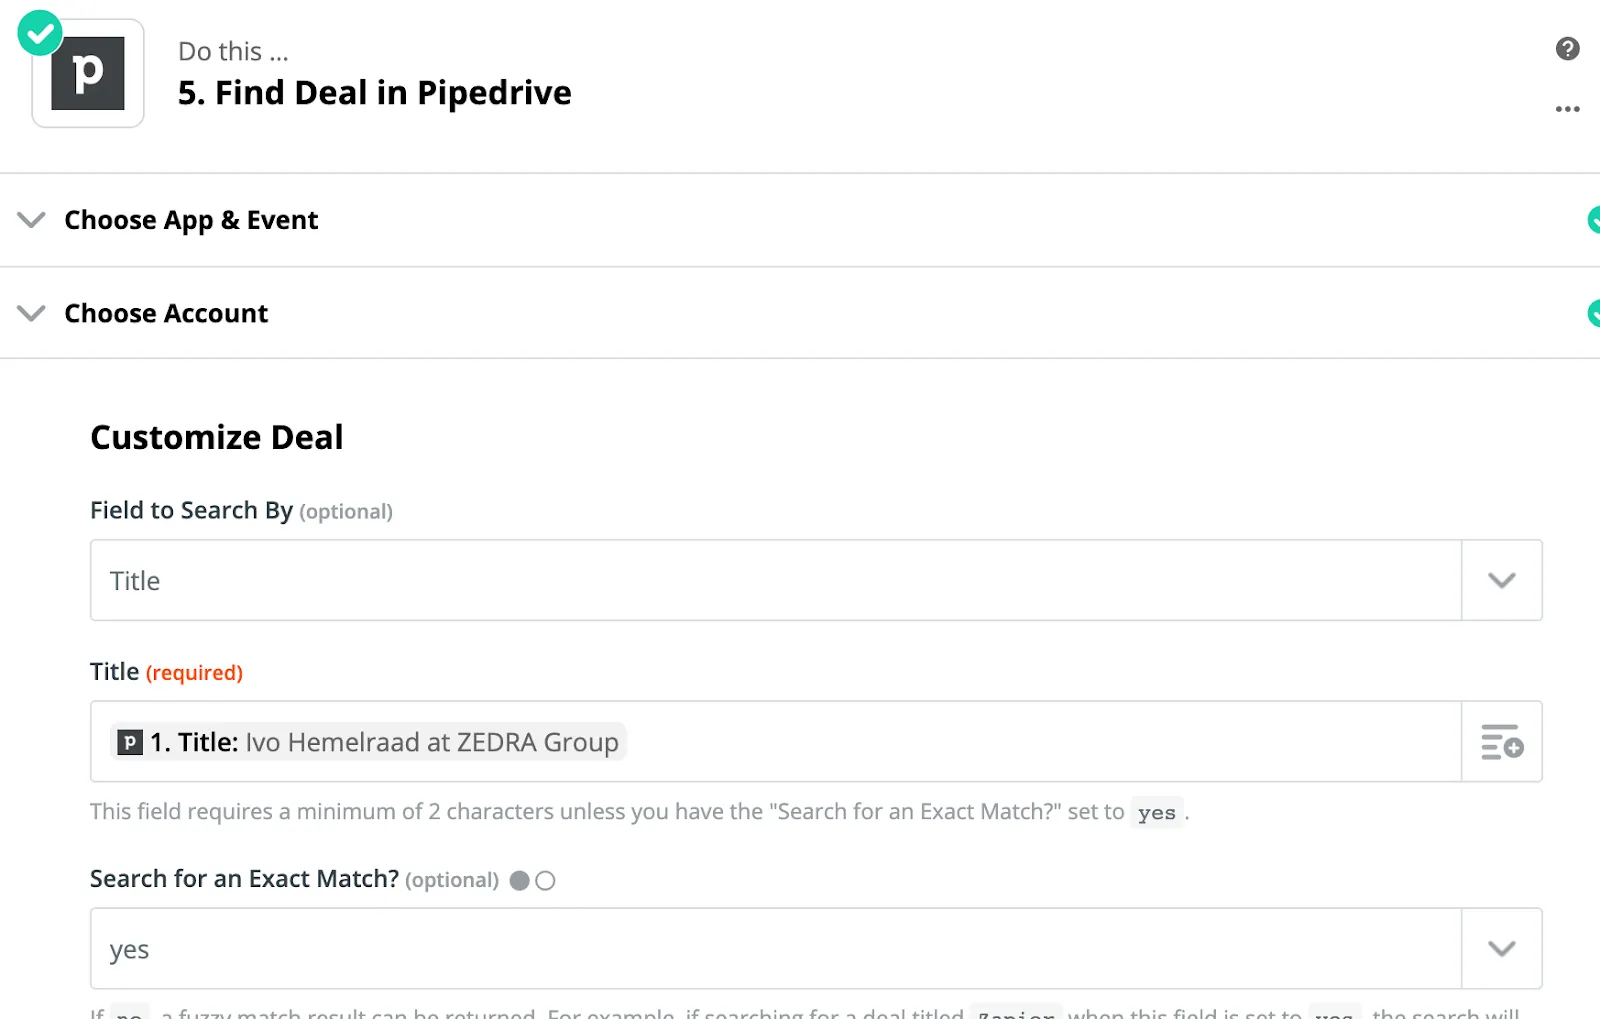
Now add a filter to only find the business email addresses of those who have not accepted:
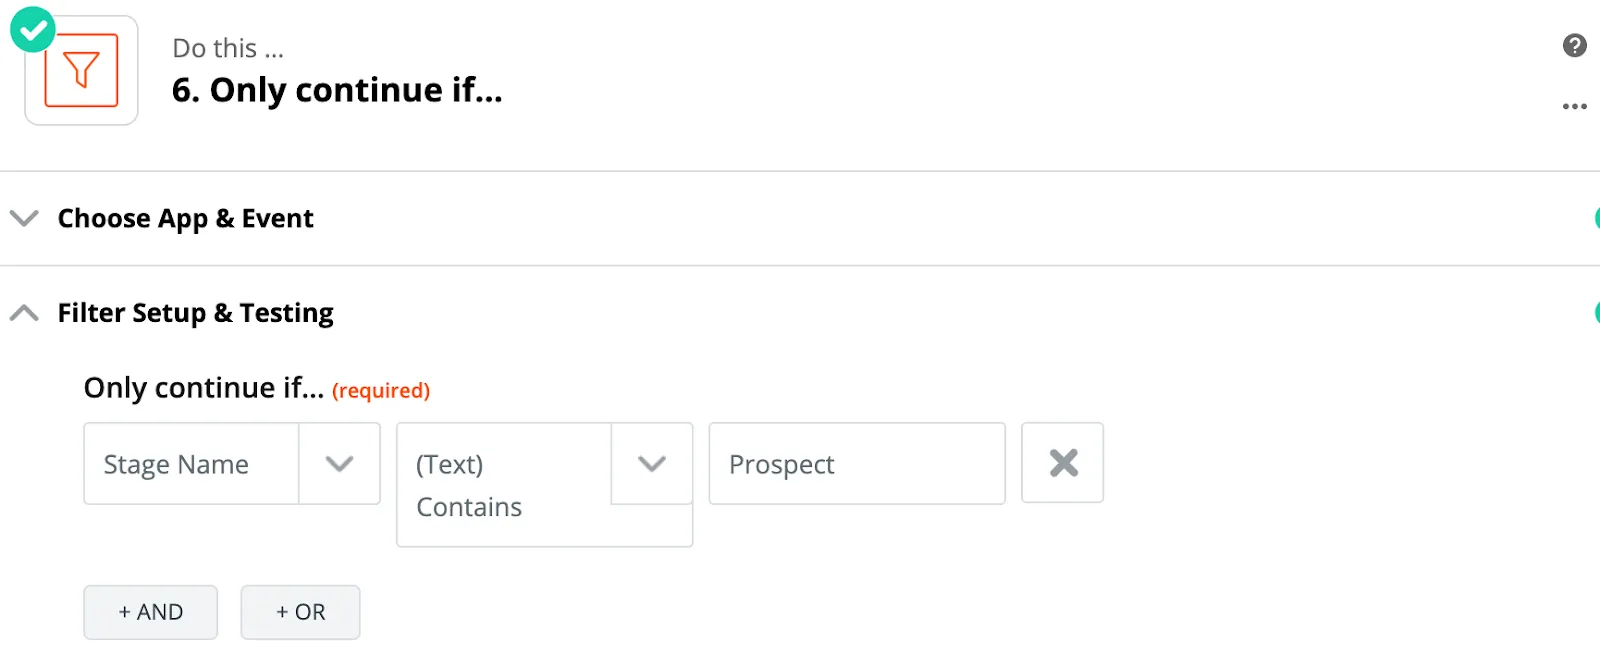
Step 3.6 Find the business email addresses of the prospects
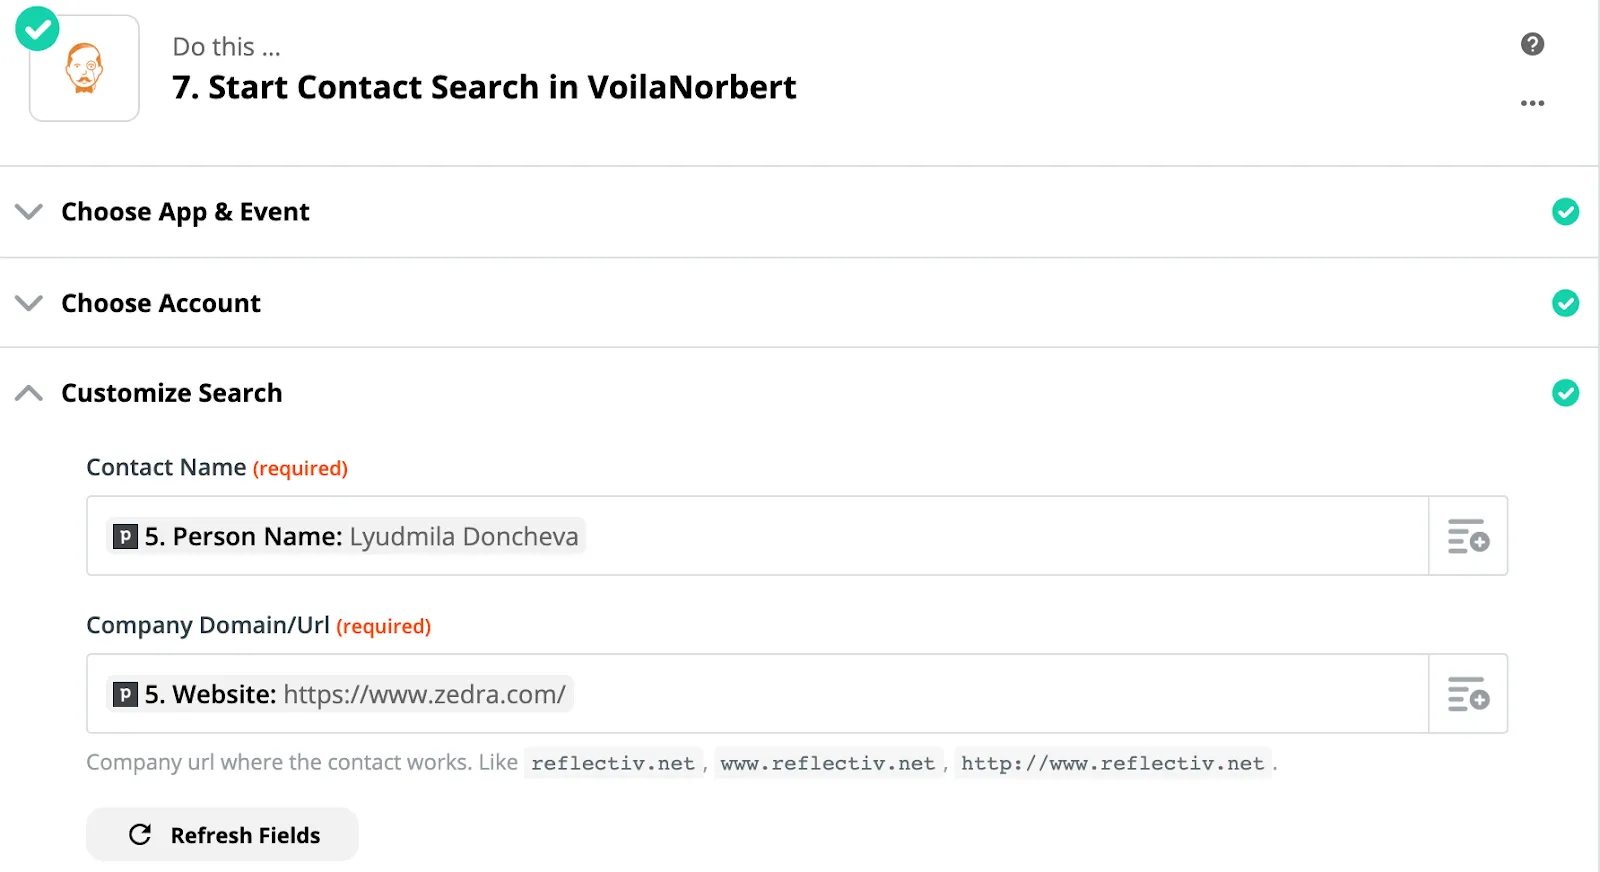
In this step, we will take the information we have in Pipedrives properties, like “Name” and “Company Website”, and use this to find their business email address through https://www.voilanorbert.com. Just like FindThatLead, VoilaNorbert is a tool that generates business email addresses for you by making as many possible combinations of the first + last name & domain name of your prospect, and confirming these matches on server level to ensure they exist. I wont go over this process too much in detail, as I have already explained it thoroughly in this older playbook.
First, lets create an account and get ourselves an API key to be able to use in the setup:
Next is to let Zapier execute a contact search on VoilaNorbert with the information we have in our Pipedrive CRM:

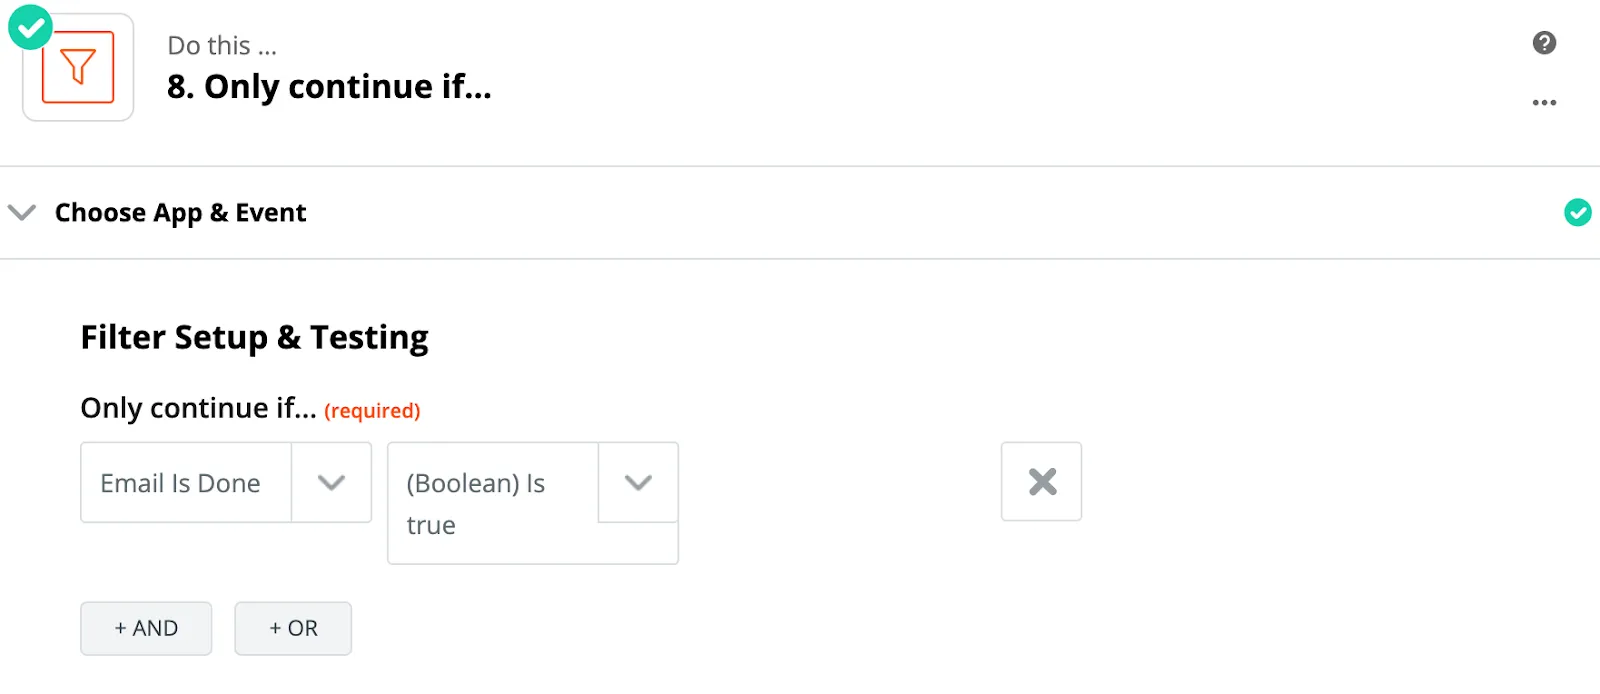
Eventually, you want to filter out the bad results, only continuing with the email addresses that have successfully been found:
Step 3.7 Setting up your LemList account and creating a campaign
As revealed in chapter 3.2, we will be using LemList as a tool to send out our cold emails. LemList is an automated outreach email platform that, unlike Mailchimp or Sendgrid, is specifically designed for cold email campaigns. For $29,- per month you can warm up your domain, create unlimited campaigns, and send up to 100 emails per day. The software allows you to send out hyper personalized emails through the use of dynamic image templates and text replacements.
With LemList, your emails are being sent through your own email address. You can simply connect your email account and start sending straight away.
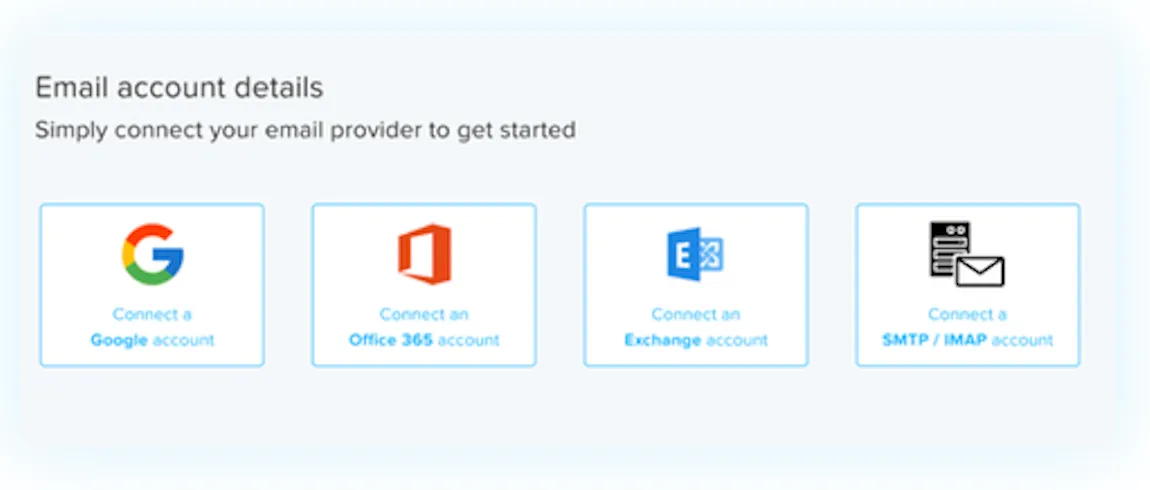
You now need to create a campaign that you want to send to the leads that do not accept your request. Add your own email address as the first recipient (or “Buddy-to-Be” as how they call it) for now, as the rest of the email addresses will automatically be imported through Zapier if the setup is completed.
Next up is to create your campaign copy. In this example, we will create a three email campaign that will continue to send out emails until the prospect replies.


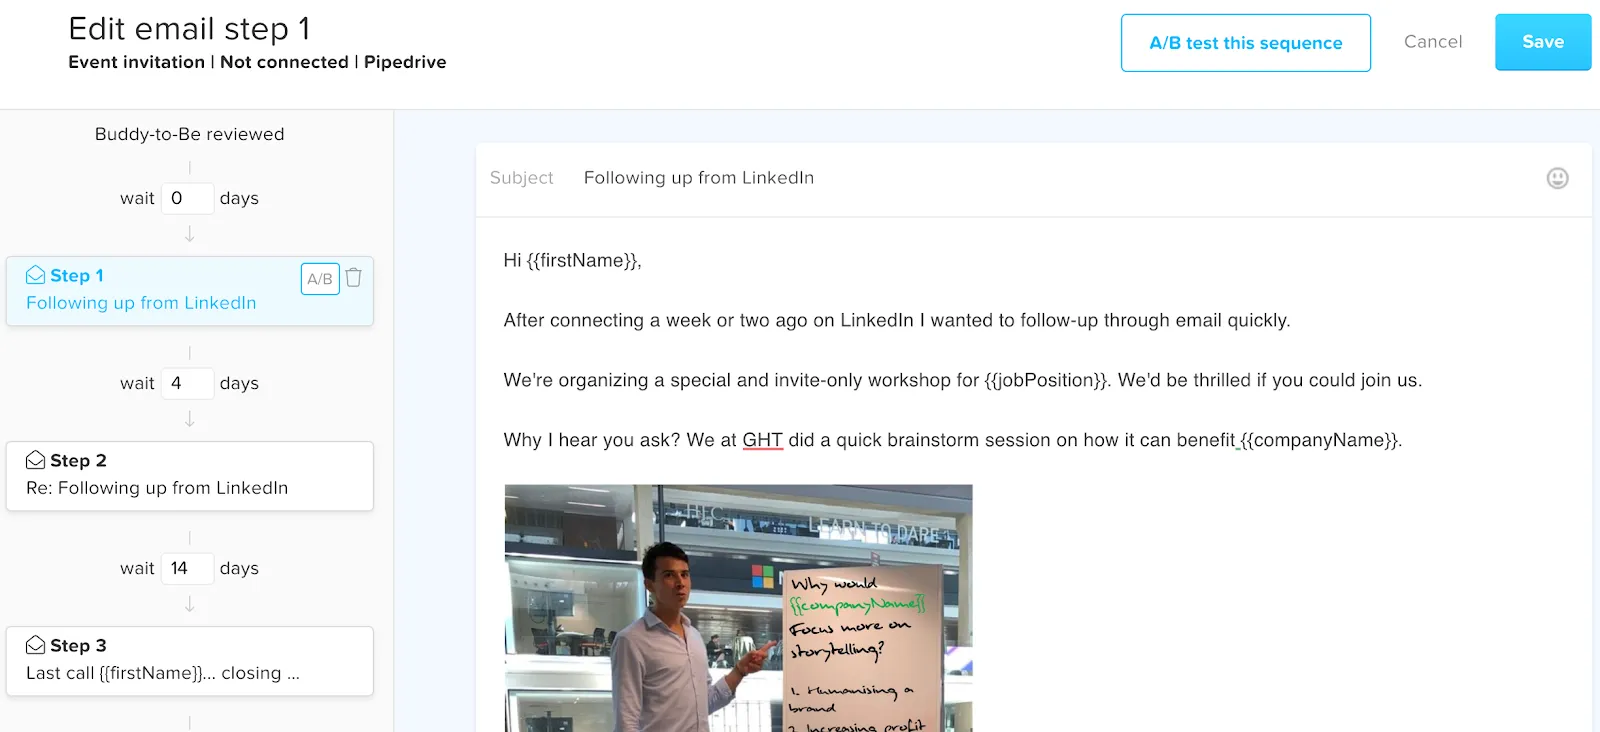
You see that in this example I used a dynamic image replacement that automatically adds the company name to a picture in a whiteboard. LemList provides you with tons of templates to use as inspiration.
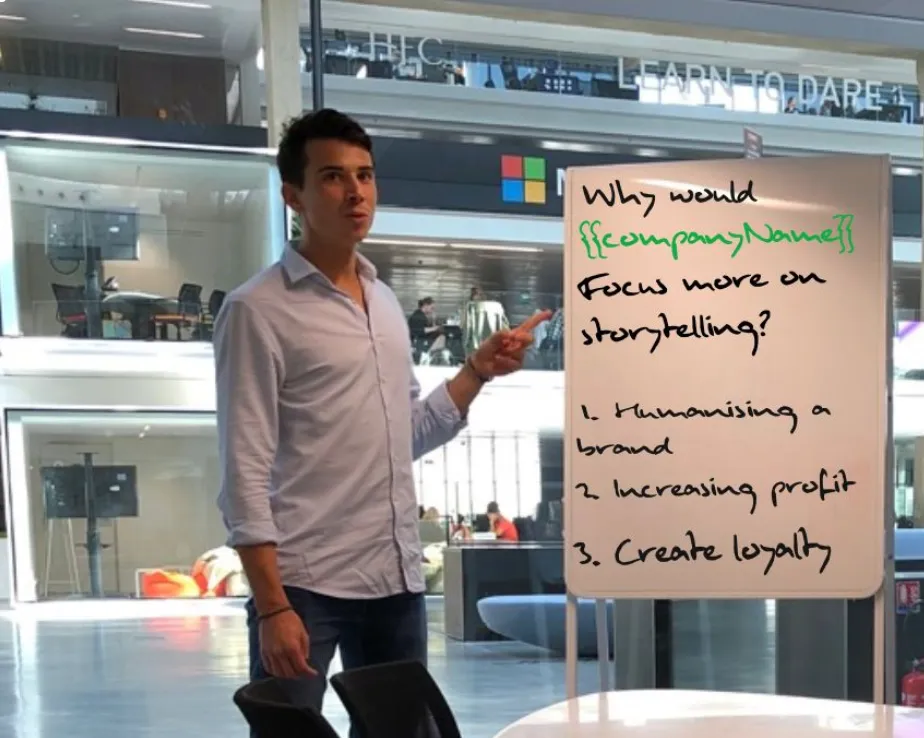
You can also create and upload your own templates to use them in your email. It does not stop here. With LemList you can even create custom landing pages for each prospect to land on. Talking about hyper personalisation!
Step 3.8 Importing the leads in the campaign through Zapier
In the next step you’d want to take the email address found in VoilaNorbert and push it to the campaign you’ve just created in LemList. In order to achieve this you’ll use the LemList App in Zapier and fill out all relevant fields.
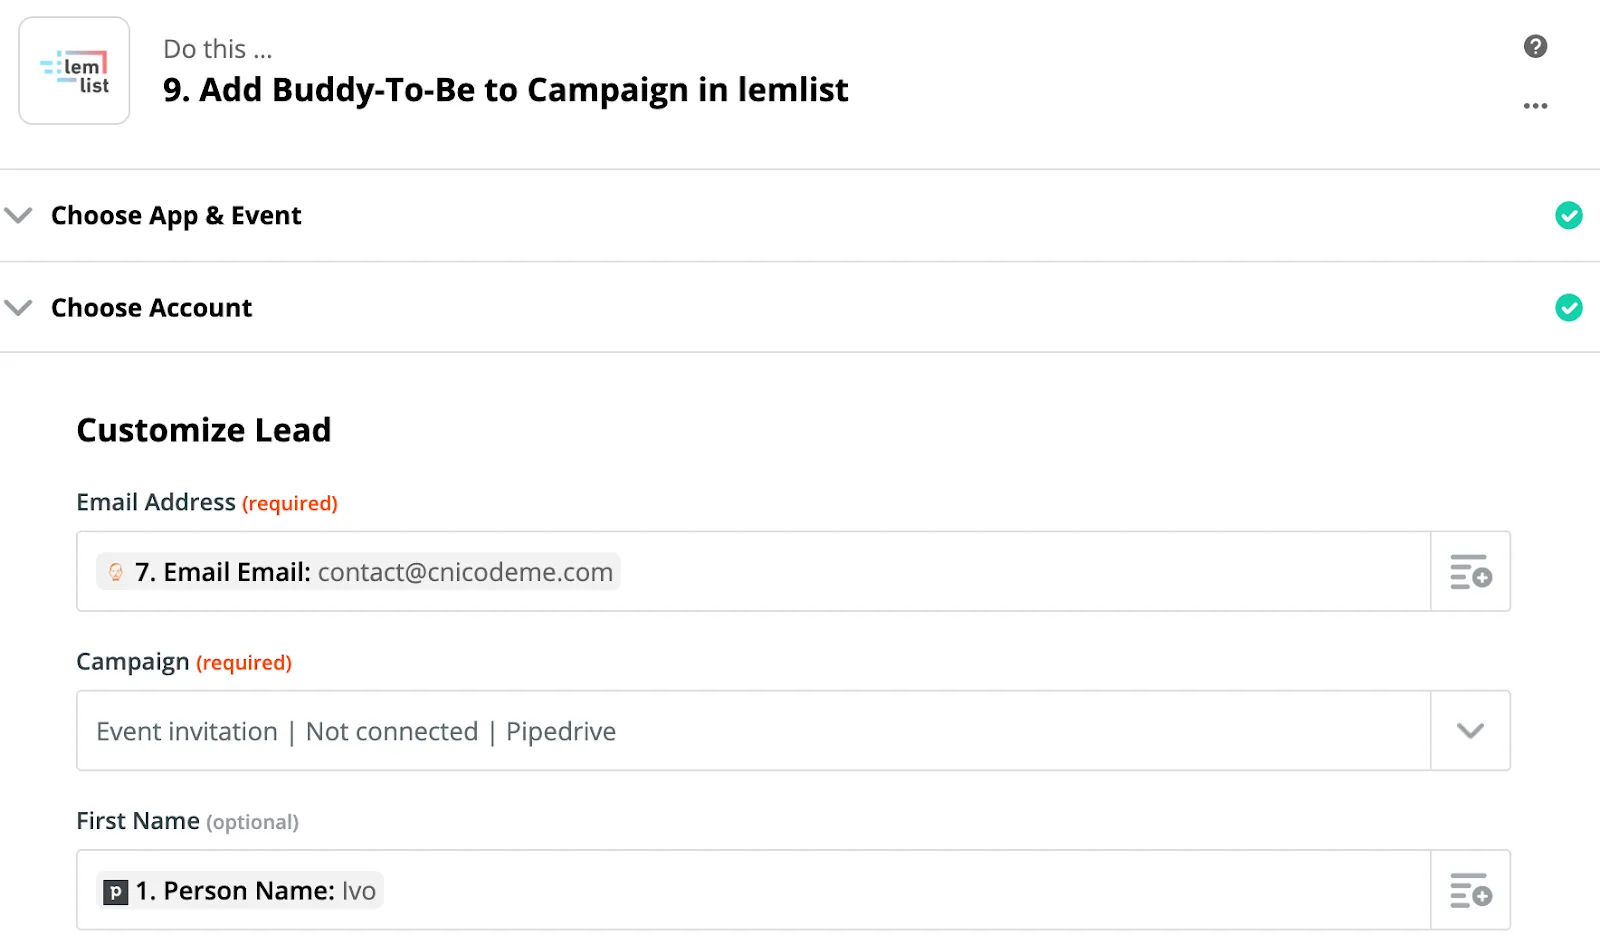
If every step has been filled in properly, you are now able to make a test run and see your lead ending up in your LemList campaign under the “Buddies-to-Be” section. You are now ready to run your automated email campaign.

Step 3.9 Reply detection trigger
In the last step of this playbook, you’ll create a Zap that automatically changes the status of the deal in Pipedrive whenever the prospect replies on an email in LemList. We will first create a “New Email Activity in LemList” trigger that triggers every time a prospect replies.
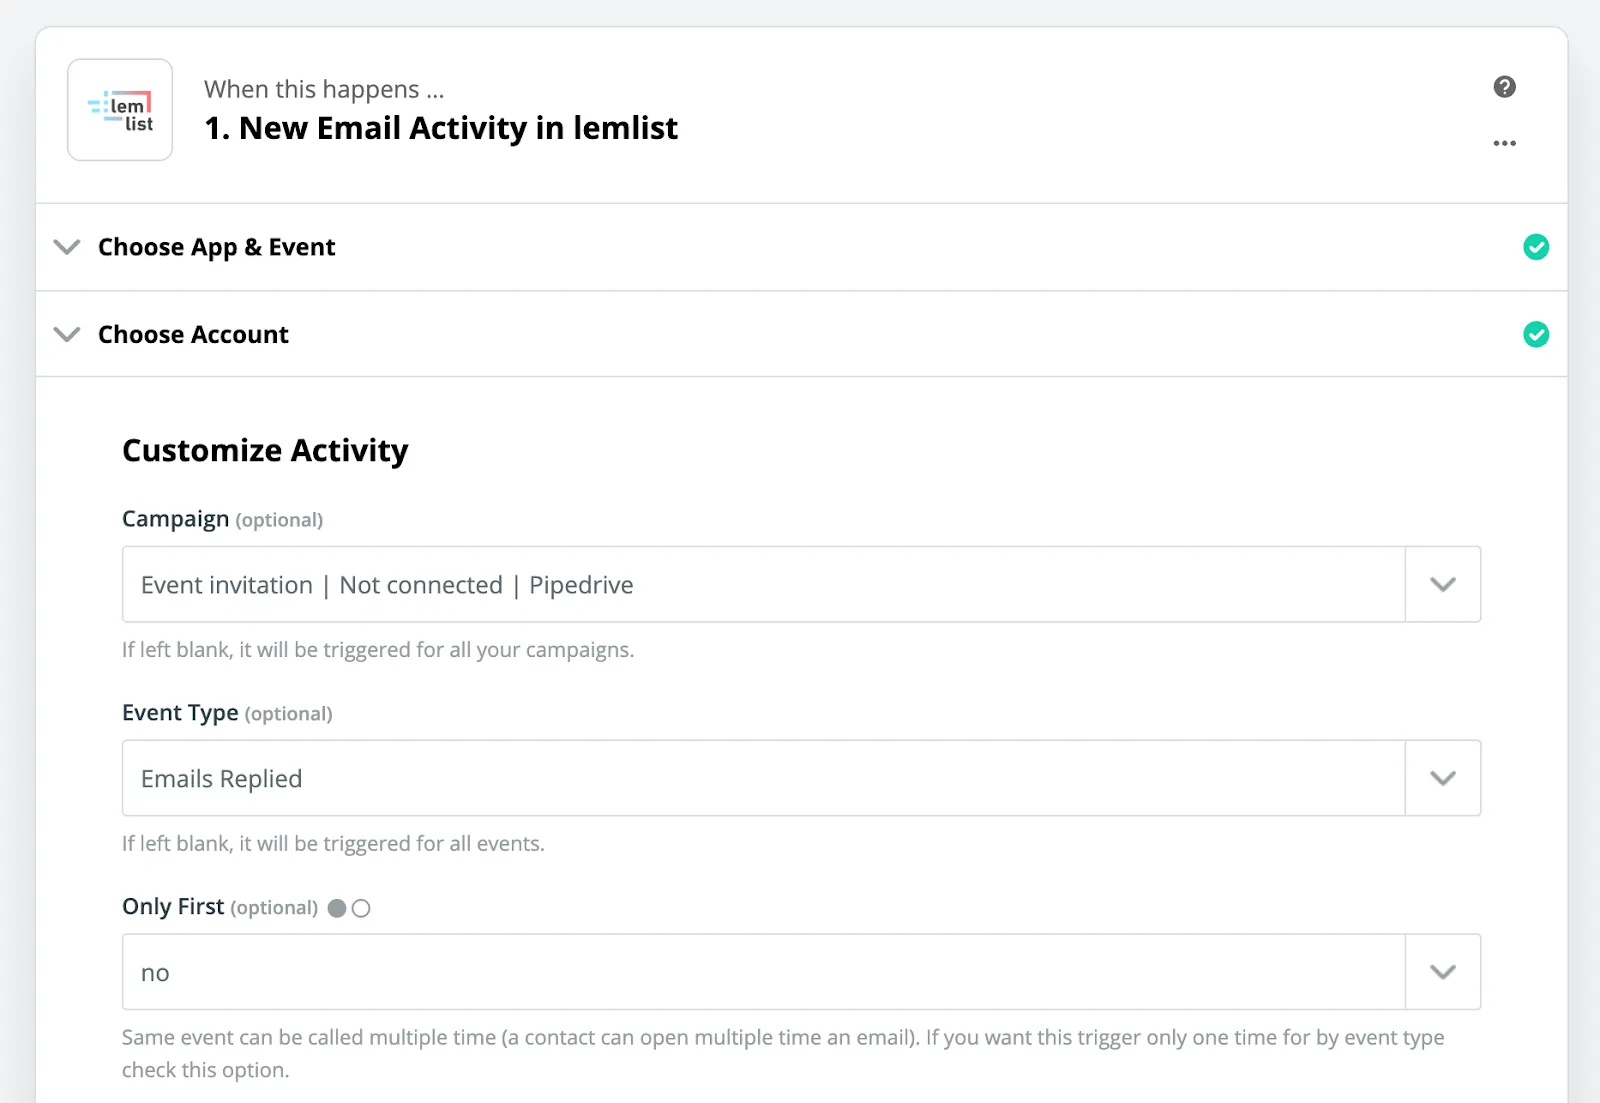
We want to change the status every time a prospect replies, and not just the first time. This is why we select “no” in the “Only First” field.
Next up is to find the correct deal in Pipedrive.
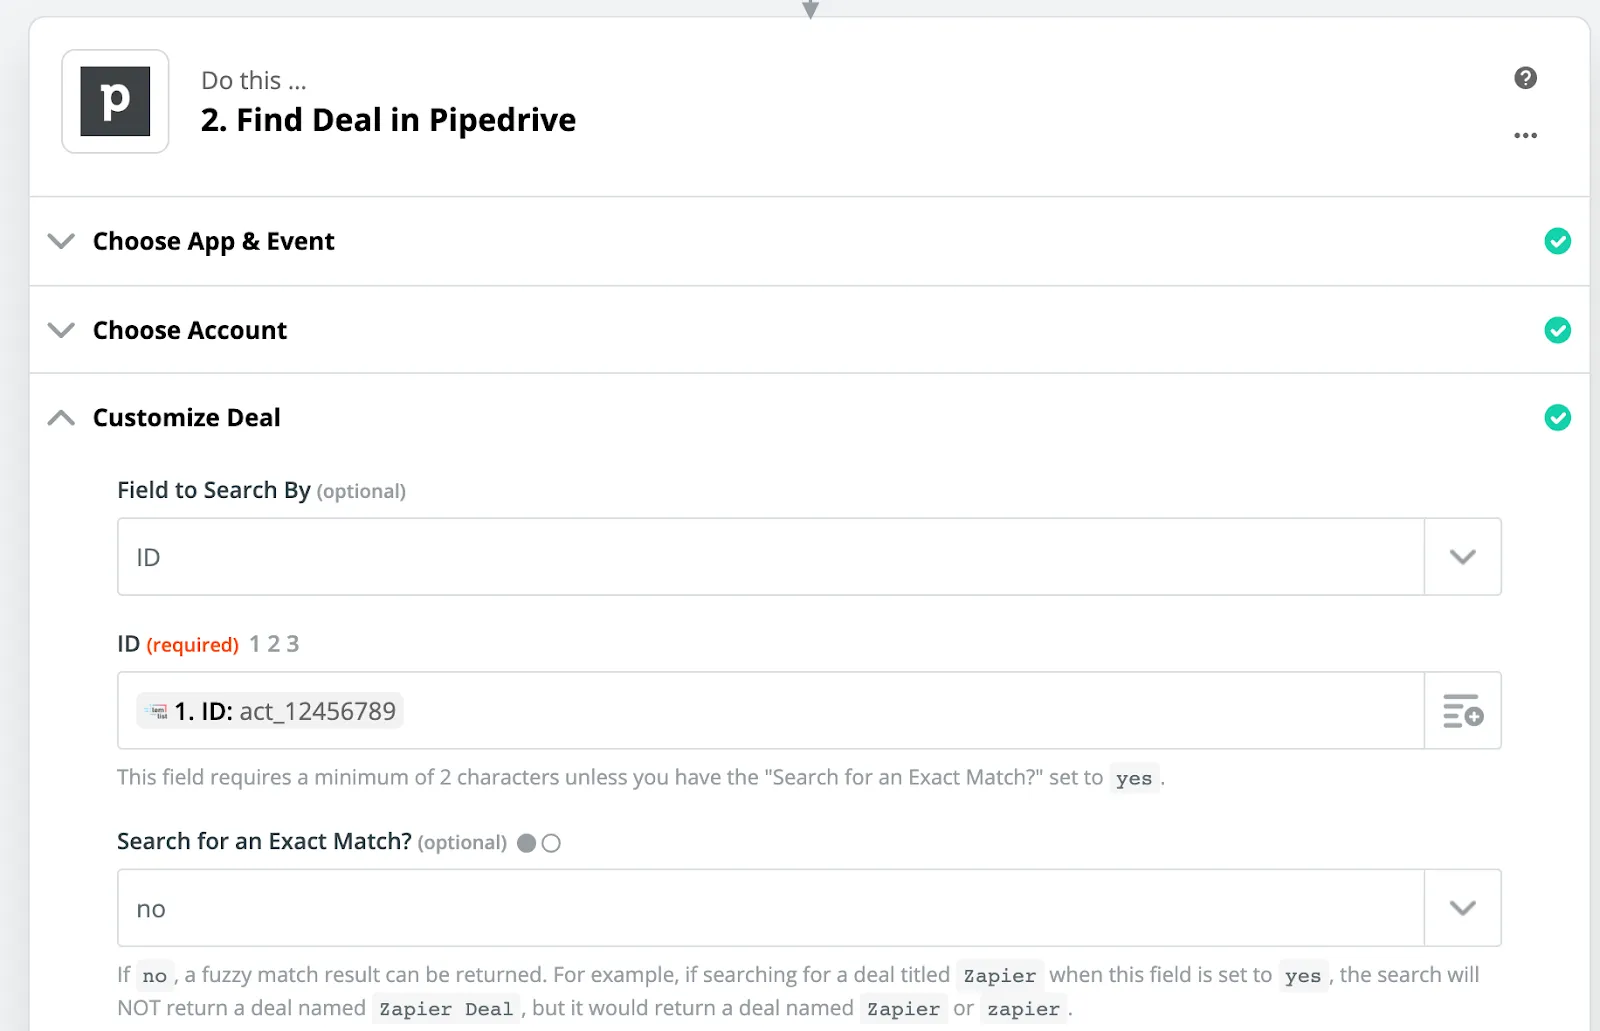
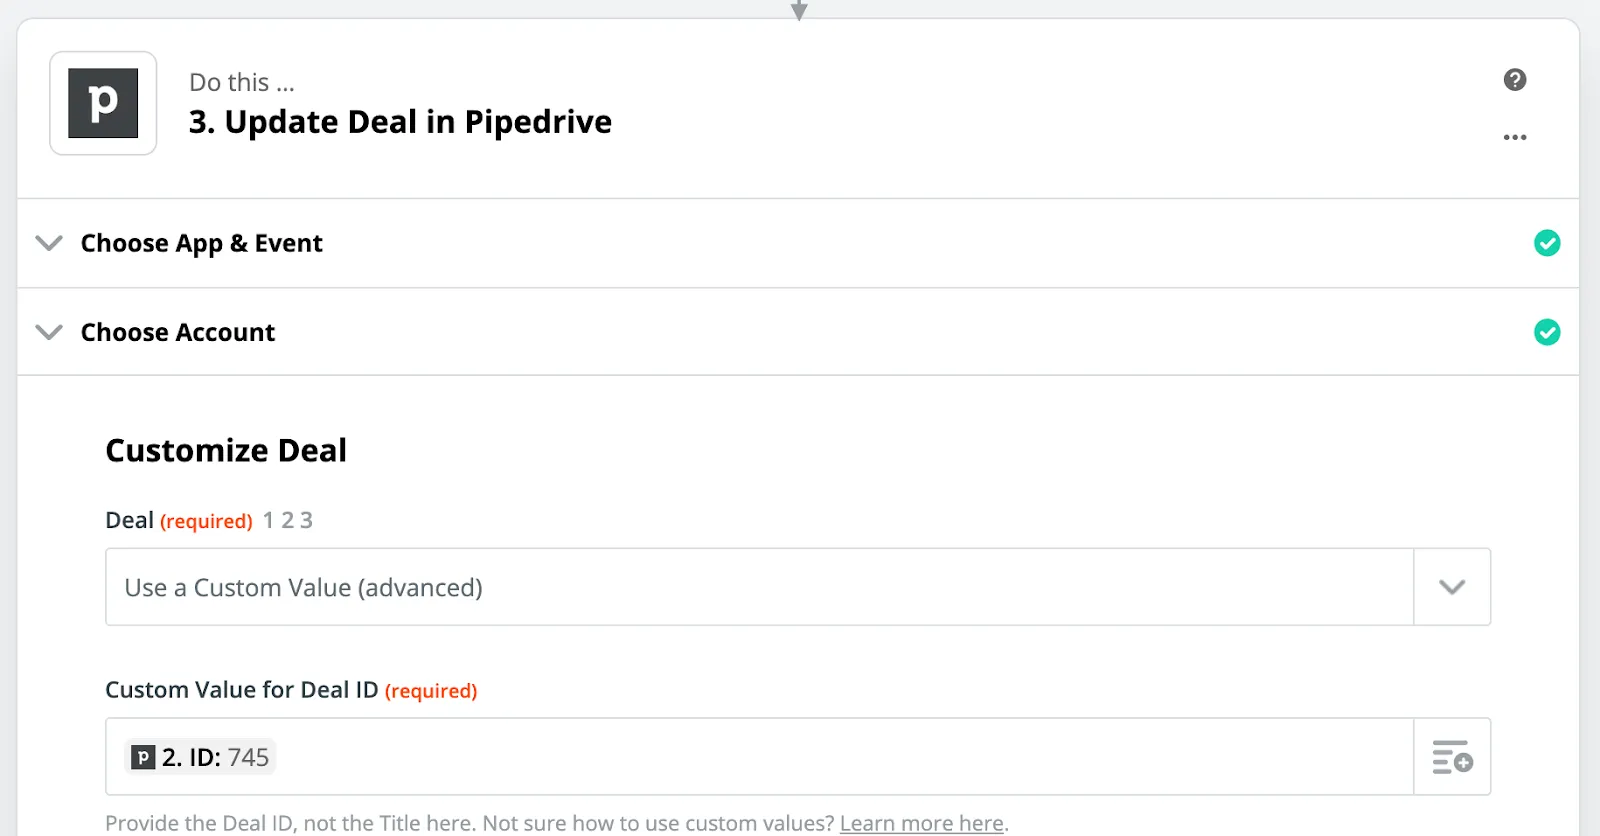
When you find the correct deal, we need to make sure it gets pushed to the “Replied” stage. Therefore we go to the “Update Deal in Pipedrive” app, find the correct deal, and eventually change the deal stage to “Replied”.

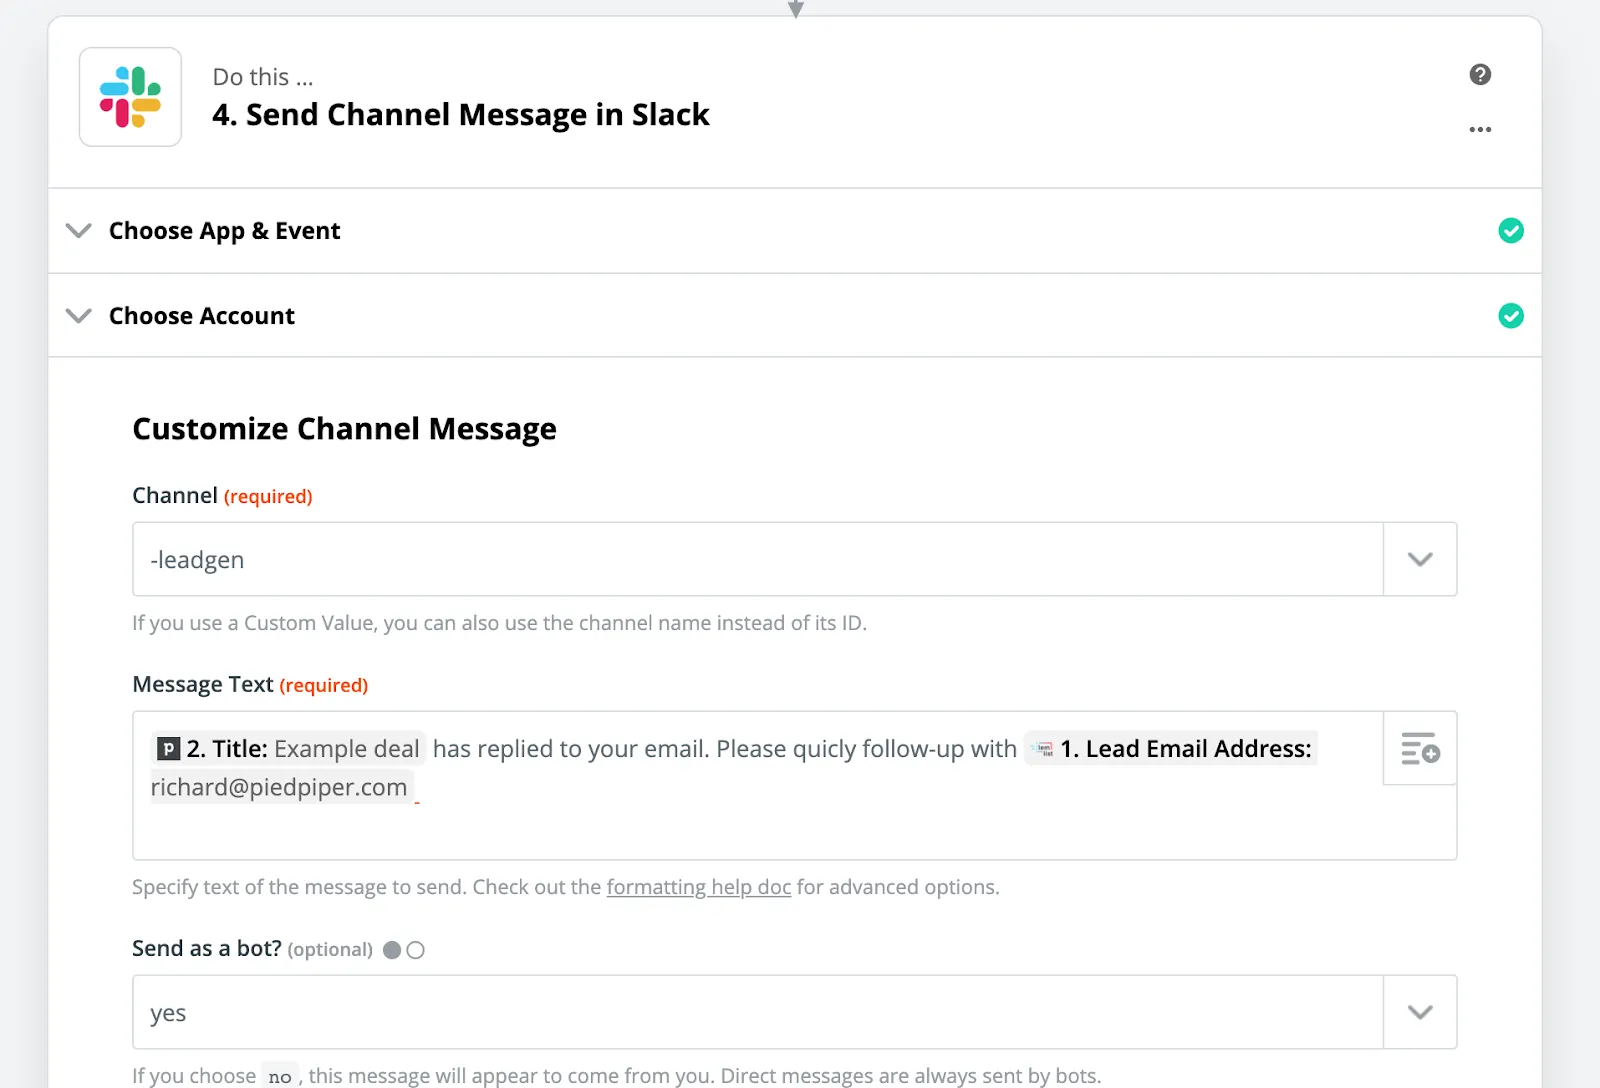
Last is to send out an alert message to your Slack channel to alert yourself whenever someone has replied to your email, just like we did in step 3.3 in part 2 of this series.
Great job! After showing the prospects ads for a period of two weeks, you have now removed the prospects from your awareness campaign on Facebook and LinkedIn, invited them on LinkedIn by sending a custom connection request, followed up on the prospects that did not reply with a generic message, followed up on prospects that did reply, send automatic alerts to your Slack environment, updated all of your prospect statuses in your CRM with the right conditions, warmed up a new email domain for cold outreach, found the email addresses of the people who did not accept your request, and sent them a 3 hyper personalised email sequence through LemList - all on auto pilot.
Don’t forget, ONLY connect with prospects if you think you can truly provide value! Don't be the person that uses these powerful tools to annoy your target audience into subservience - this does not work.
If you liked this third part of the series be sure to join our Facebook group here.
The first two parts of this series you can find here.
See you on the other side!

Gino Taselaar, founder and Head of Operations at Spike - Growth Marketing Agency.
Need help with generating leads? Add me on LinkedIn or schedule a consultation call through https://cal.mixmax.com/bookginotaselaar/30mincall


