


Why follow up?
Statistics constantly prove that following up - and having a consistent process to do so - significantly increases your chances of winning business. Read our previous blog which contains some great facts and figures about why follow-up is so important.
Automated direct messages, also known as drip marketing, can help with managing follow up and making sure it is done! Automating this process leaves you more free to focus on prospects that respond positively to your follow-up and ultimately, close more business.
How can Dux-Soup help?
Once a LinkedIn prospect accepts your connection request, I bet you want to follow-up and see if they are interested in your product or service. Dux-Soup can make this process easy if you have the Turbo version, but we want to demonstrate that you can do a lot with Dux-Soup Pro too! And at just $15/month it's ROI is incredible.
In this blog, we will show you how to:
- Scan profiles to scrape the data from your 1st-degree connections
- Tag profiles to group them by your target audience
- Use custom message markers
- Follow-up your target audience by sending a direct message
- Skip profiles that have been already messaged
- Send an InMail to OpenLink members
So - keep on reading!
How to Automate LinkedIn messages with Dux-Soup Pro
Option No 1
Let’s assume that you have targeted some groups that you want to follow-up, all with a different message.
In our scenario, we want to send a different message according to the prospect’s job role: marketing, web developer, lawyer.
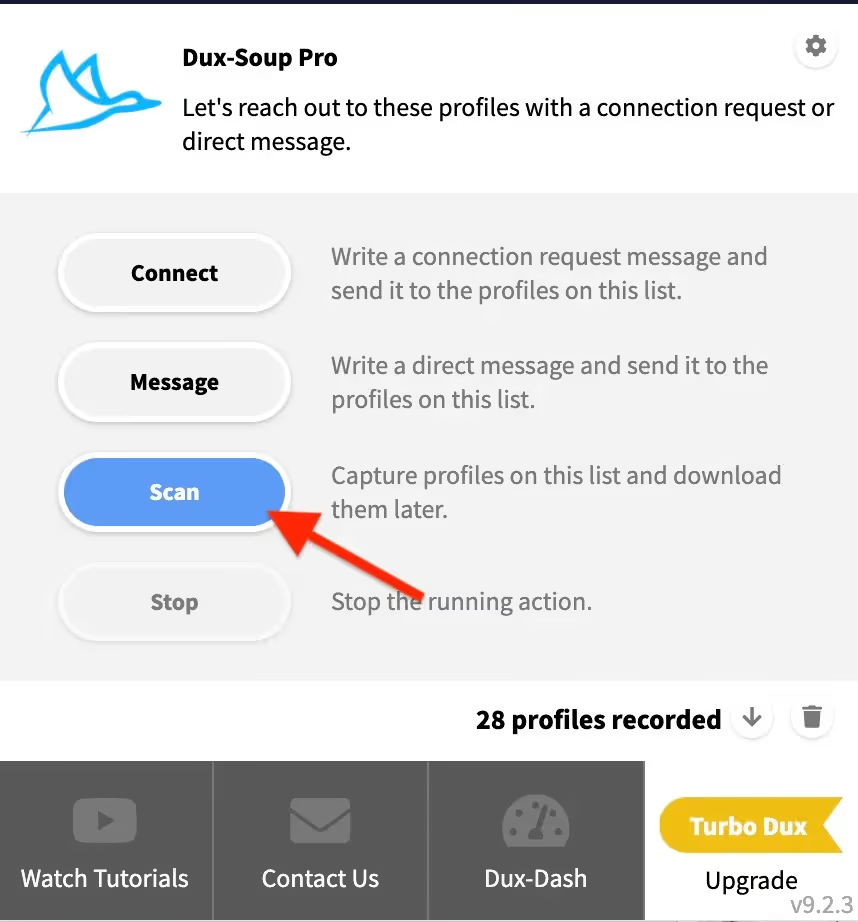
First, apply LinkedIn Filters by job role for your 1st-degree connections. Repeat this process for all 3 target groups. Then scrape your results with the Scan function.
Tip: To avoid confusion, save previously recorded data on your computer and clear it from the Dux-Soup extension.
Afterwards, download this data, so you can work through it and delete connections you do not wish to message.
Now, we have 3 separate CSV files that contain different target audiences. Here’s what you have to do next:
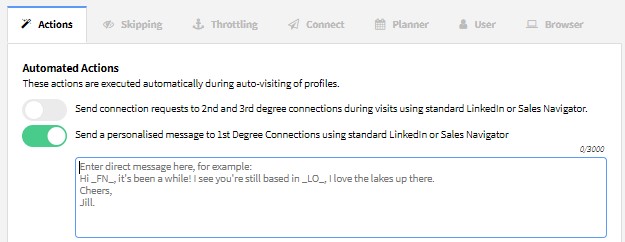
1. Create a direct message in Dux-Soup Options, Actions tab:
2. In order to locate the profiles that were already messaged, make sure that you use the auto-tagging option (find more about how you can tag a profile here):


3. Upload one CSV file at a time to the Dux-Soup Revisit Data tool and use the Visit Profile function to activate direct messaging. Watch this in action here.
Note: Make sure that your document contains these 3 columns: Profile, First Name and Last Name. Find more details on uploading a custom revisit file by following this link.
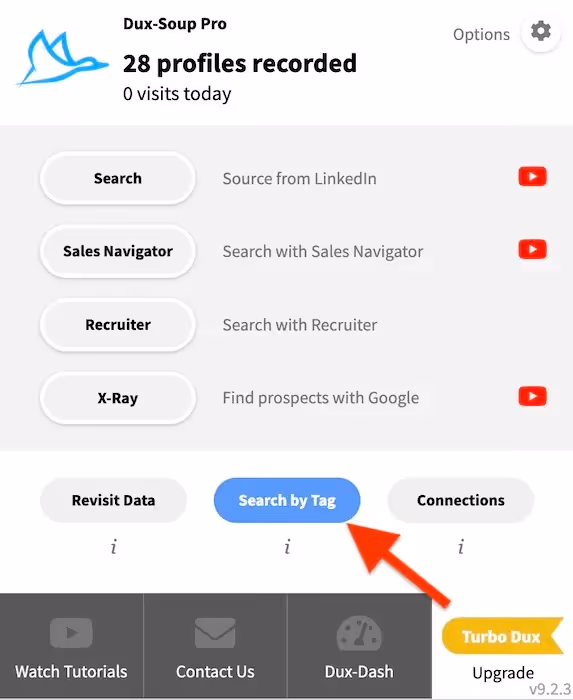
After you have sent out your 1st message, you can locate all your tagged profiles using the "Search By Tag" option:
When approaching these profiles with your 2nd direct follow-up message, use another tag, for example, “marketing2”. This will allow you to track the profiles who received your 2nd message.
Later you can skip profiles that are tagged to avoid messaging them again in Dux-Soup Options, Skipping tab:

Option No 2
In this scenario, we want to send a different follow-up message to our 1st-degree connections according to the company they work for.
In order to do that, we will apply LinkedIn filters and select the companies we want to message. Afterwards, we will scan these profiles with Dux-Soup and download the data.
The main trick here is that we are going to use custom message markers and upload 1 revisit file to message all selected prospects with a different message. Here is what to do next:
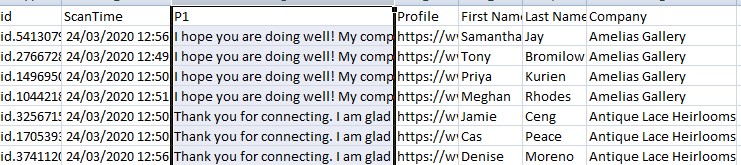
1. Open your CSV file and sort all data by the company name.
- Mac Numbers: Select the whole table excluding the 1st row and move the pointer over the letter above the column by which you want to sort. Click the arrow that appears, then choose a sorting option.
- Microsoft Excel: Select the whole table excluding the 1st row and click on Sort in the Data tab. From the menu option, select the column value you want to sort and click OK.
2. Add the column to the CSV using the heading P1 and write your message:
3. Enable an option to send a personalised message to 1st-degree connections and use custom message marker P1 in Dux-Soup Options, Actions tab:

4. Upload this file to the Dux-Soup Revisit Data tool and click on “Visit Profiles”.
Sending InMails to OpenLink members
InMail is a private message to or from a LinkedIn member who is not your connection.
In general, sending InMail is a paid LinkedIn feature. If you have a LinkedIn premium account, you would receive the following InMail credits:
- Career: 3 InMail credits
- Business Premium: 15 InMail credits
- Sales Navigator: 20 InMail credits
- Recruiter: 30 InMail credits
If you go over these monthly grants, you can purchase additional InMail credits from LinkedIn. However, it can cost up to $10 per send and can only be purchased with certain LinkedIn accounts.
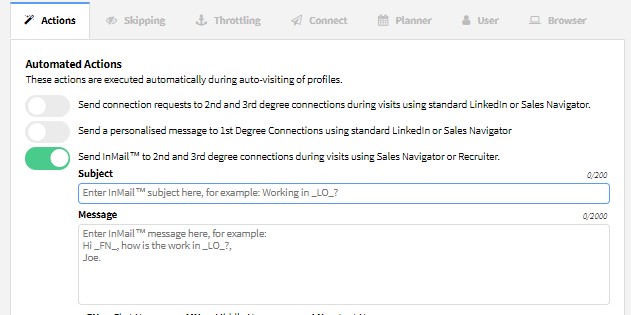
You can send InMails with any paid Dux-Soup version, however, you need to have Sales Navigator or Recruiter in order to do that. All you have to do is to write a message in Dux-Soup Options, Actions tab, make a profile search and click on “Visit Profiles”:
Purchasing extra InMail credits might be an expensive option! However, OpenLink messages are free InMail messages that can be sent to any OpenLink member, even if they are outside your network.
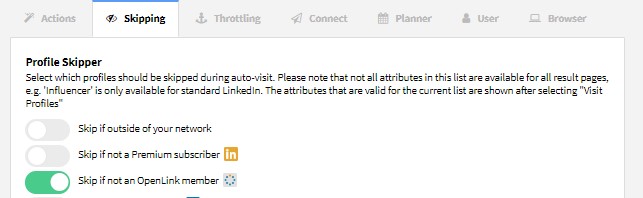
Dux-Soup makes this option easy as you can skip all profiles that are not OpenLink members so you would not use any InMail credit.
Tip: don’t forget to tag OpenLink profiles when you send InMails so you can locate them using Search by Tag tool and follow-up them again in the future.
Summary
It's not just our Turbo edition that can automate LinkedIn follow-up! In this blog, we’ve shown you how to implement automated follow-up with Dux-Soup Pro.
There’s a very true saying that ‘sales is all in the follow-up’! You need to make sure that you touch your prospects enough times for them to take an interest in your product or service.
Automating this process with Dux-Soup Pro or Turbo helps to ensure that the follow-up gets done, that you have this vital discipline in place and that your lead gen process is more productive than ever!
Do you have any questions, comments or suggestions? We’d love to hear them so send them over to info@dux-soup.com and we’ll respond straight away!


