


When it comes to blacklisting profiles from your LinkedIn automation outreach, Dux-Soup offers some brilliant features to make sure you don't target the wrong prospects.
In this guide, we explore:
- The benefits of blacklisting connections
- How to use Dux-Soup's blacklisting features both manually and automatically
- How you can be more selective in the LinkedIn profiles you’ll be visiting
- How you can use system tags to track activity within your campaign
Here’s what you need to know:
Blacklisting Connections on Dux-Soup
One of the most important things to do before launching your LinkedIn campaign is to carefully think about who you want to target with your messages. To save you the embarrassment, trouble and time of messaging the wrong people, with Dux-Soup you can blacklist certain LinkedIn connections. This means that that Dux-Soup will skip these profiles when auto-visiting.
This feature allows you to ignore any commands on the profile (such as enroll into campaigns, visit, endorse, InMail etc), and will instead move on to the next profile. In other words, they become excluded from your campaign and will be skipped.
For example, if you’re going to pitch your services as a consultant, it is bad form to contact current clients or competitors. Similarly, you might also want to blacklist current colleagues or any other people you think that might not be relevant.
Manual Blacklisting - Pro,Turbo and Cloud Editions
If there’s a specific group of connections you want to be exempt from your messages, you can manually filter them from your campaign list.
To do this you need to enable Dux-Soup Pro,Turbo or Cloud, go to their LinkedIn profile and in the “Your Tags” section manually type in the tag “blacklisted”.

If you want to blacklist people who you can’t filter out in any other way from LinkedIn Searches, then tagging them one-by-one is the best way to make sure Dux-Soup doesn’t send them any messages.
Automatic Blacklisting
Note: You need Dux-Soup Cloud, Turbo or Pro for this feature
If, however, you want to automatically blacklist a group of people who you can filter on LinkedIn, here’s what you can do.
From your LinkedIn tab, go to “All Filters” and specify the connections you want to exclude from your campaigns.
Then, filter based on your preferences.

For example, you could bring up your 1st and 2nd connections in the United Kingdom. To filter out previous colleagues, type in your previous workplace name in the “past companies” box. Additionally, you can also export your current CRM into Dux-Soup and tag all of them together to avoid contacting your current prospects. (See our guide on Integrating Dux-Soup with HubSpot).

Now, go to the Dux-Soup extension, and ensuring you are in expert mode, tick the option to tag profiles when auto-visiting and type in the tag “blacklisted”.
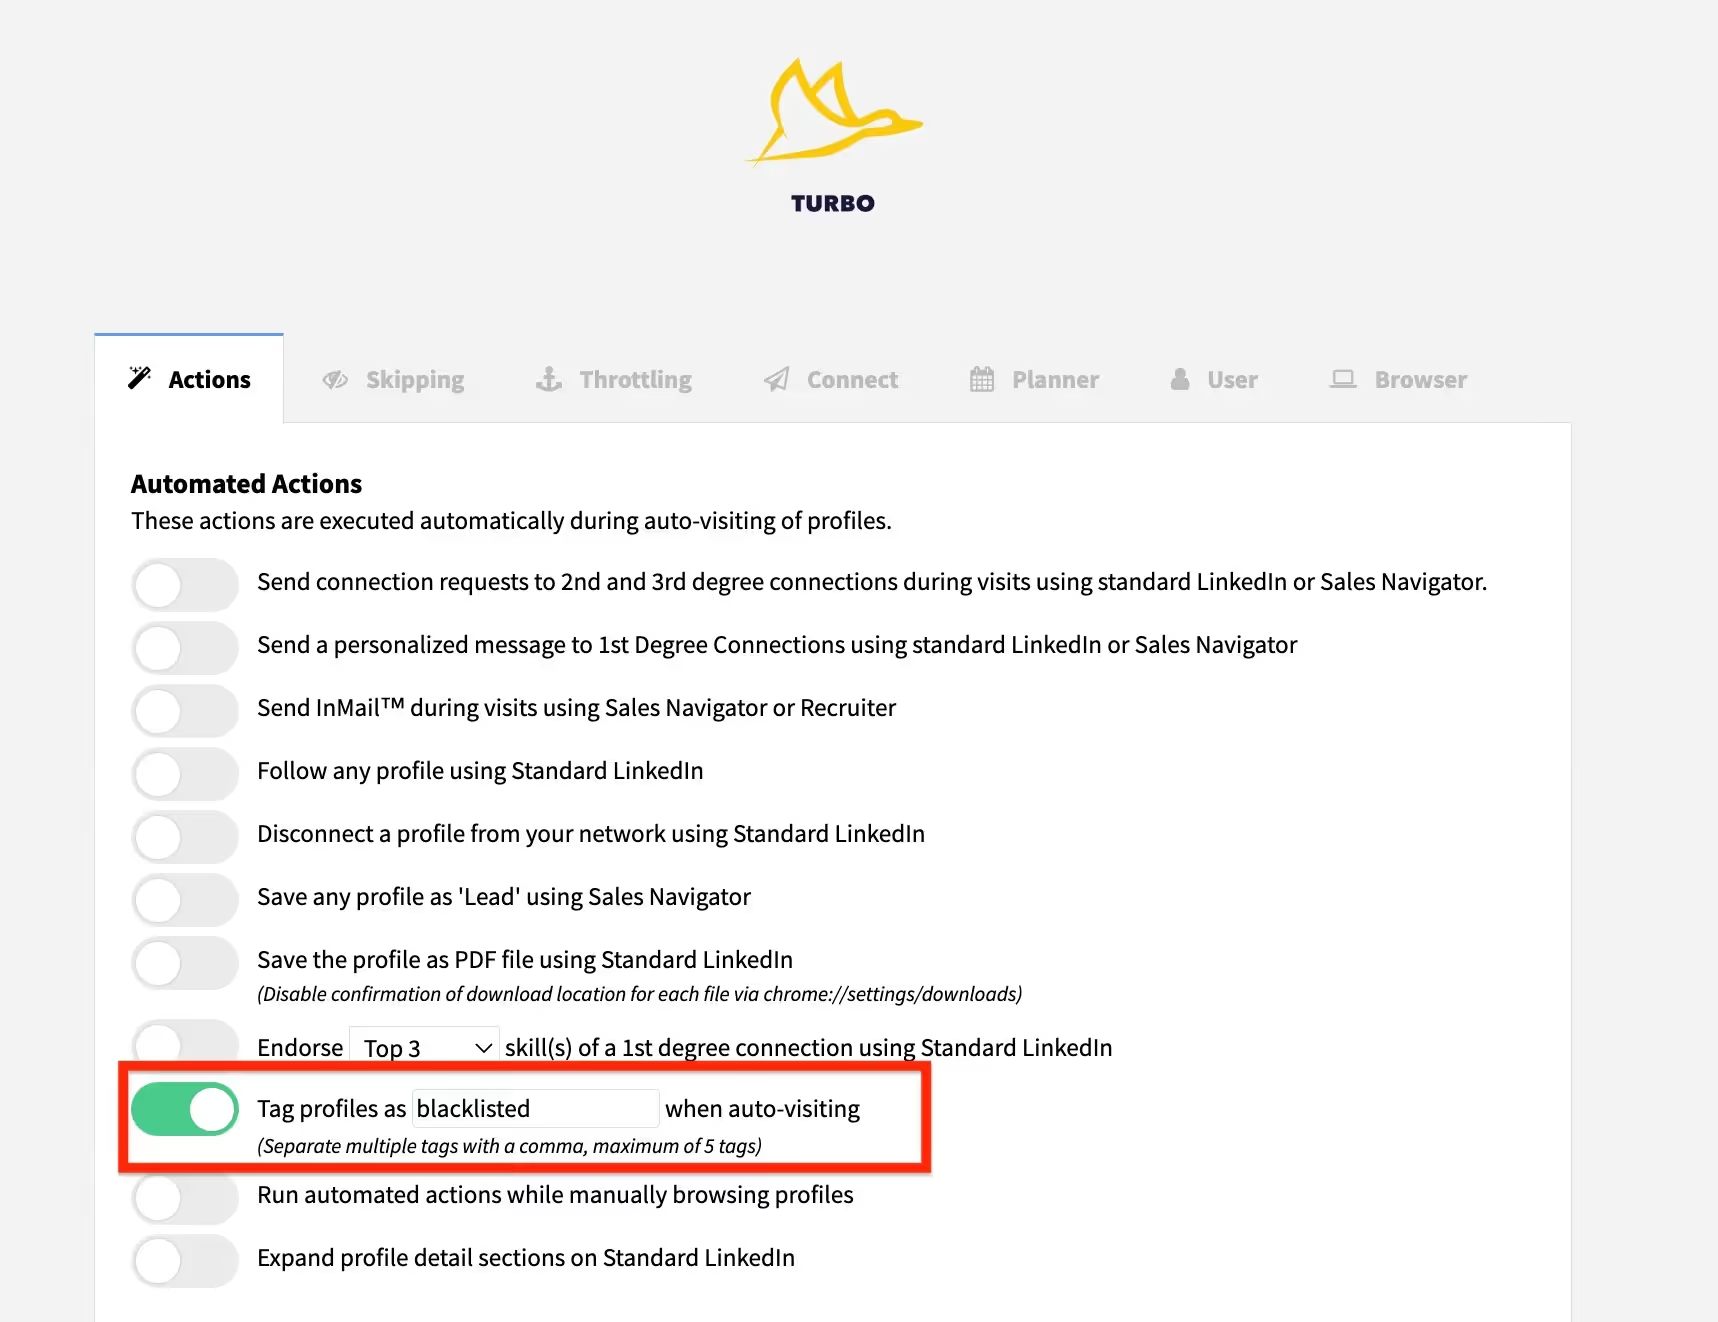
Now, go back to LinkedIn, click the Dux-Soup extension and then “Visit Profiles” for Dux-Soup to automatically start tagging your list. The robot will then automatically start visiting all of their profiles one-by-one and tag them as blacklisted.
Note: Anyone tagged as blacklisted will be Skipped from any future Dux-Soup actions - including first-degree messaging campaigns and automated follow-ups.
Automatic Blacklisting with Turbo and Cloud Editions
To enable automatic blacklisting with Dux-Soup Turbo or Cloud, you need to turn on the Message bridge first:
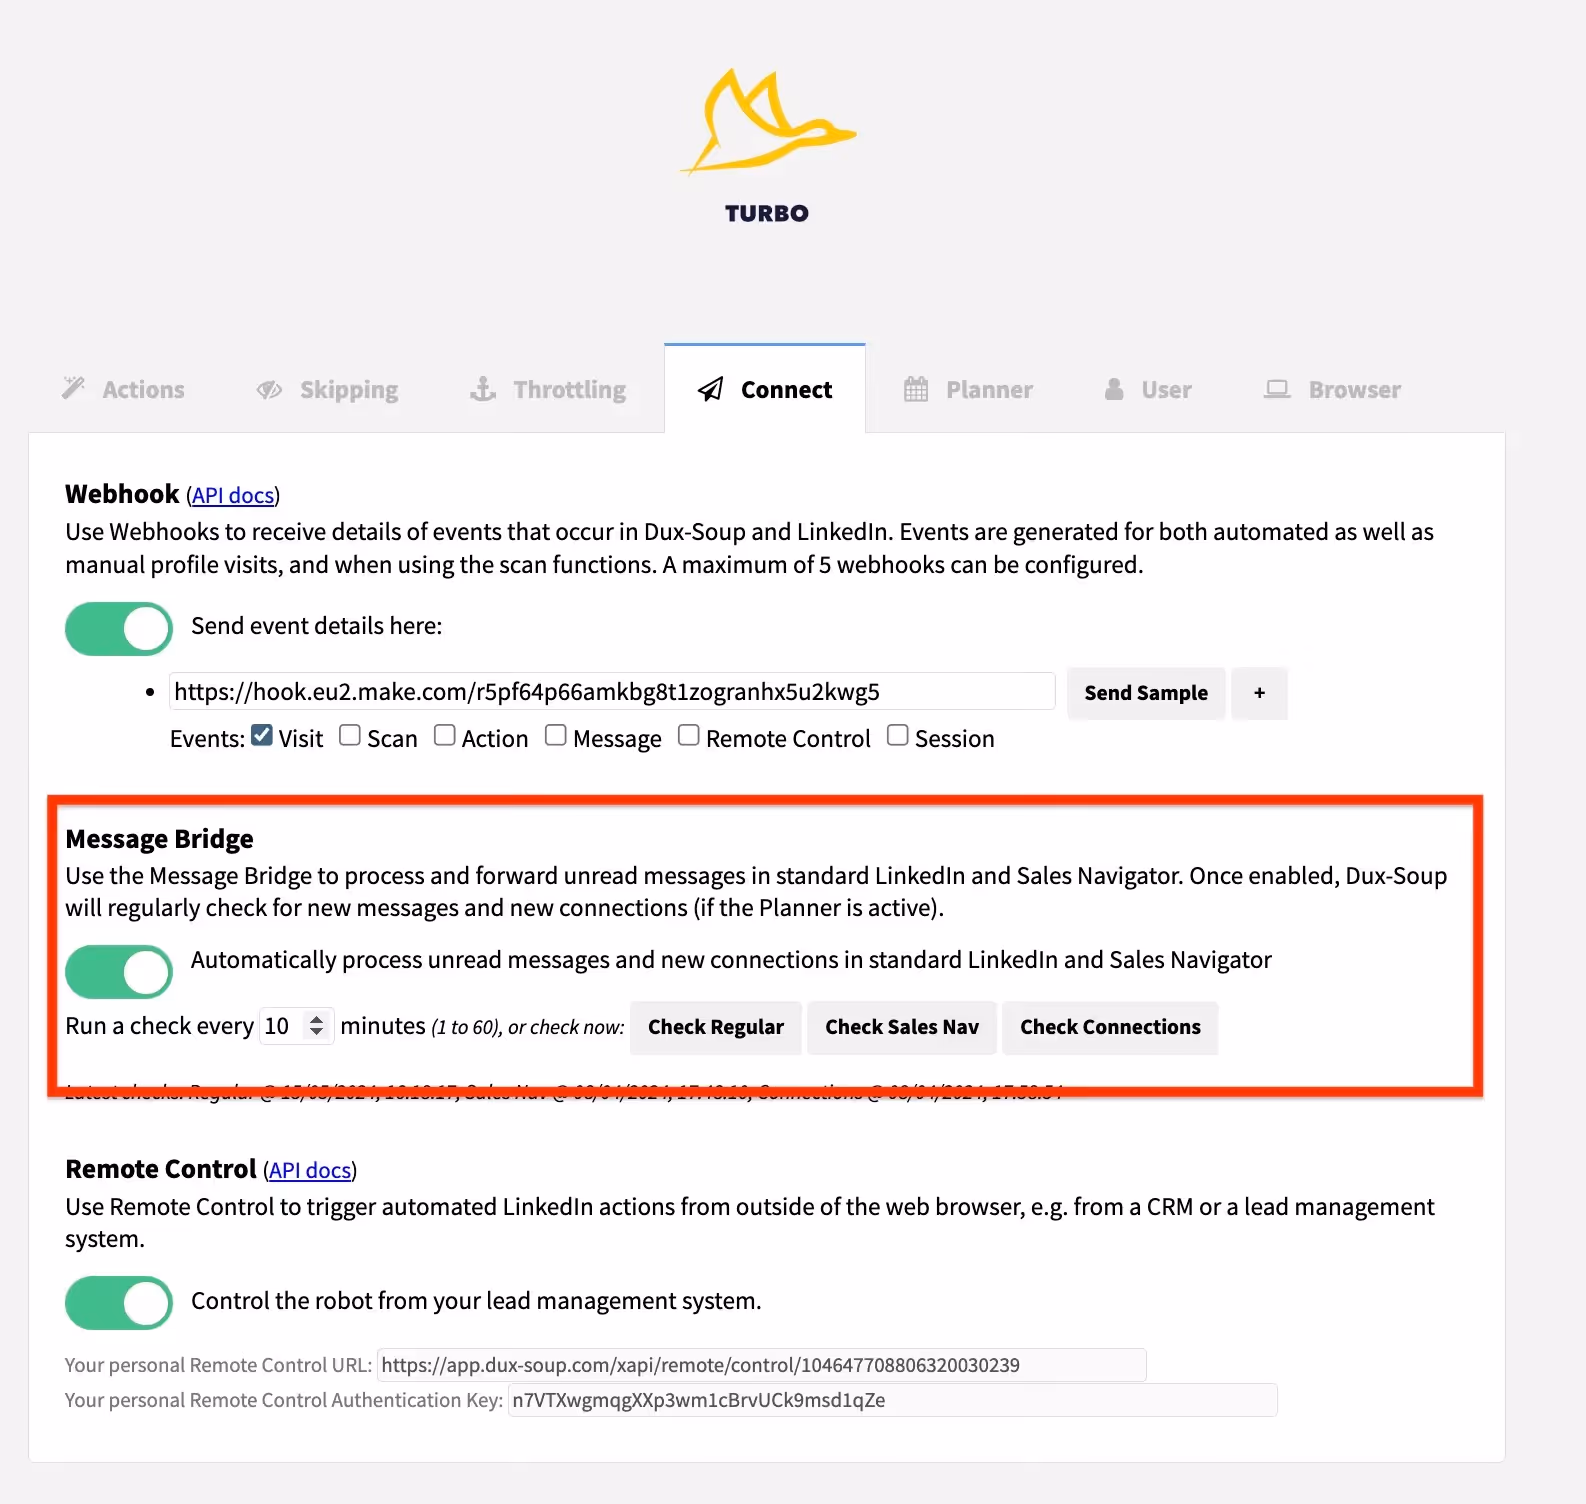
Now, with the Message Bridge active, any profile that sends you a message that is processed by the Message Bridge, will be blacklisted.
System Tags - Turbo & Cloud Edition
Another feature of Dux-Soup Turbo & Cloud is using system tags to automatically keep track of any activity on profiles based on your campaigns.
Please note you must be using Dux-Soup Turbo or Cloud and have Message Bridge activated for this to work.
Essentially, these tags aim to automatically filter and tag your prospects, based on their activity. For example, if you get a reply to your automatic follow up Zap, the campaign will stop and give you the chance to manually reply to them.
For this, there are three different system tags:
🦆-newconnections-start
When you first enable the Message Bridge, Dux-Soup will add this tag to the most recently added connection. This way Dux-Soup will be able to detect when new connections are added later, and will trigger the Message Bridge to send a connection acceptance message to the WebHooks.
🦆-default-accepted
After a profile accepts your connection request, the Message Bridge will add this tag. This simply means that they are now your connection on LinkedIn and you can retrieve these profiles anytime for your future campaigns.
🦆-default-responded
If they responded to your current campaign (e.g. as a reply to your connection request or any other campaign template), the Message Bridge will add this tag instead. Anyone tagged as default-responded will be skipped from any future dux-soup actions, this includes first-degree messaging campaigns and automated follow-ups.
Managing Tags
The above tags are automatically added to help make your connection filtering easier and more convenient. Once your campaign is running and you have a number of people with the corresponding tag, as mentioned above, you can use the tag-search function in Dux-Soup to get the full list of tagged people.
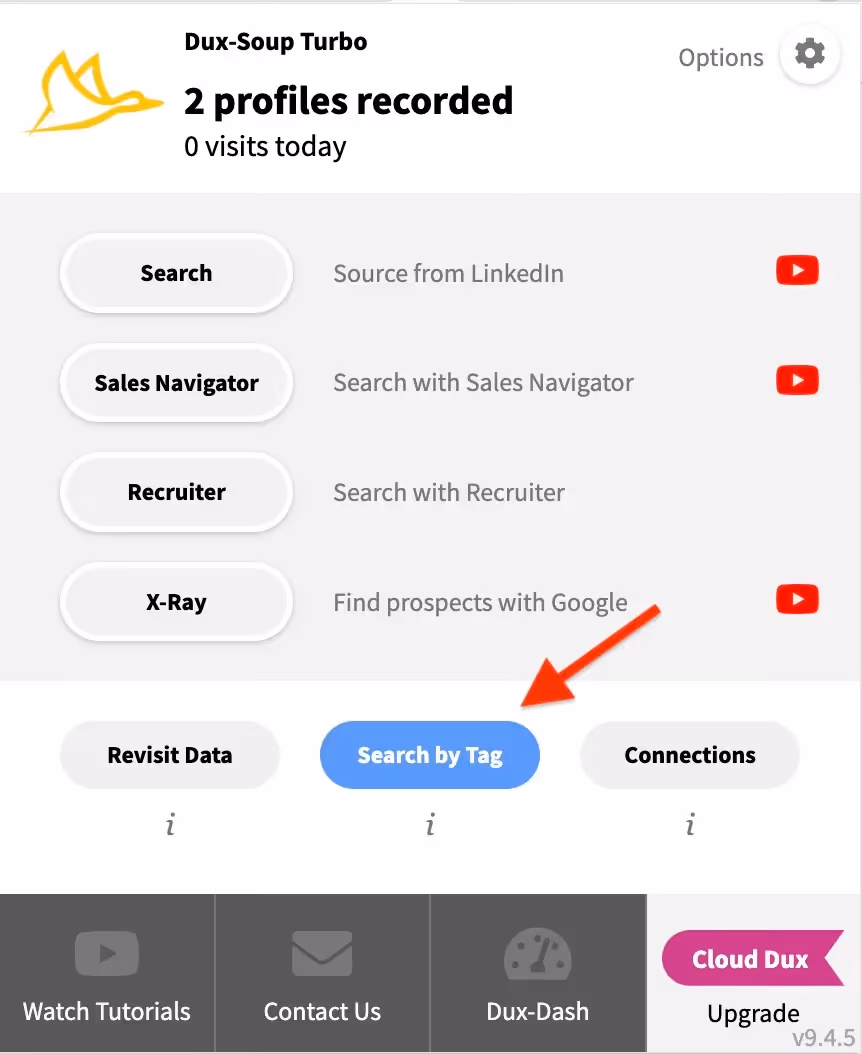
To see the full list of all the people tagged (both manually and automatically), go to the Dux-Soup extension and click “search by tag”.
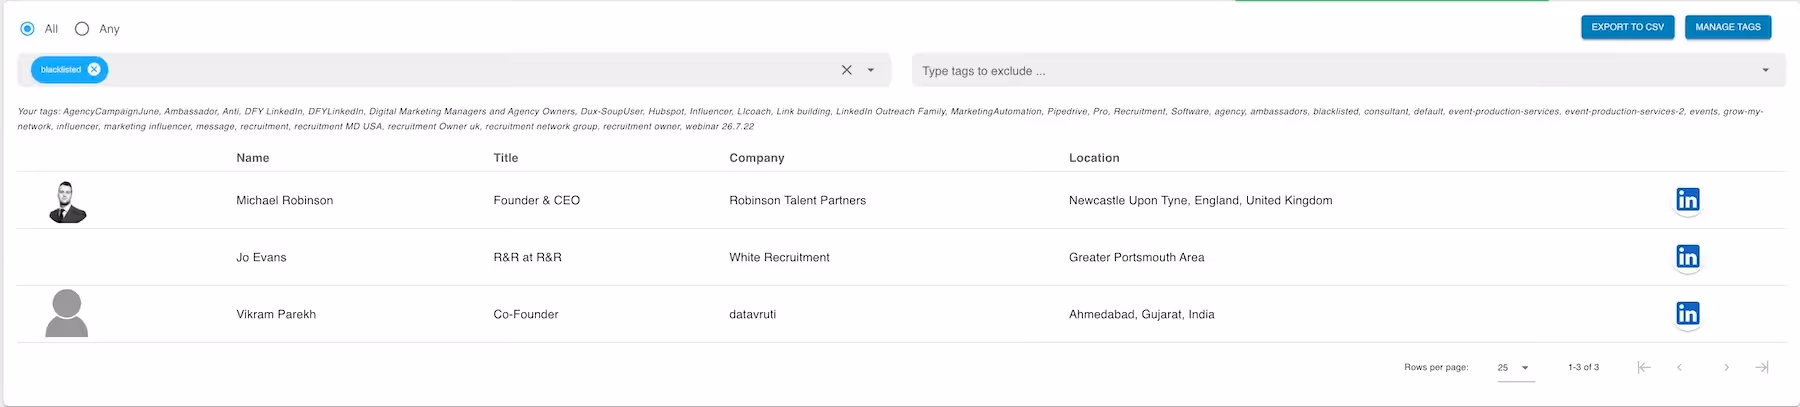
You'll be taken to the tag menu in the Dux-Dash. Here, type in any of the above tags (both blacklisted and the system tags) in either of the search bars to see the full list of people you’d be including or excluding in your campaigns.
We hope you find the new features useful in your future LinkedIn outreach campaigns. If something is unclear or you’re unsure about any of the new features - feel free to get in touch with us at info@dux-soup.com and we’ll get back to you!


